Finally, progress made. Goal is in sight.
My first attempt to press the BBright Campagnolo cups into the R3 frame ended in disaster. I ended up pressing the left hand side cup crooked with about 0.25 mm space between the shell of the bottom bracket and the cup flange. Not happy with the result, I knocked out the cup and attempted again, this time making it worse. I ended knocking both cups out, cleaning up the loctite and placing an order for the proper tool (Campagnolo UT-BB140) and a set of replacement cups.
Now here is something interesting worth mentioning. There appears to be at least 2 versions of the Campagnolo Ultra-Torque BBright adapters – Campagnolo part numbers IC12-UTR51 and IC12-UTR51E. The two versions vary significantly enough that it is worth mentioning.
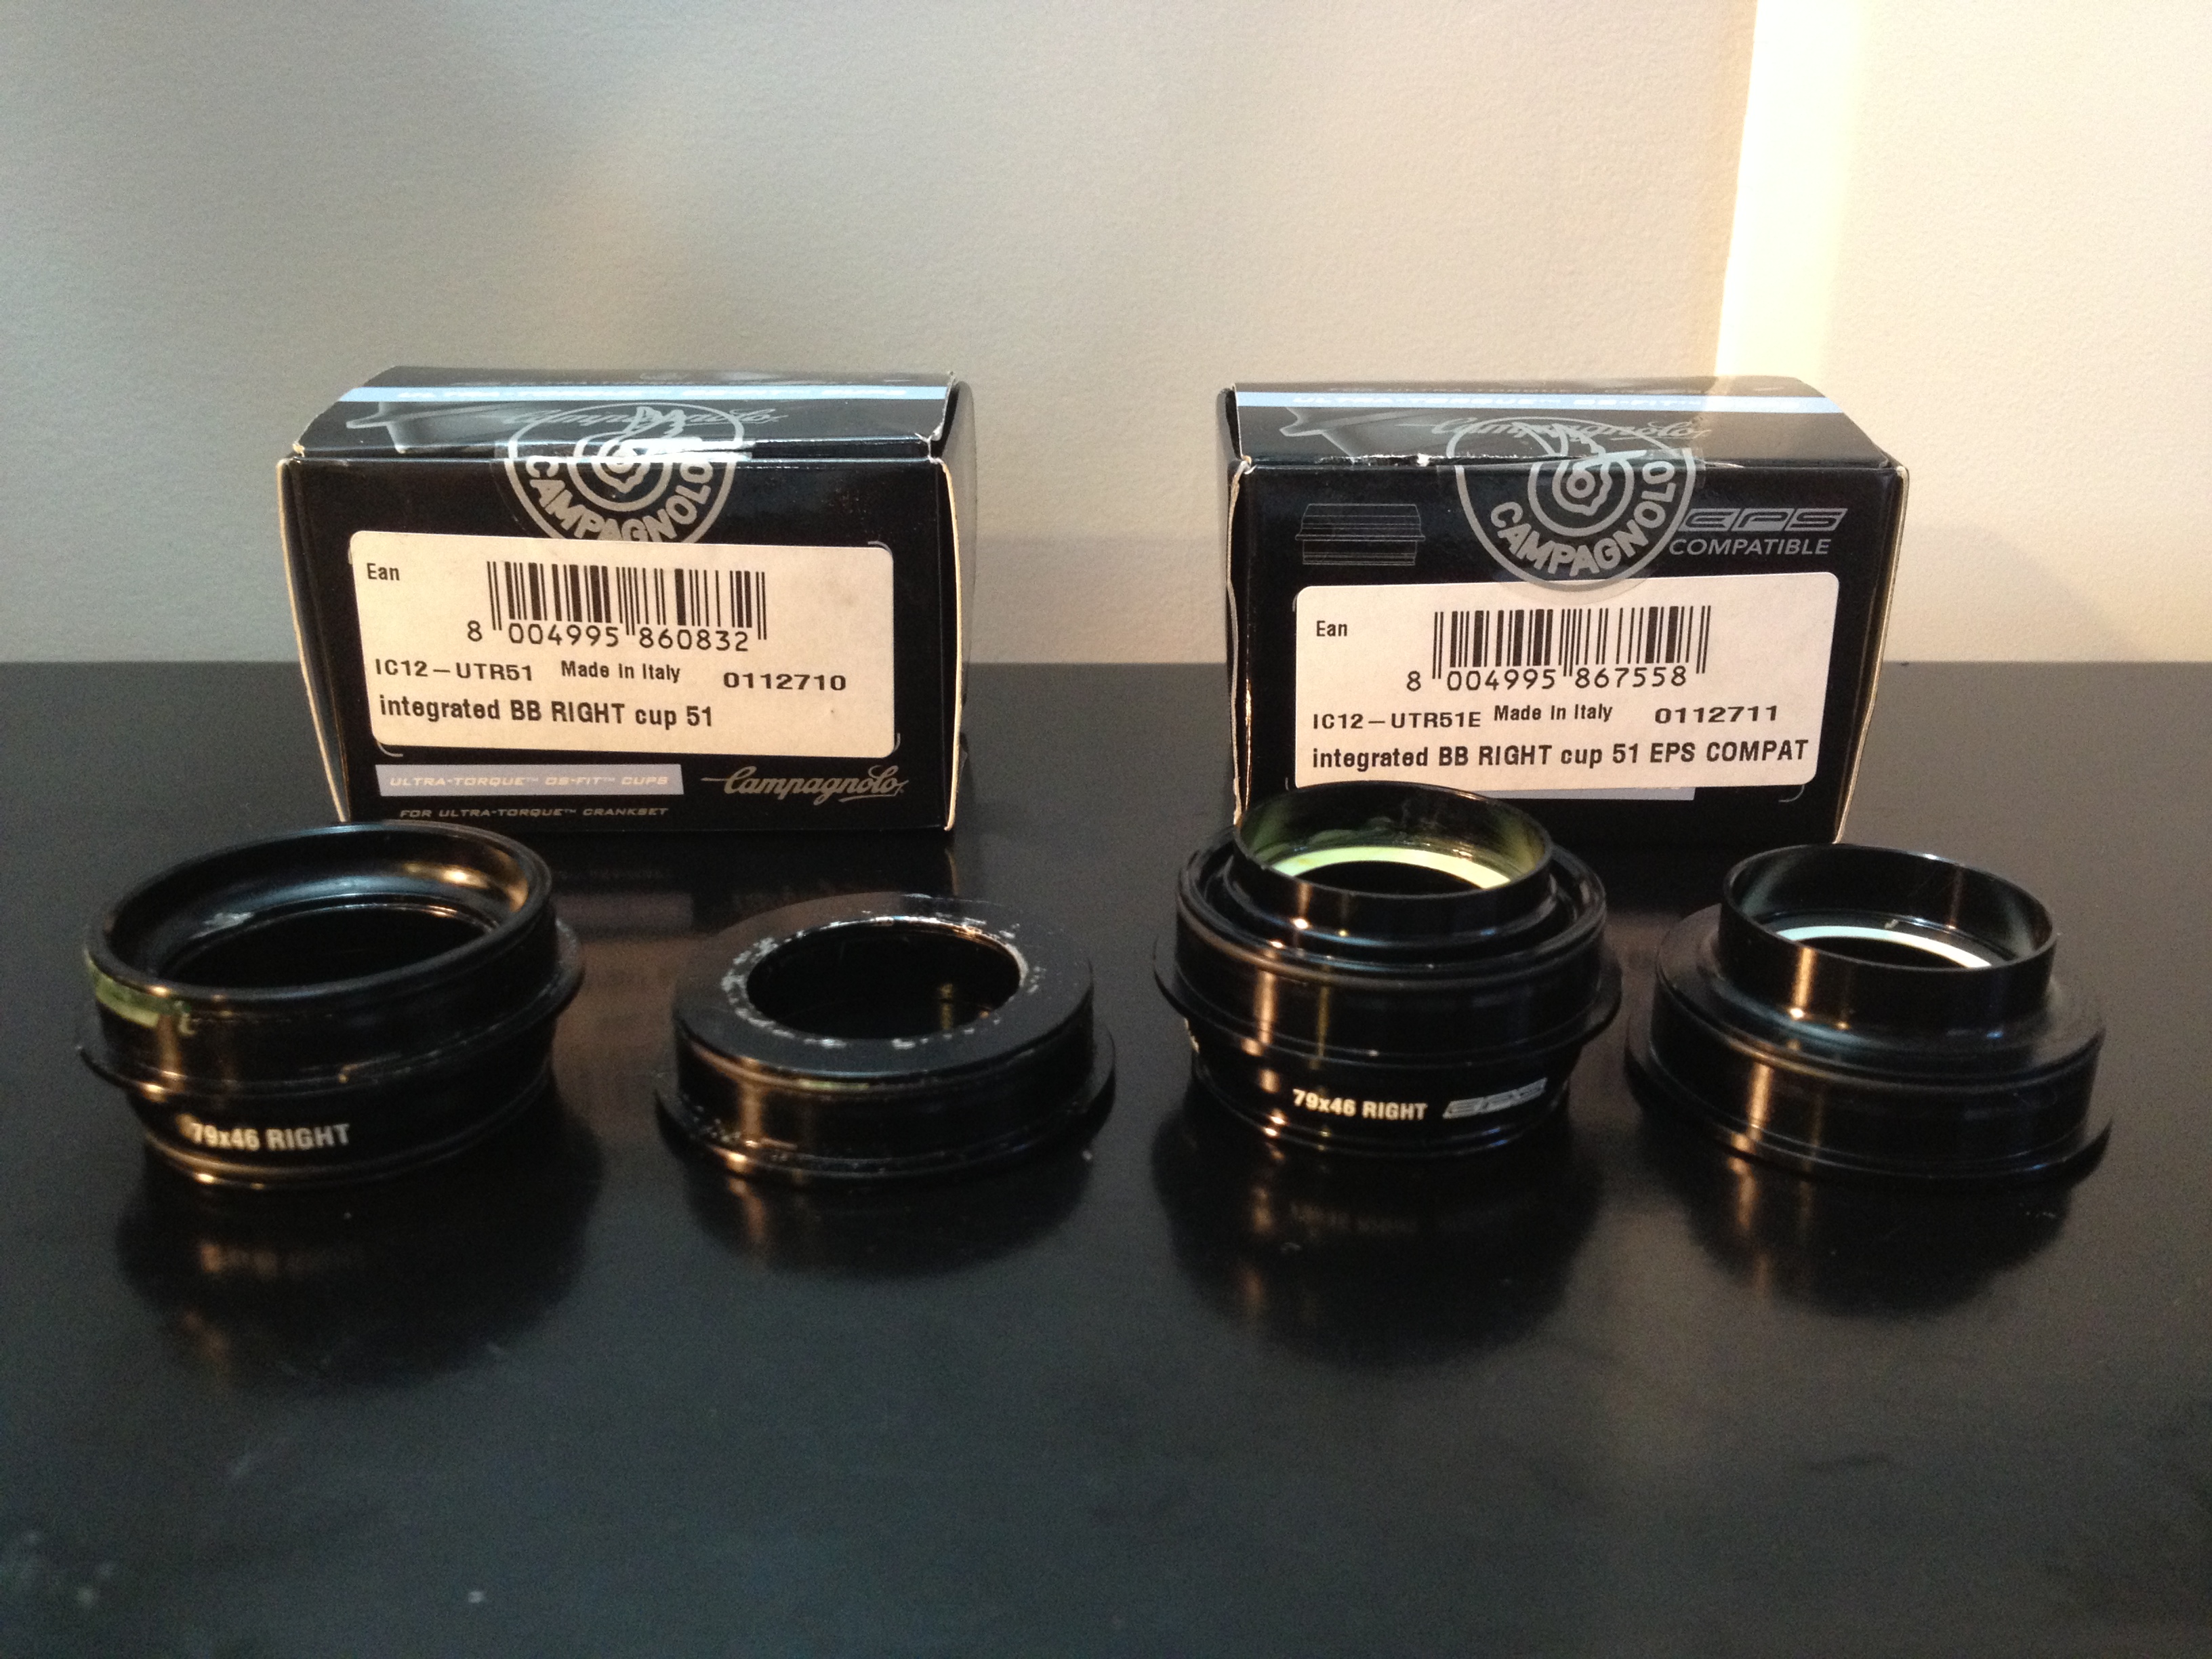
IC12-UTR51 (L) 58 grams and IC12-UTR-51E (R) 67 grams
The UTR51E appear to be a later version judging from the “EPS COMPAT” markings on both the packaging and on the shells of the cups themselves. The UTR51E cups have a prominent o-ring around the leading edge of the cup, and extra material around the bore. This makes the UTR51E cups heavier by 9 grams.
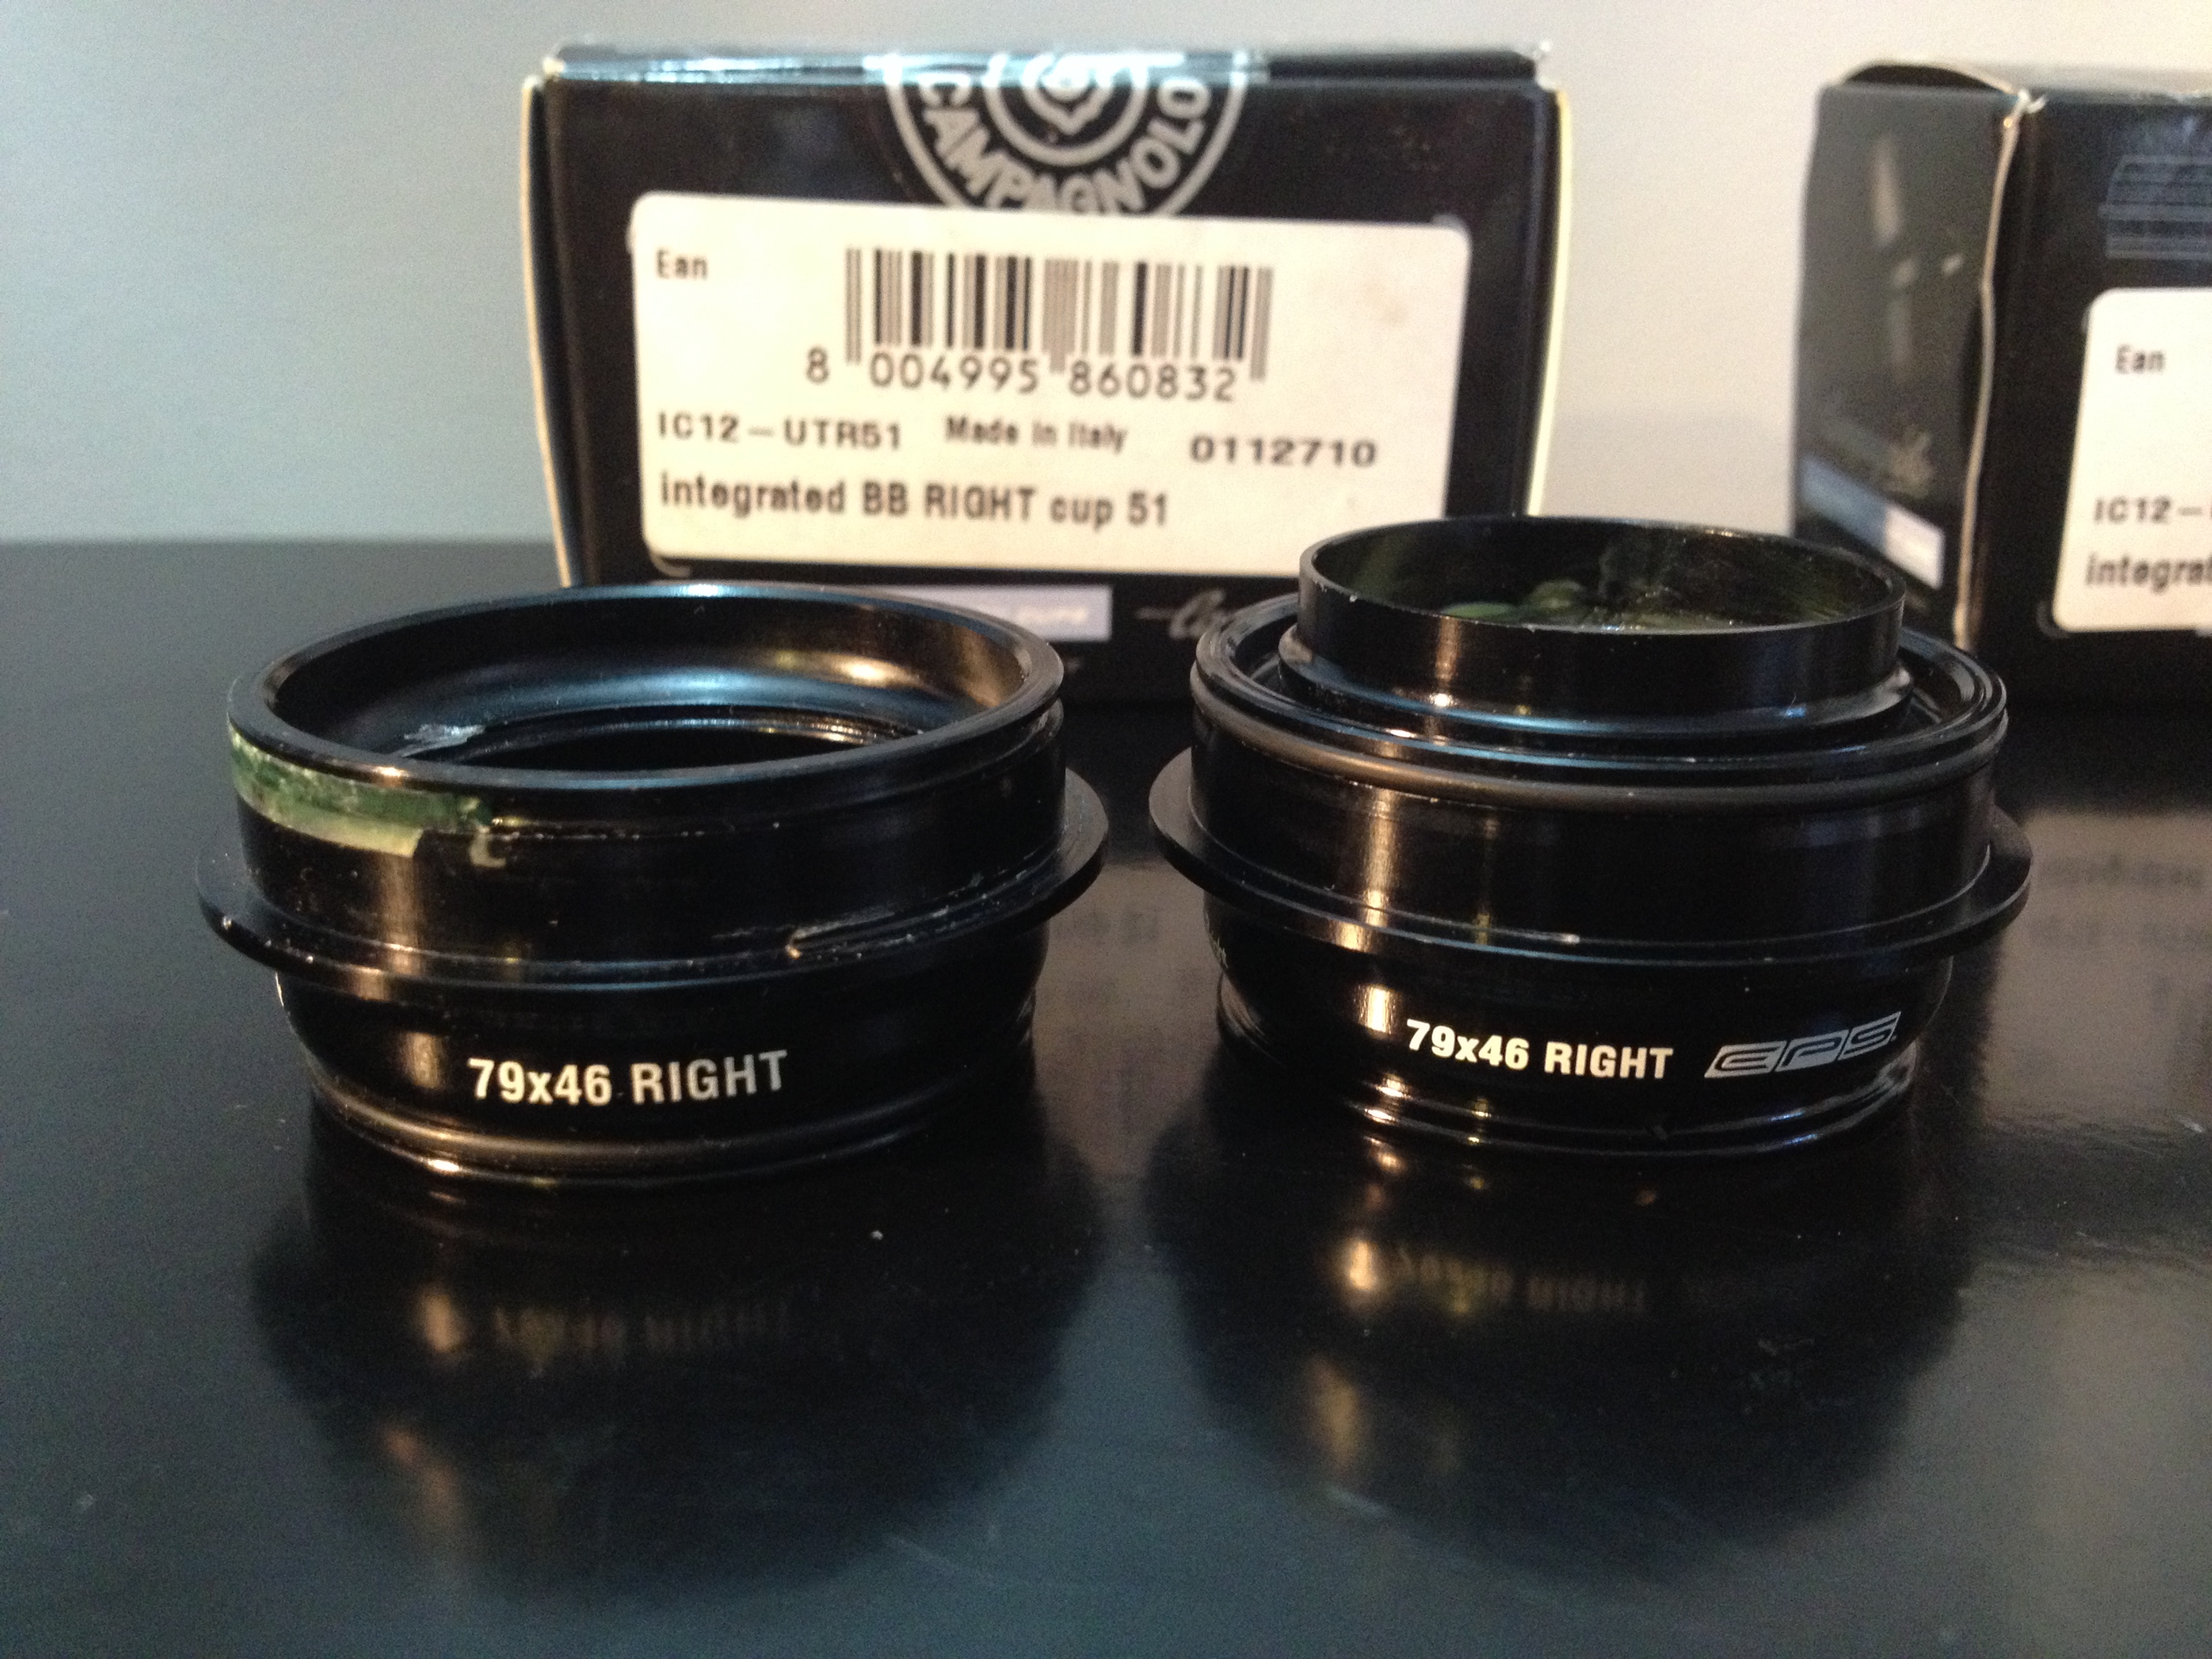
Close up of the right hand side UTR51 (L) and UTR51E cups (R). Note the additional material on the inner diameter of the cup.
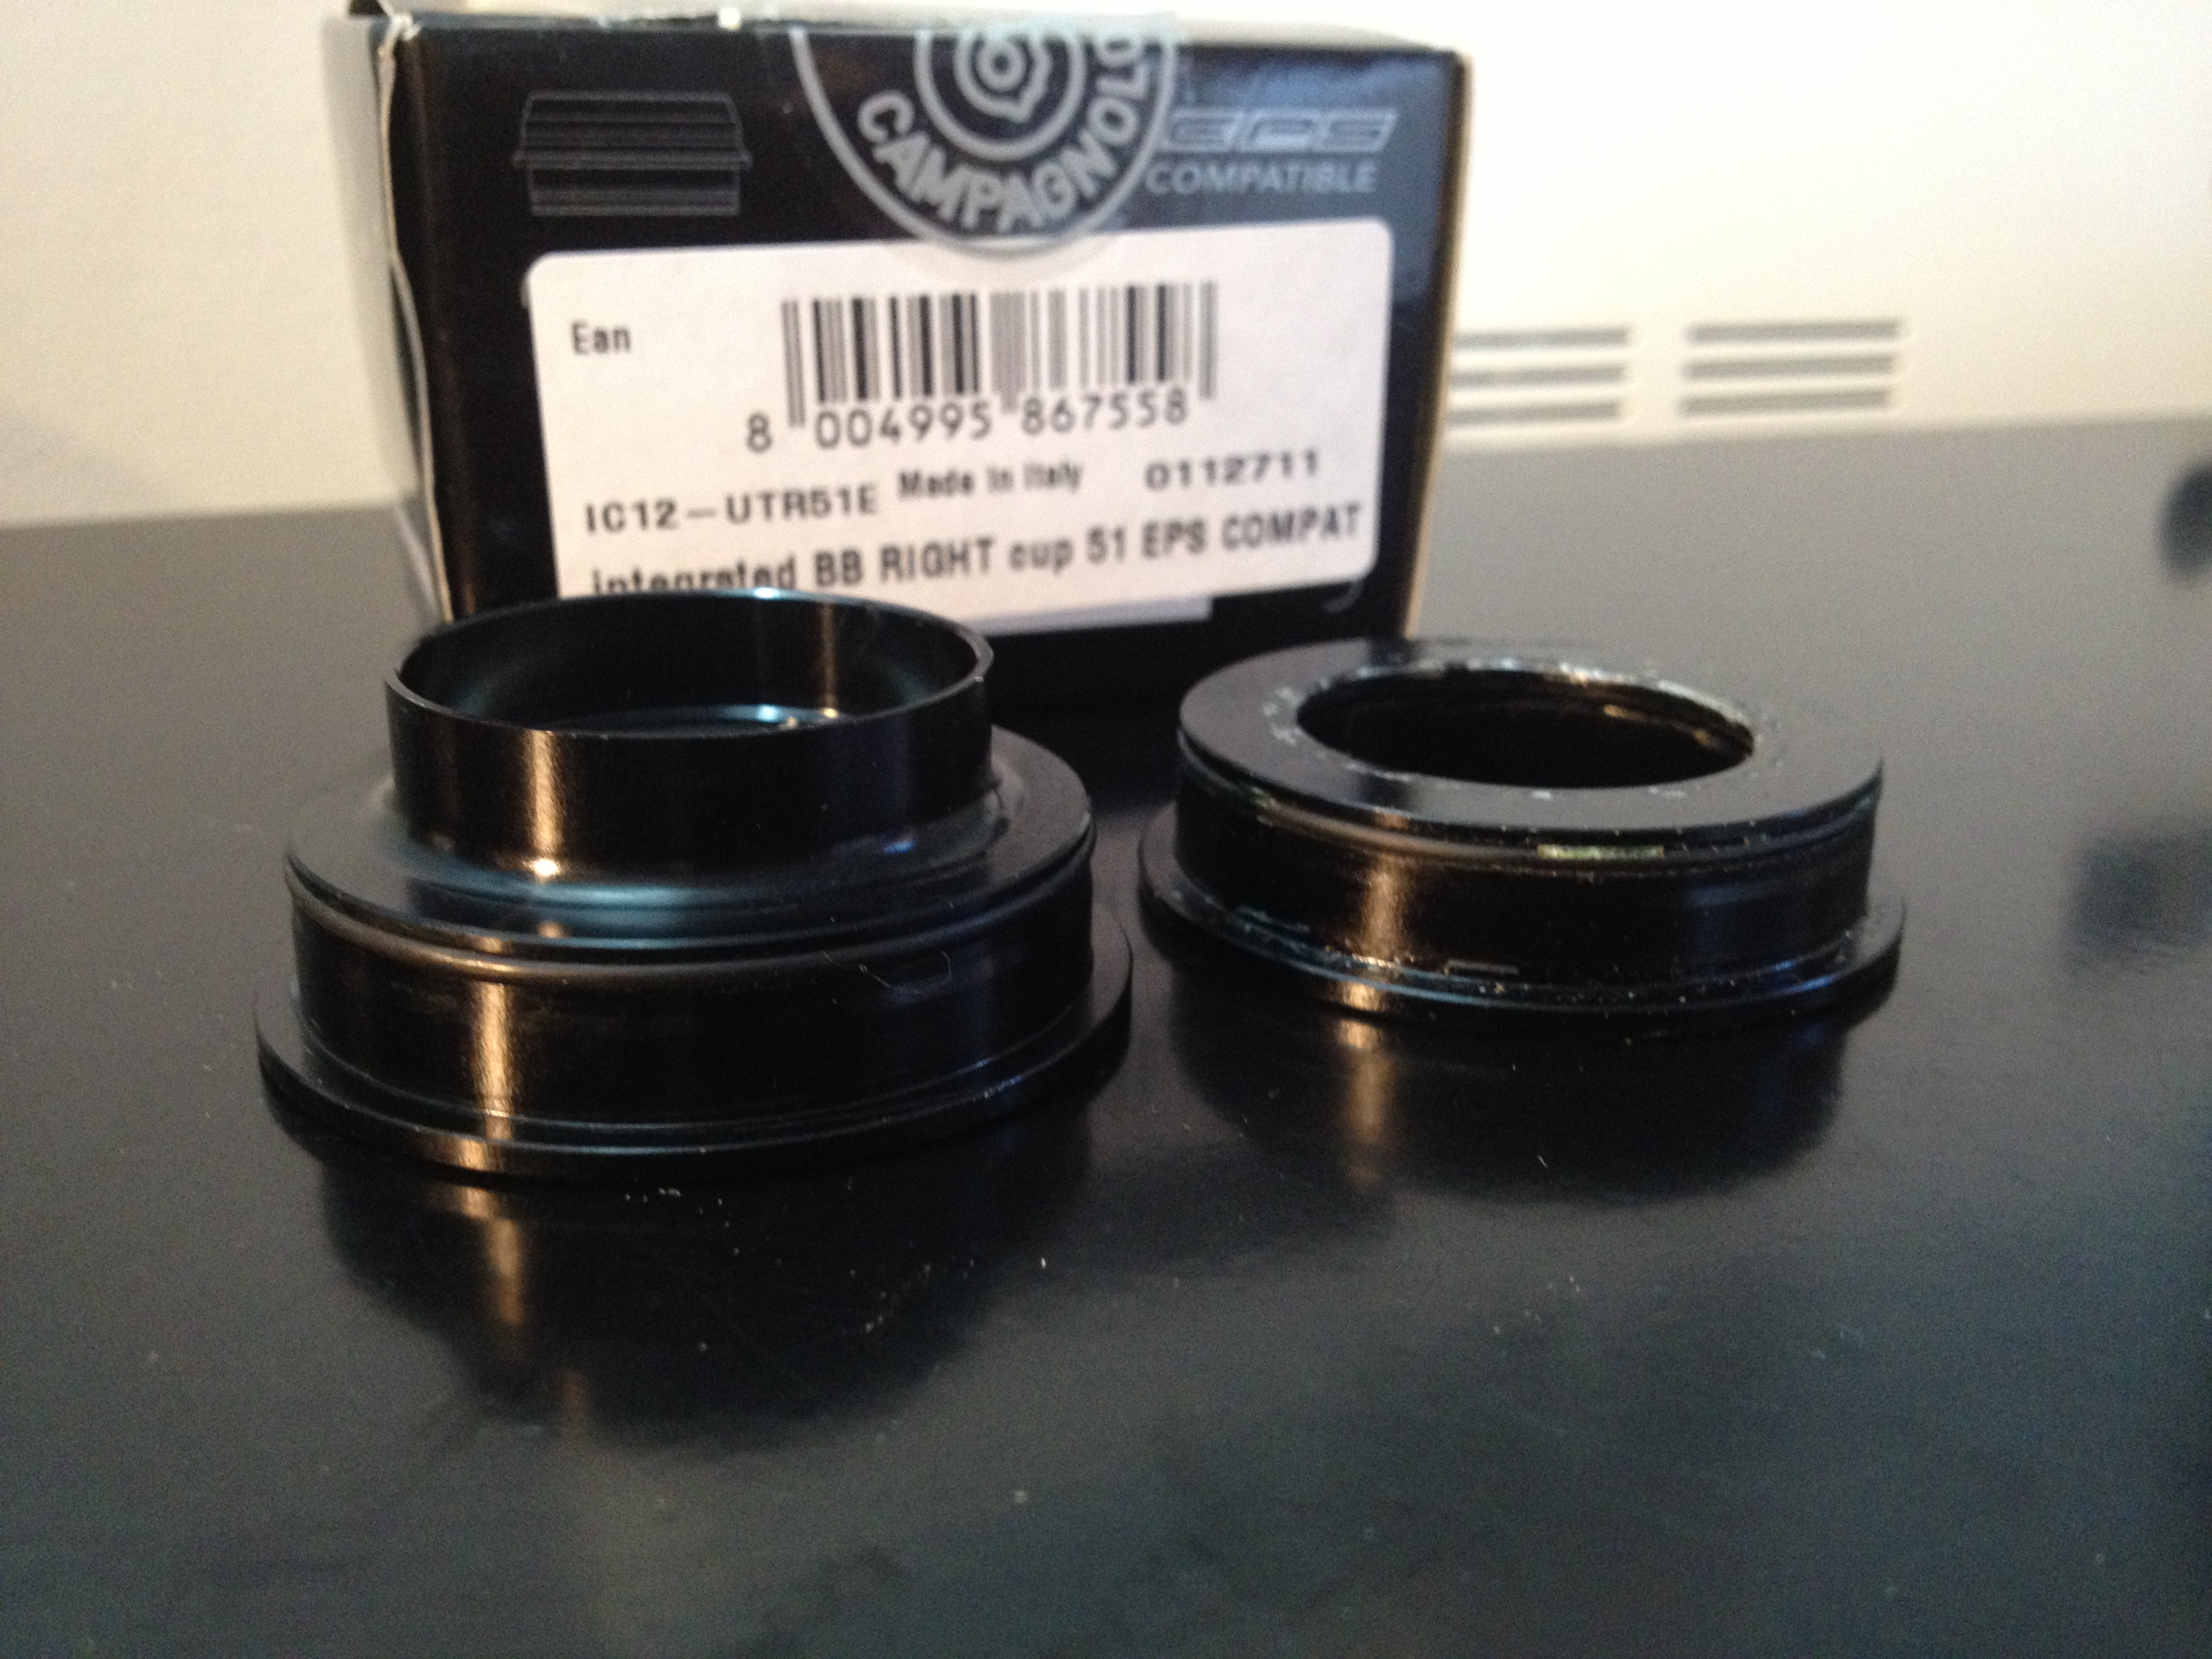
Left hand side UTR51E cup (L) and UTR51 cup (R). Same additional material is present as on the right side cups.
Obviously, the material is there for some good reason. If I had to wager I’d bet the re-design is to accommodate the EPS bottom bracket sleeve that prevents the internal wiring from tangling around the crank axel. I will say however, removing these cups is going to be a colossal PITA as the Park BBT-30.3 can’t be used as the extra material prevents the neck of the tool from being placed through the inner bore of the cup. Hopefully the VAR Tool used for extracting Campagnolo cups will fit.
Here’s a shot of the juices required as outlined by the technical documentation provided by Loctite.
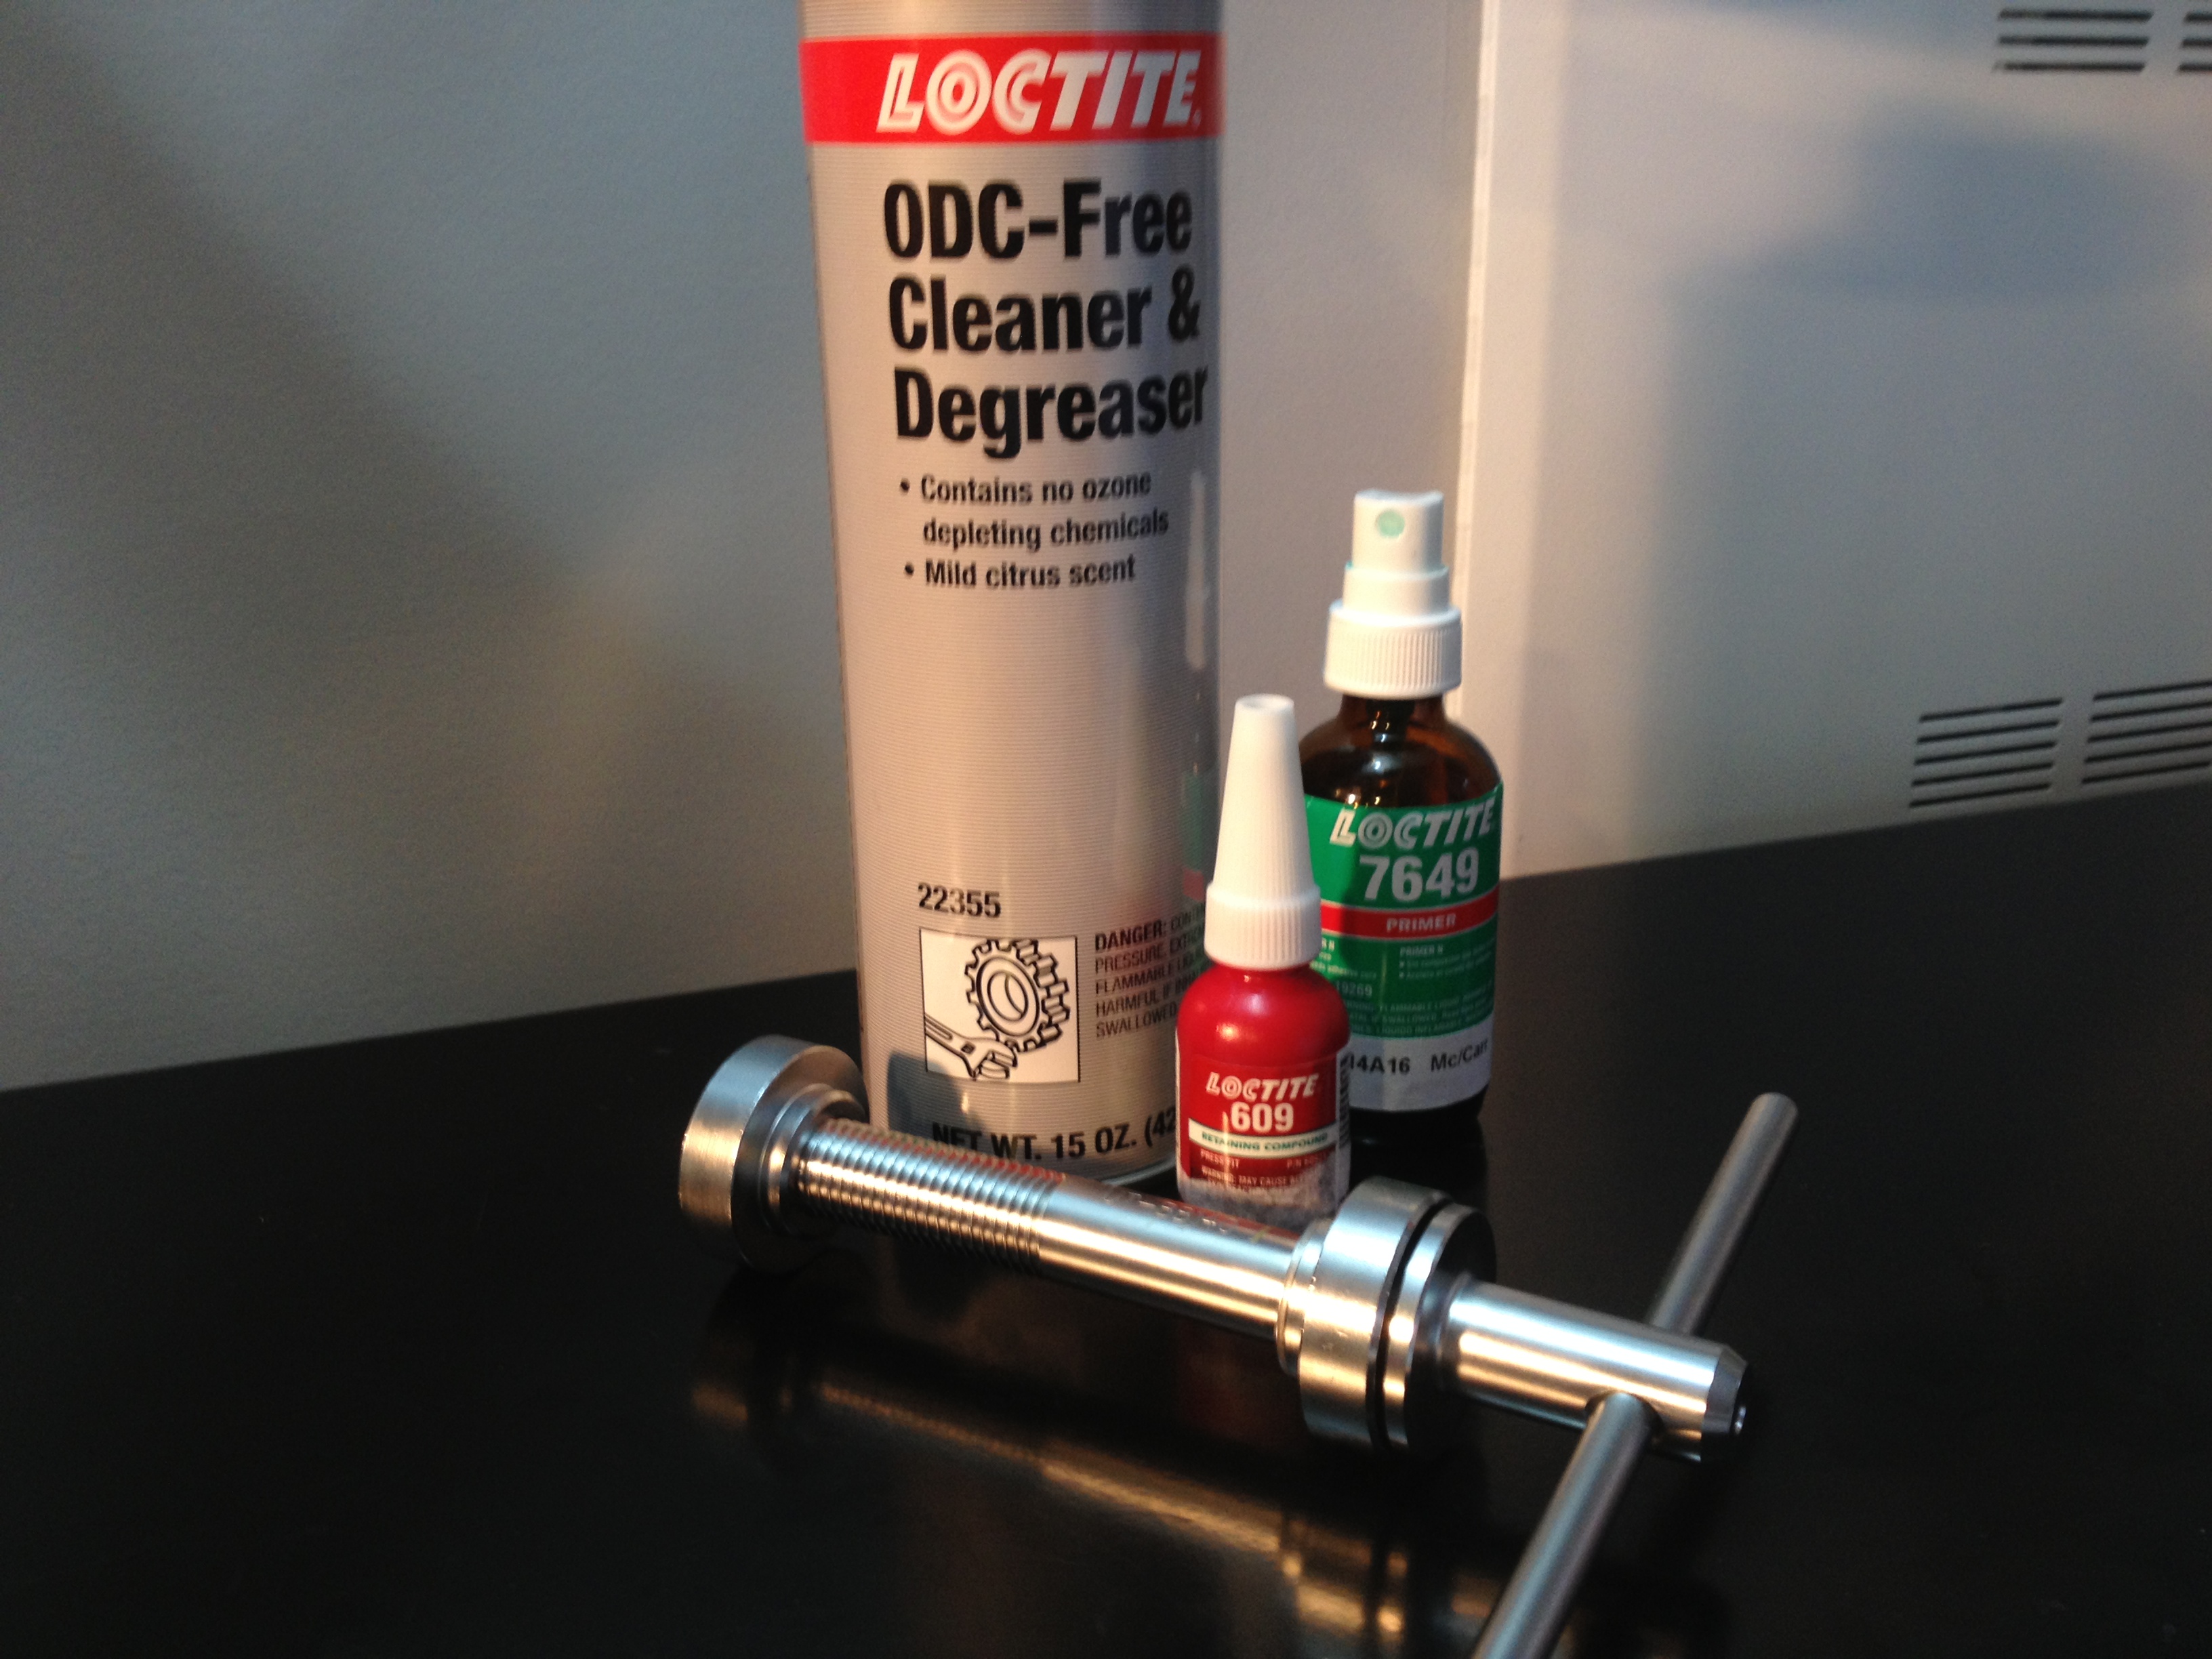
Loctite ODC-Free Cleaner, 7649 Primer, 609 Retaining Fluid, Campagnolo OS Fit tool
Basic procedure: Degrease the cups and the bottom bracket shell with the cleaner, minding not to spray it over everything, wiping up the excess. Once dry, apply a few squirts of the primer to the cups and bottom bracket shell surface. Mind not to get the primer on the seals of the cups, as the acetone will discolour the seals. It’s also recommended to put a shop towel into the bottom bracket to prevent primer and/or degreaser from pooling in the shell. Be tidy.
After the initial squirts of primer are dry, apply a second, then following the directions for “housed components” -pg 29, apply a bead of the 609 to the leading edge of the cup and press in, following the procedure outlined by Campagnolo.
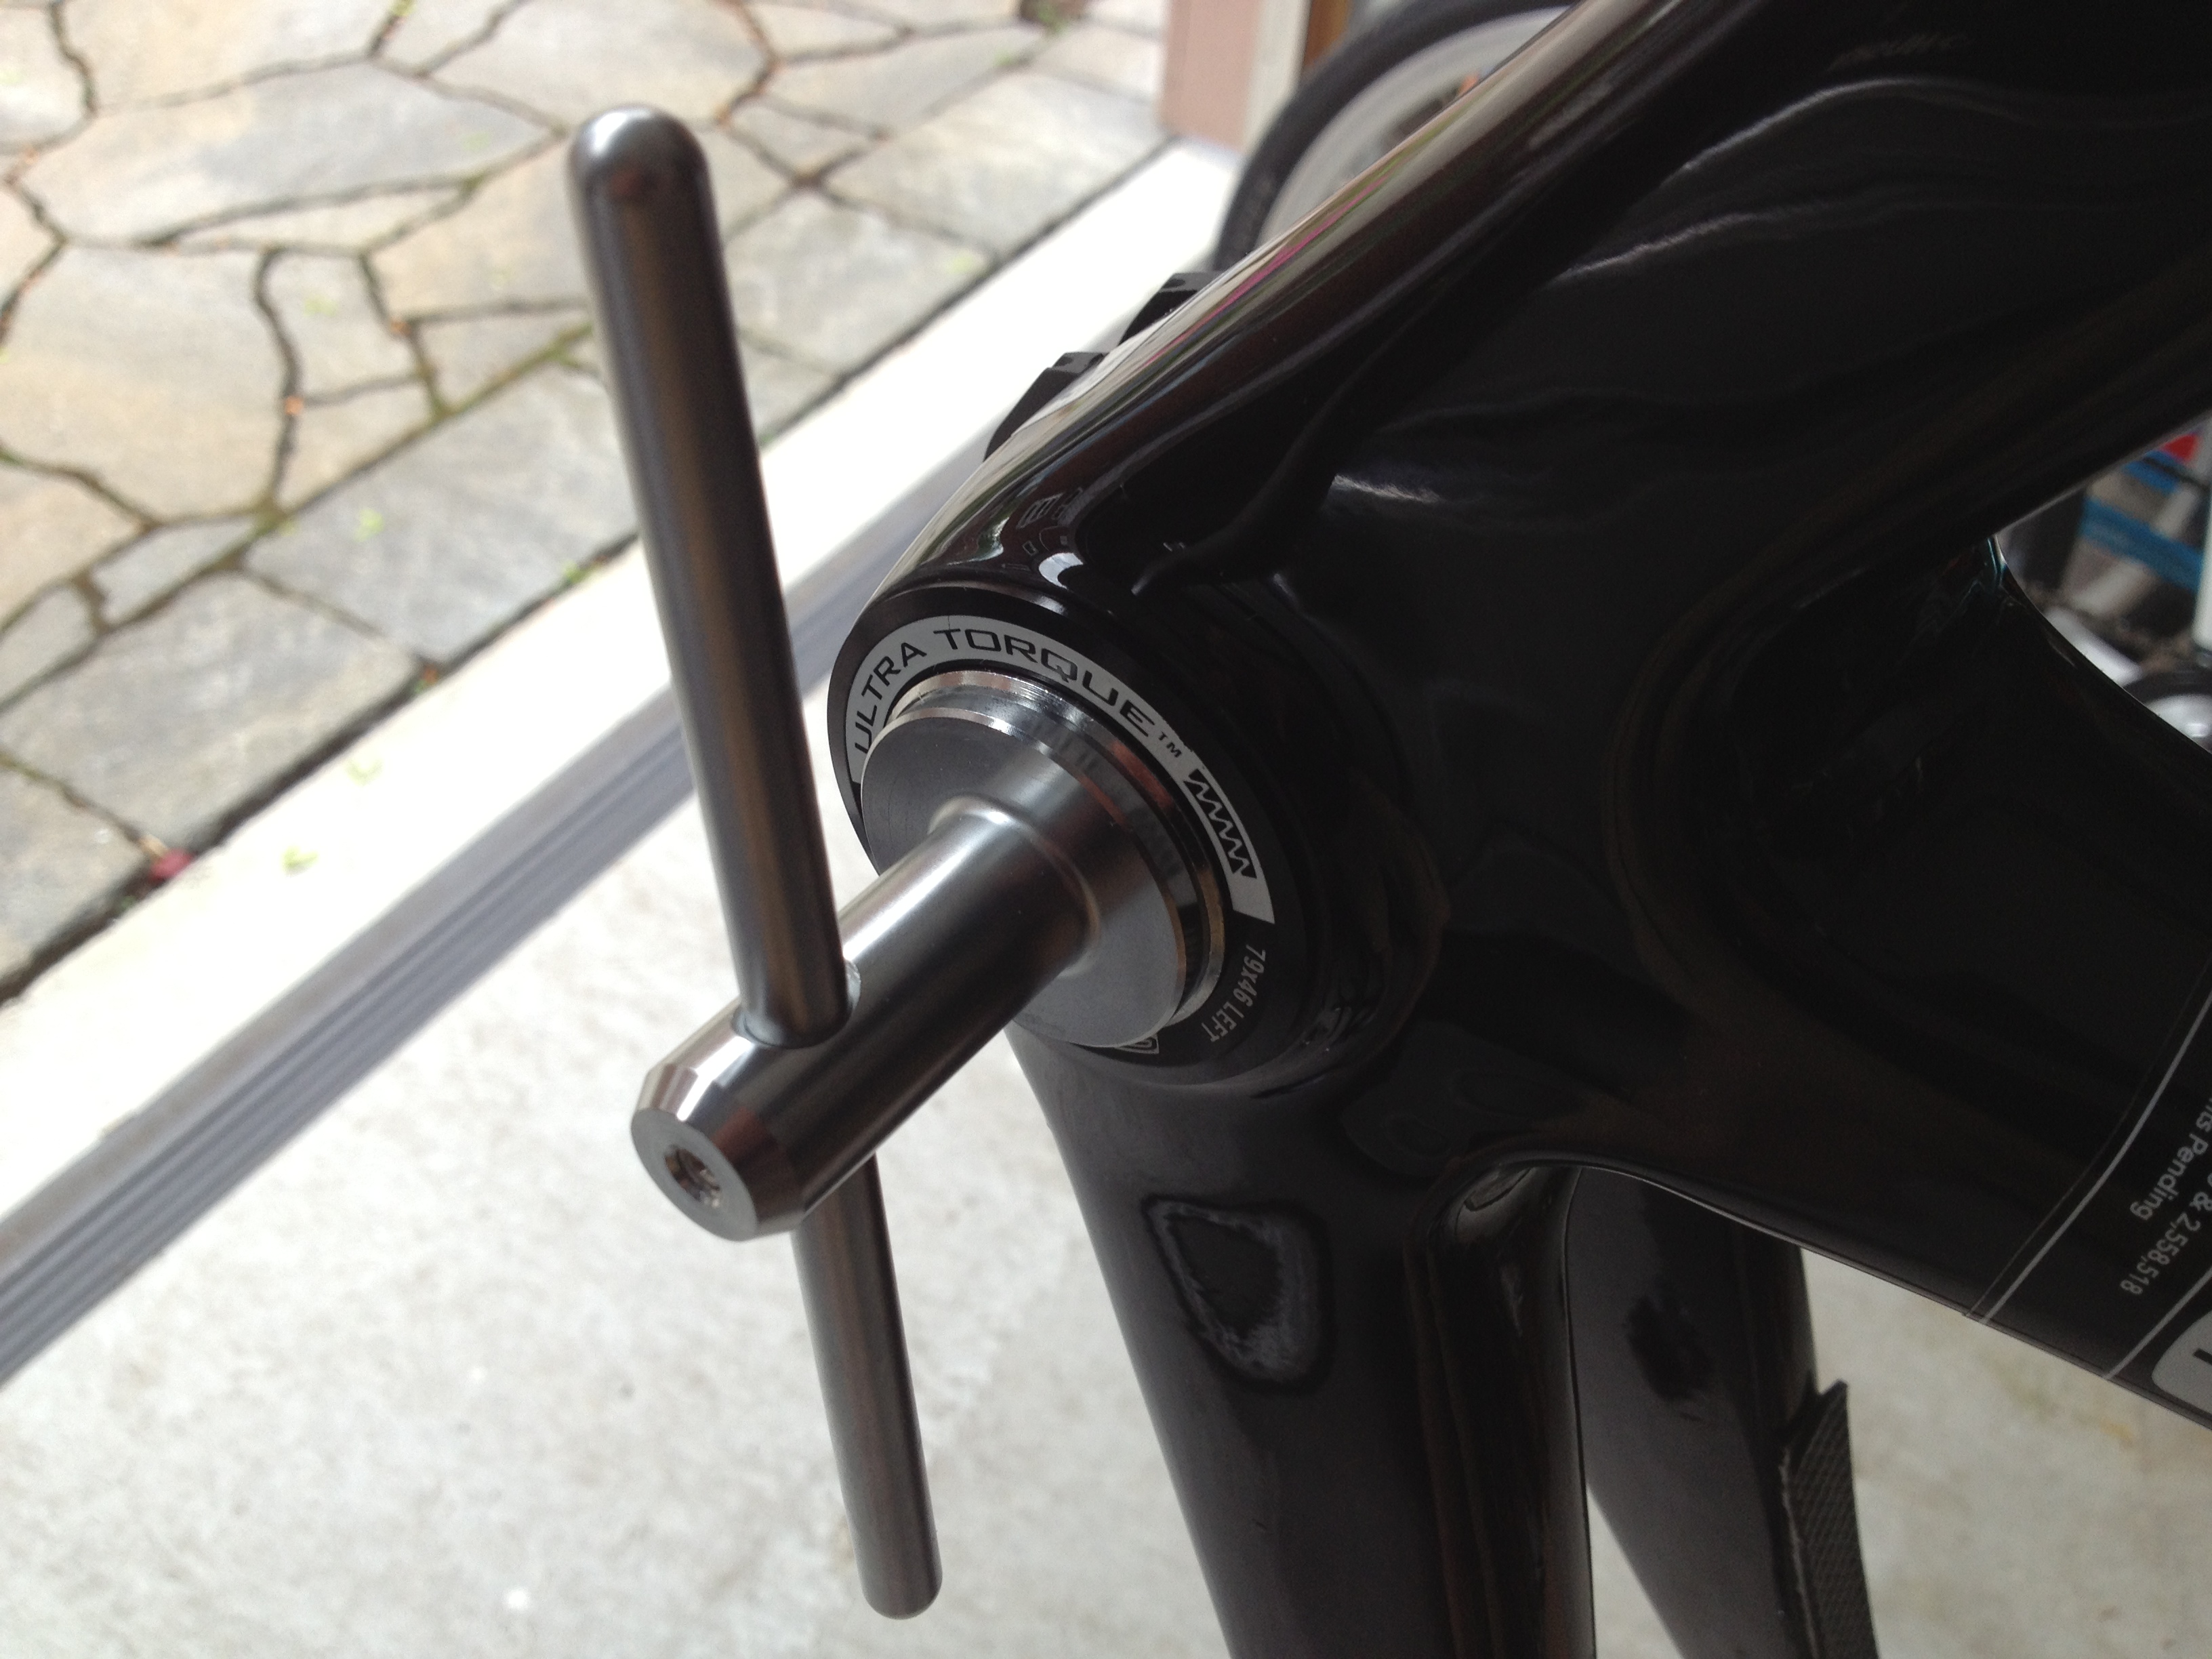
All done !
For the uninitiated – it requires a significant amount of torque to press in the cups. Nasty popping sounds will ensue. If you are careful and continue to twist the handle they will go in. Leave the tool in the cups for at least 30 minutes to allow the loctite to set-up. Some people say overnight. Loctite says 30 minutes minimum is fine at typical room temperatures.Full strength is reached in 24 hours, so it’s not recommended that you install the cranks and ride until after a full cure has been achieved.
The results. Nearly perfect. The Right hand cup still does not meet the shell perfectly. There is about a 1cm spot where the flange is 0.001″ out as measured by a feeler gauge. That’s 0.0254mm or about 1/4 the thickness of a sheet of 20 lb paper.
Or close enough for government work.
