Building the Cinelli – Done !

Finally, finished the Cinelli build. A few issues required some last minute ordering and running around.

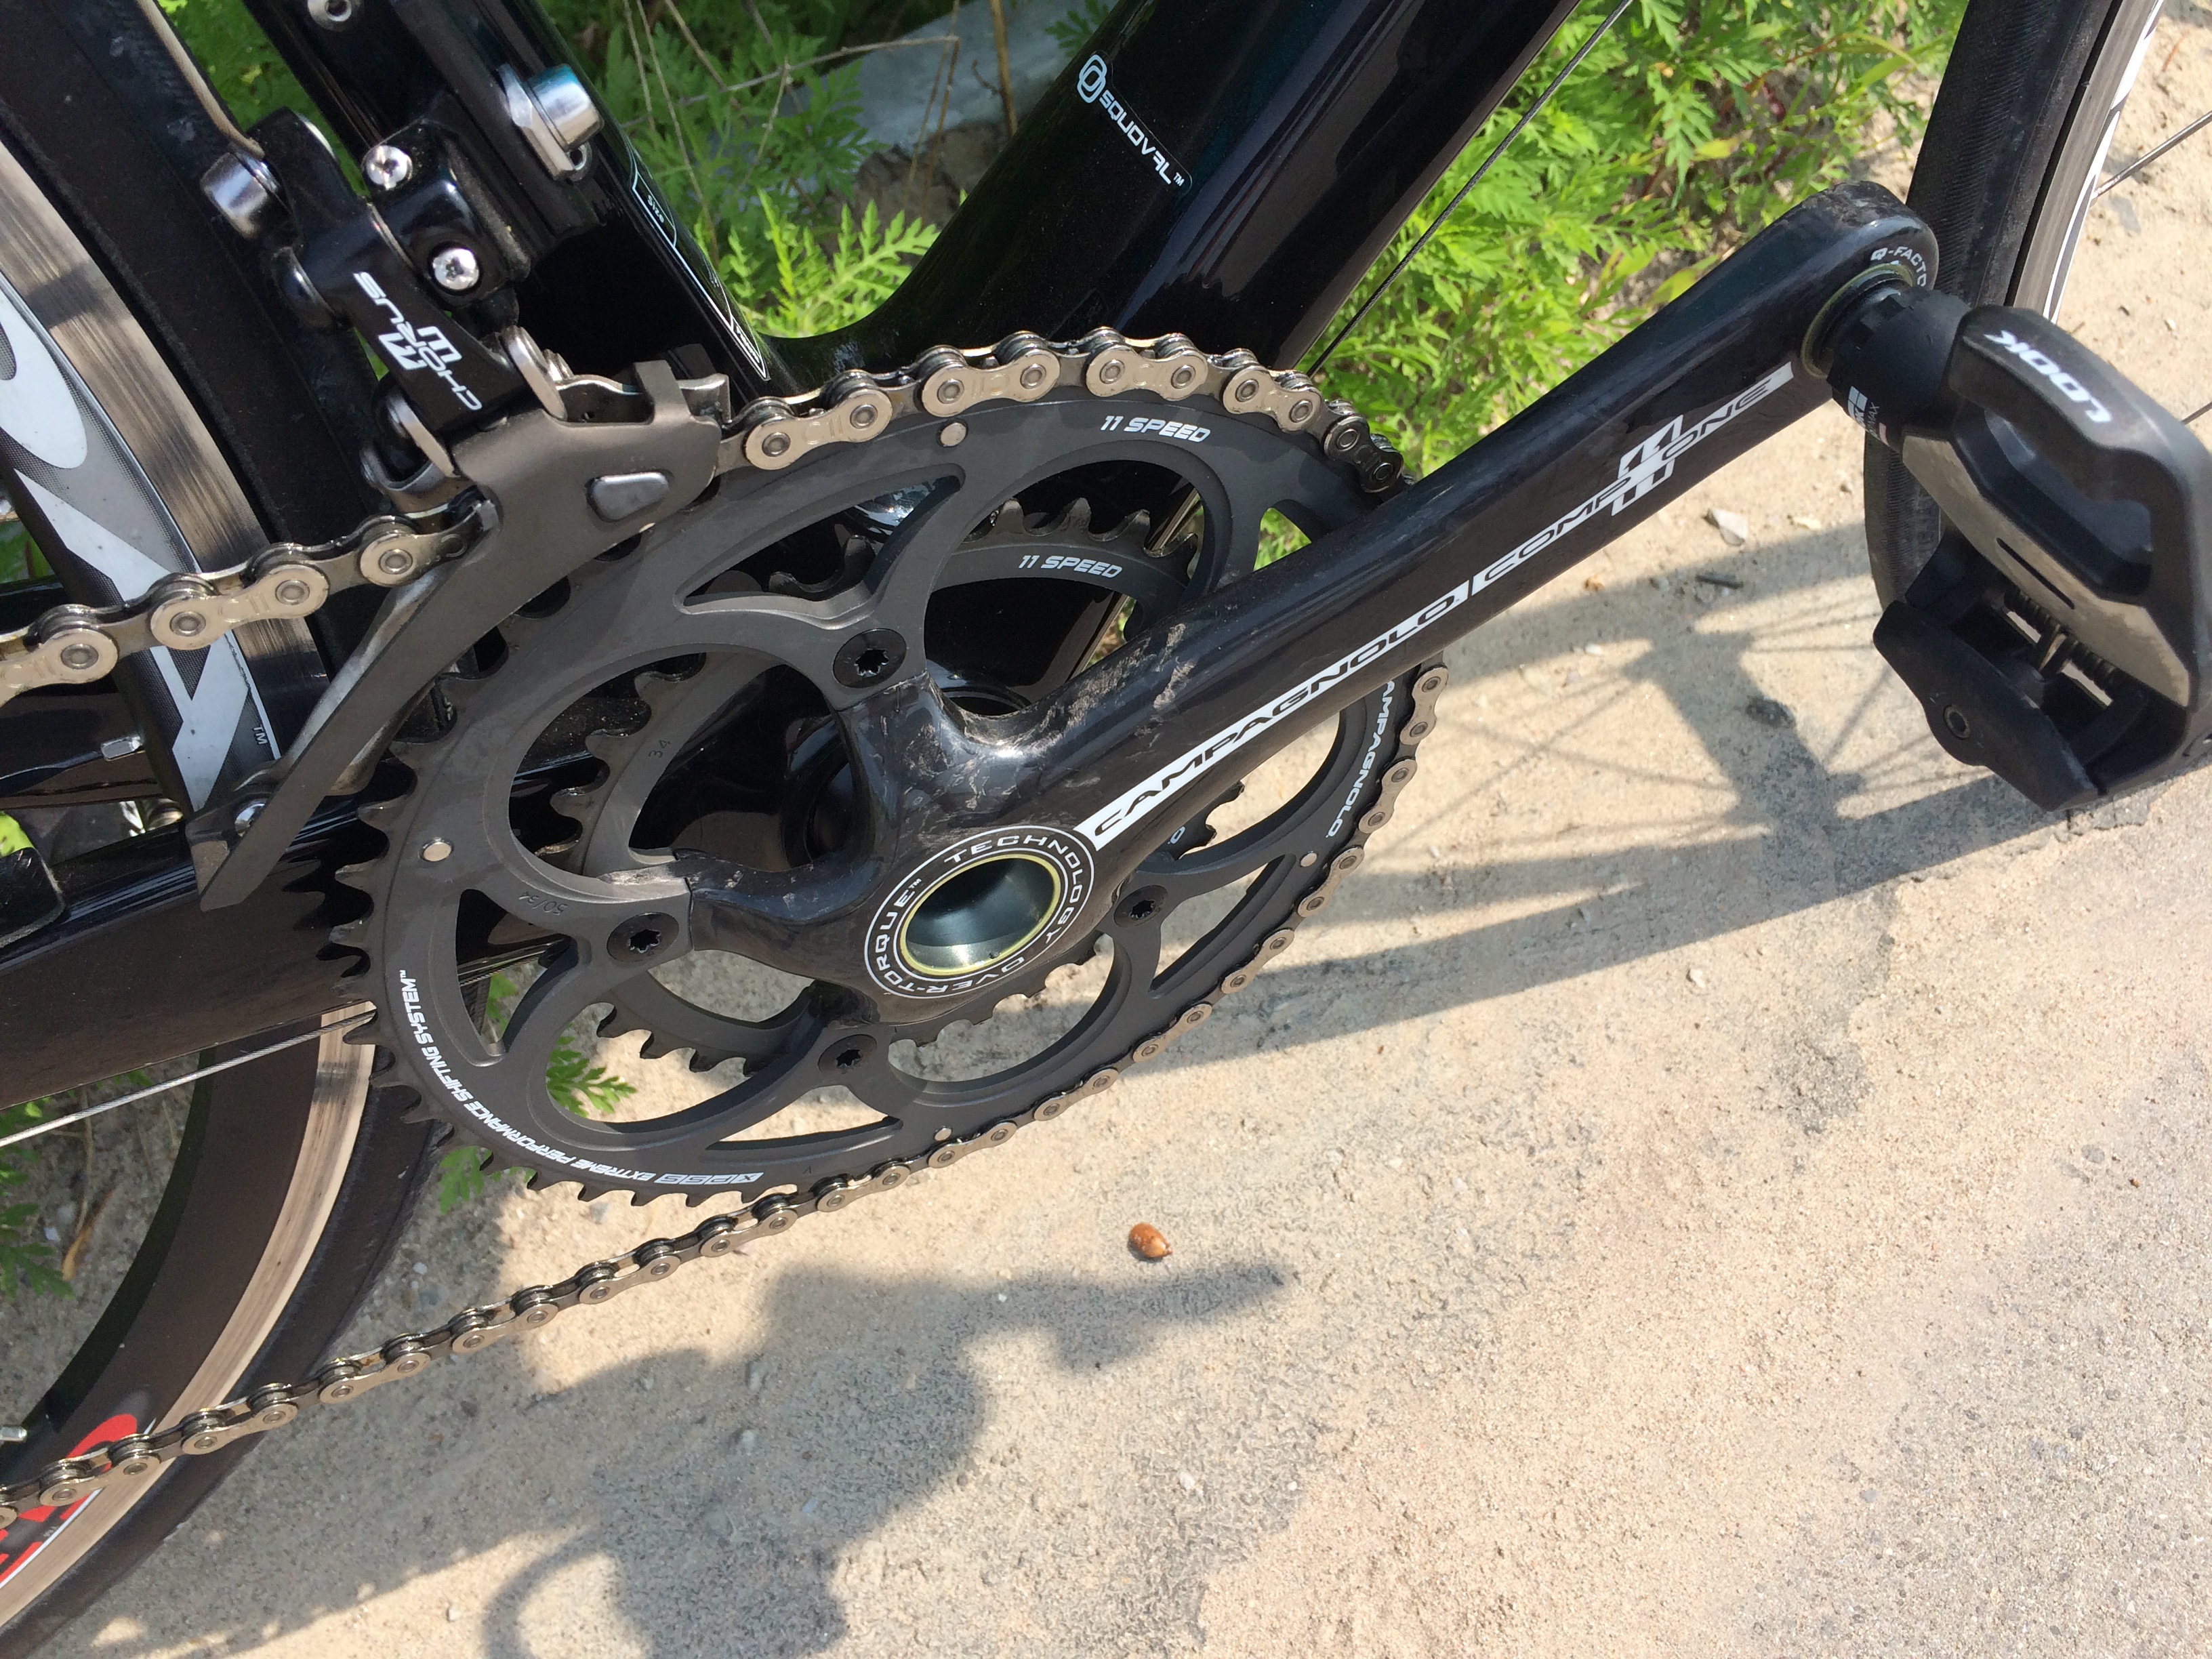
The front derailleur requires a clamp-on type. The clamp to braze on derailleur adapter that was shipped with the bike was giving me issues with tire clearance, as the clamp was rotated to the rear of the seat tube, a rather odd design. Notice the clamp in the picture below. When the clamp is rotated to properly orient the tab that the derailleur mounts to, the portion where the screw fixes the clamp together ends up only a few mm from the rear tire.

IMG_0311

A few phone calls and I managed to source a 35mm Campagnolo adapter from LaBicicletta here in Toronto. I also picked up a Campagnolo Chain Security Device FD-SR103. It’s a brilliant design that allows you to adjust the front derailleur and chain catcher position independently. Unfortunately, it’s not compatible with a clamp-on derailleur (or in my case, a braze on derailleur fixed to a clamp). I’ll save it for the Cervelo re-build coming up.

Fizik Bar Gel. I have been using bar gel under my tape for 5 years now. I can’t live without it as I like the extra thickness it adds to the bar and the gooey comfort it provides. When I unwrapped the bar tape from the Cervelo to scavenge the Chorus shifters, the gel had essentially fused to the bar requiring me to cut/scrape it off. Luckily another trip to LaBicicletta saved me.

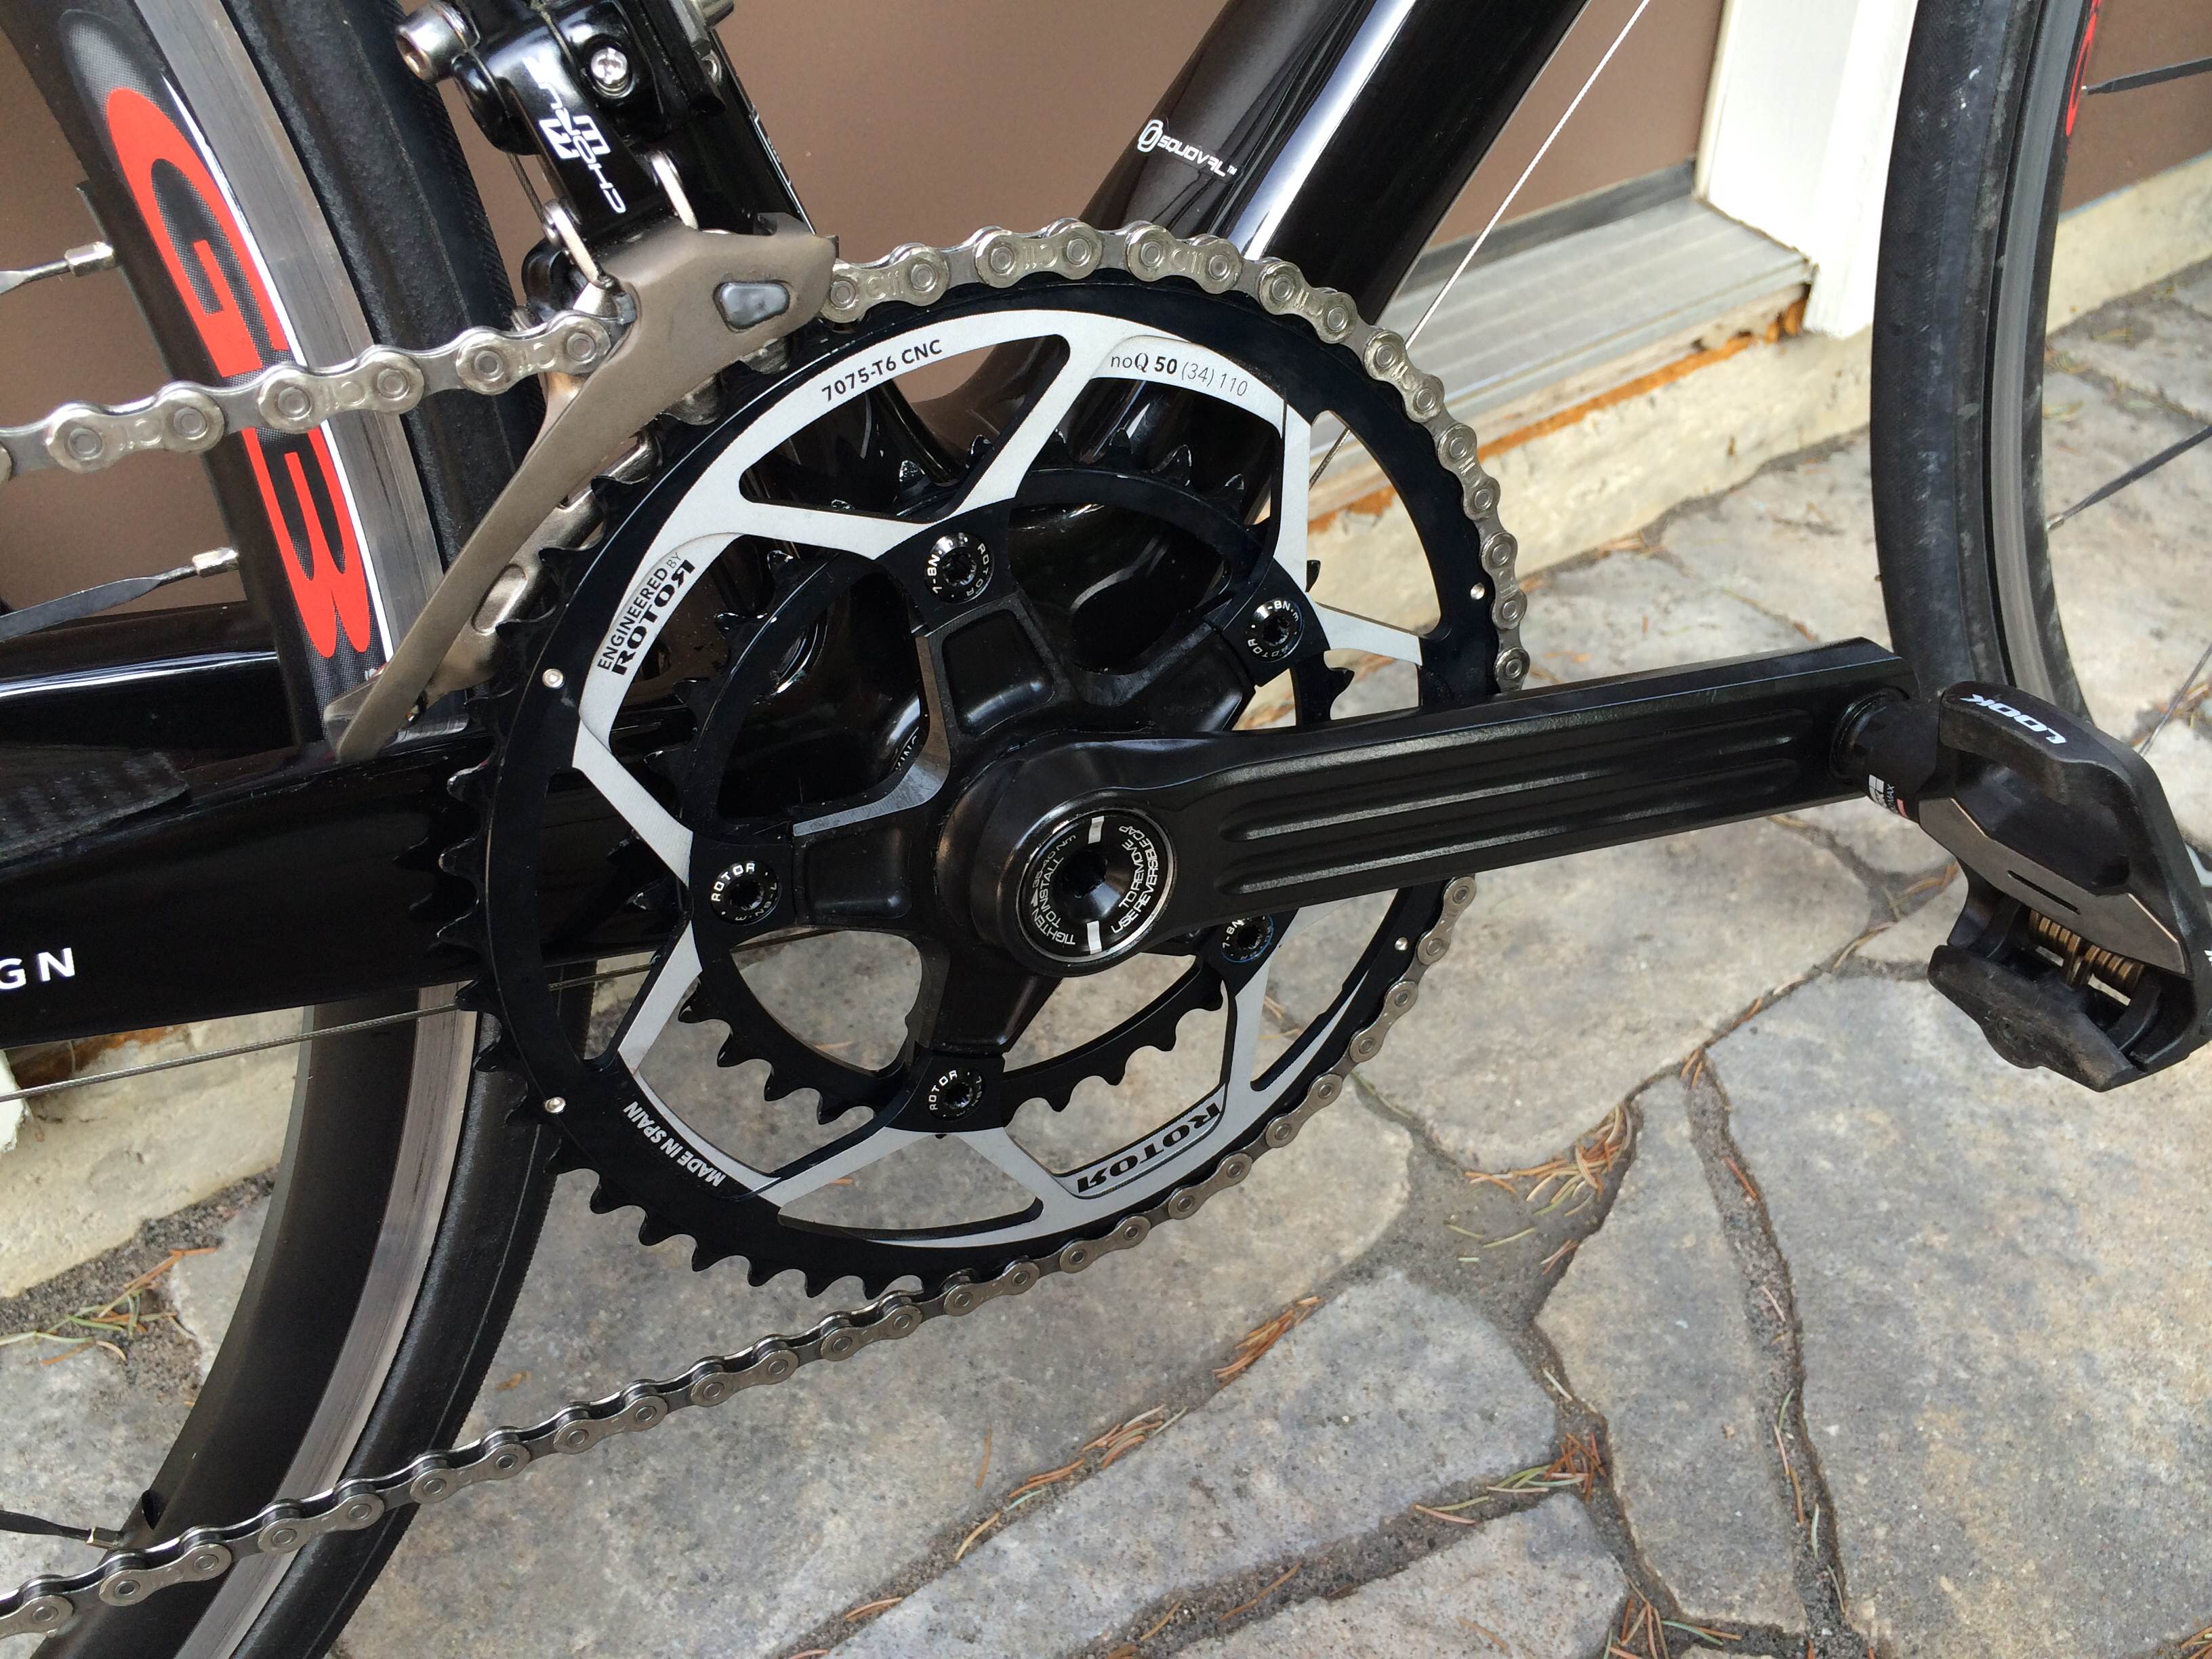
The rest of the build went smoothly. Cranks went on without a hitch. I did a deep cleaning of the shifters, pulling off the hoods and cleaning the copious amounts of greasy crud that accumulated inside them, thank you WD-40.

The only stupid thing I did was put a kink in the rear derailleur cable, right where the cable sits in the housing as it enters the derailleur. I ordered a 10 pack of replacement cables and will replace it as soon as they arrive, as downshifting is suffering as a result.

IMG_0323

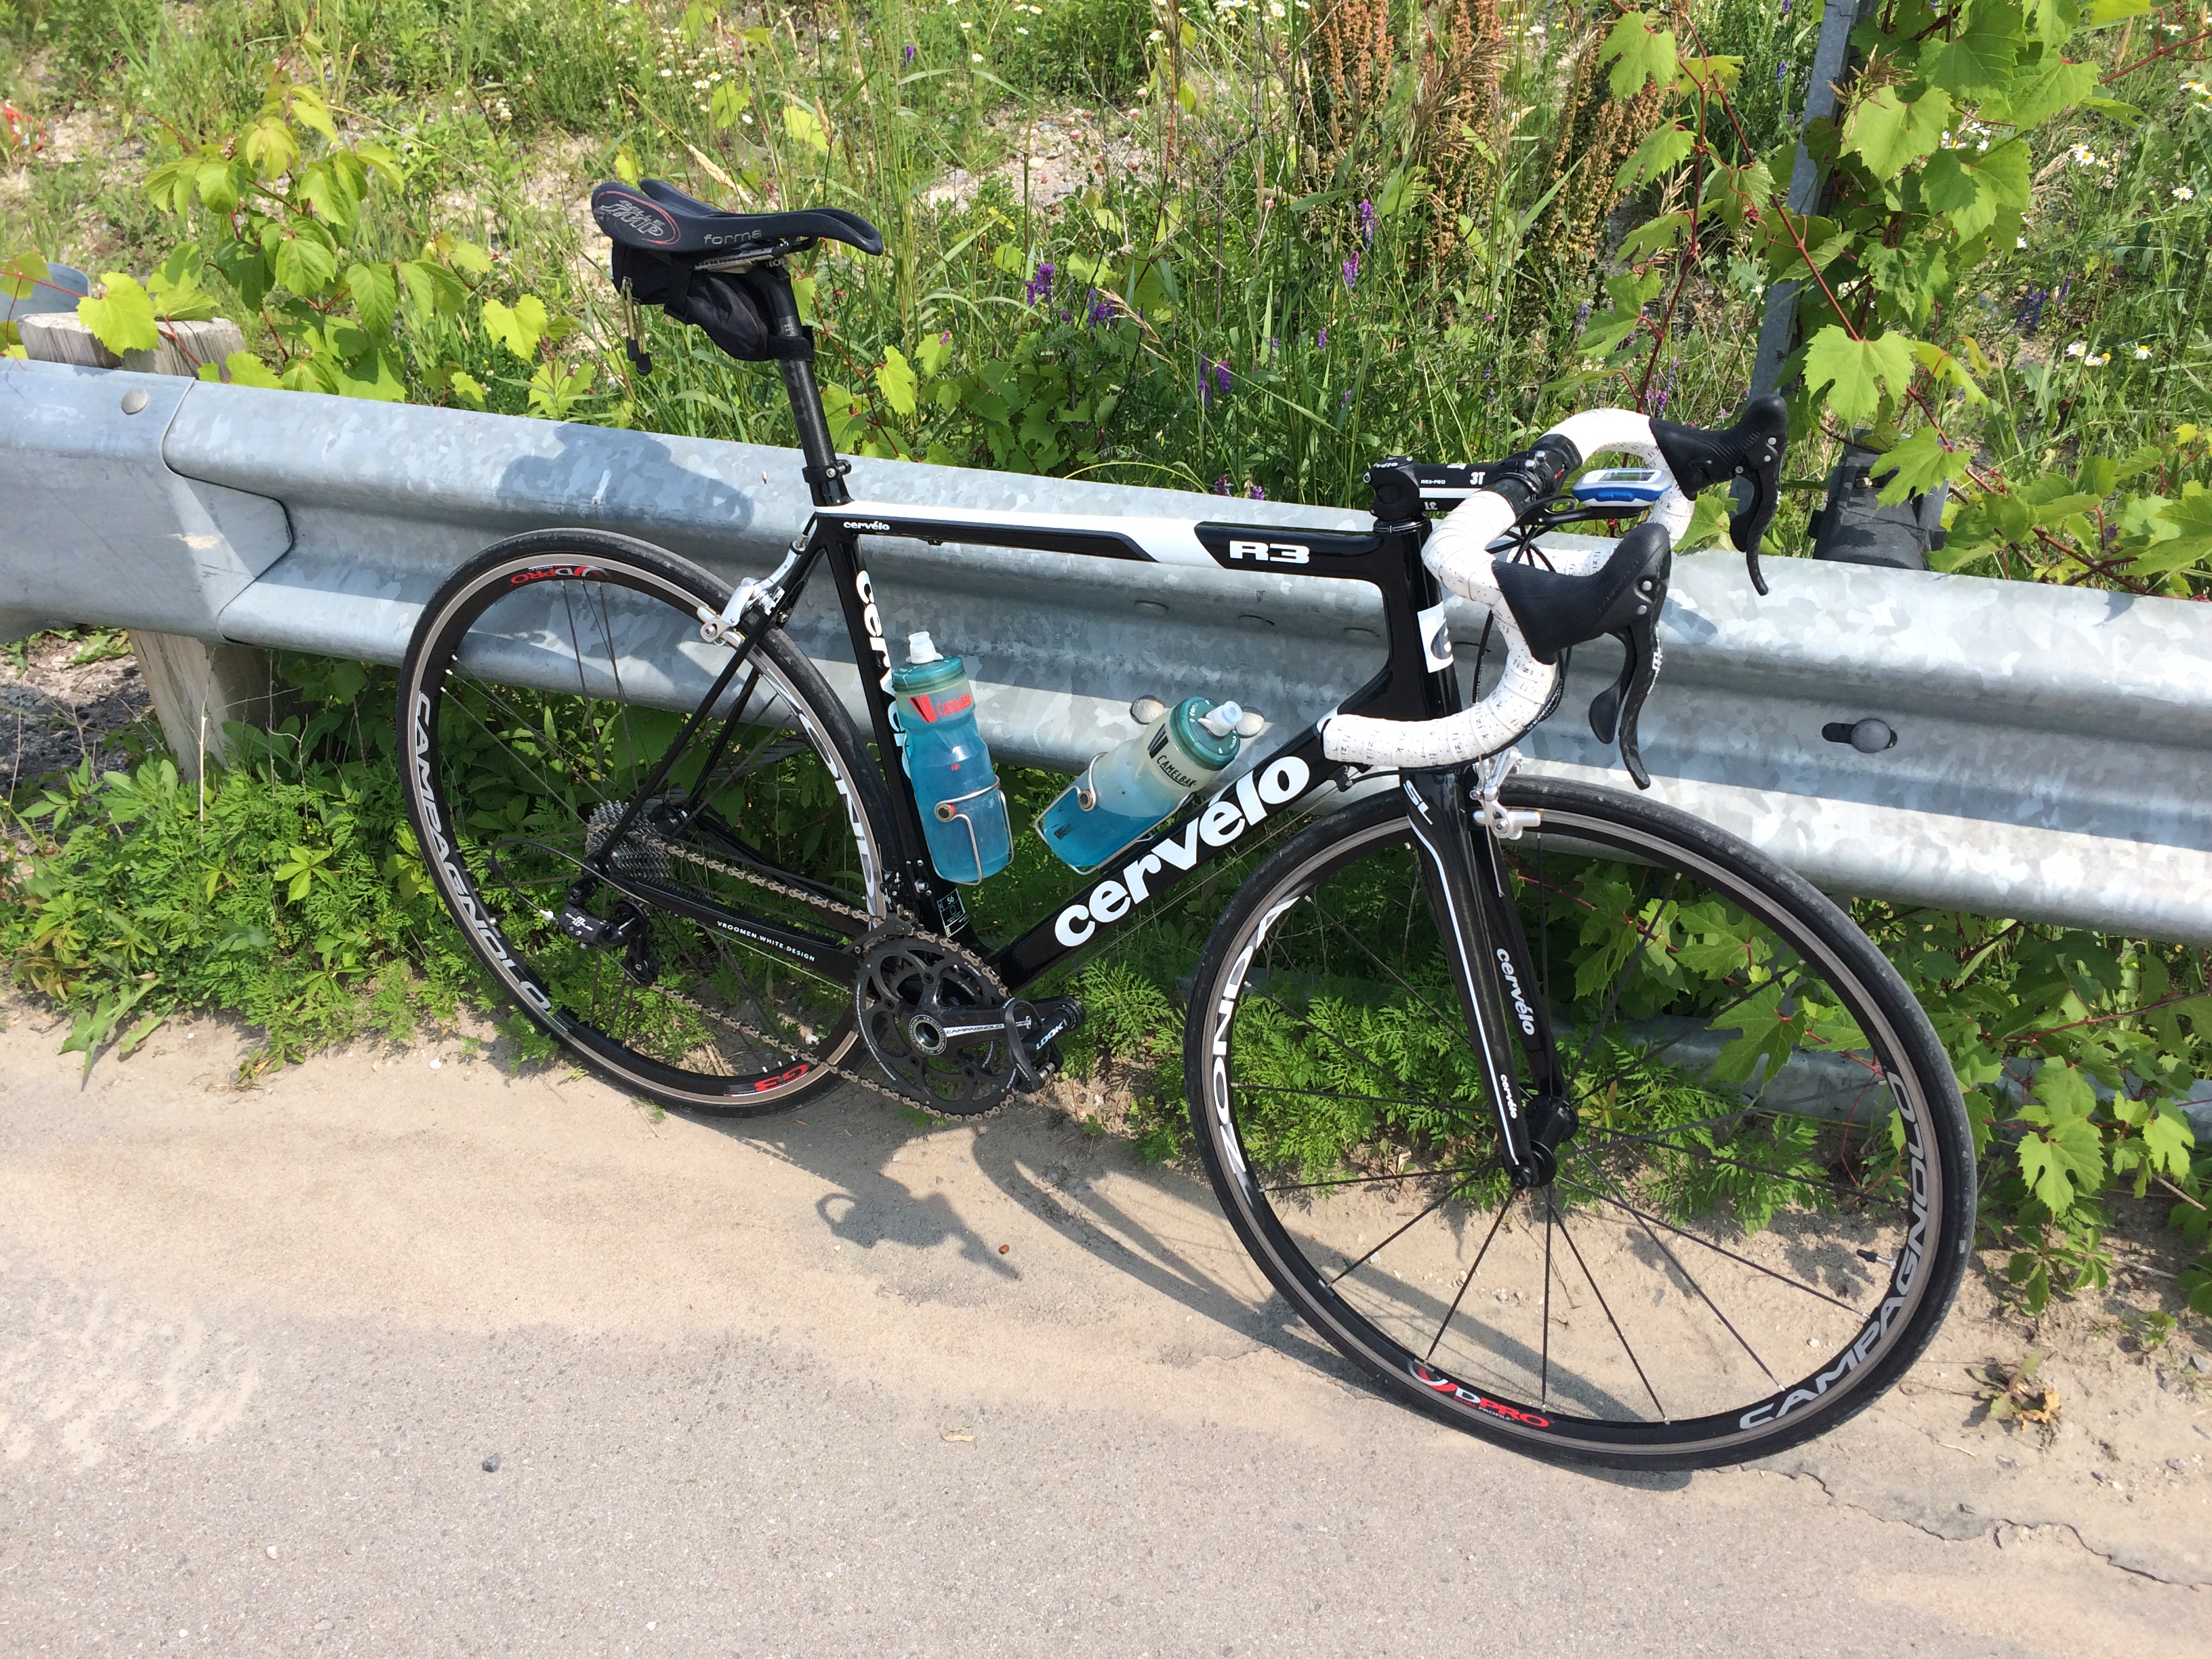
And there we have it, fini. Bottle cages are Elite Ciussi Inox, again scavenged from the Cervelo, as are the Look Keo 2 Max Carbon pedals. I have replacements on order. The Selle SMP Pro I pulled off my CycleOps trainer.

So how does it ride? Well, I did the inaugural 50 km shakedown this morning to the beach and back, a route that offers a little of everything road wise – some relatively smooth pavement but mostly rough as hell pothole filled Toronto roads and a few light climbs.

Here are my impressions. It’s one hell of a stiff bike at the bottom bracket. Right up there with peloton worthy carbon bikes. The front end is INCREDIBLY stiff, more so than the Cervelo R3. And despite clearance for 28mm tires, it’s no “Fondo” bike. It turns fast very instinctively as if controlled by Jedi mind power. A Crowbar crossed with a Ferarri. This is very much a fast group riding or race orientated machine.

It’s not a lightweight, but I never felt I was slogging my city bike up the hills. The all carbon front end probably contributes to the bikes light feeling and handling. The Sirocco wheels roll fast and are equally stiff, and those Conti Grand Prix Classic tires have made me re-think my “320 TPI, no less” tire snob attitude.

IMG_0320

Aluminum frames have a horrid reputation for harshness. But, Aluminum tube sets and alloys have improved since Cannondales 1983 ST500. This is not a harsh riding bike, thanks to the triple butted aluminum tube set. There is definitely compliance in the frame, so I didn’t feel like every imperfection in the road was going straight to my ass and hands.

IMG_0328

The big difference between the Cinelli and the carbon Cervelo (and the carbon Look I rode previously) is if you should hit (and around here it’s more like WHEN you hit) a nasty bit of pavement – like a deep crack or hole – THEN you feel the absence of Carbons magic damping quality.  I hit a few nasty holes today, and it was a swearing DOUBLE ouch. Ride Paris-Roubaix on this? No thanks. But for most road riding I’ll be doing, it will be just fine.


Building the Cinelli Part 2

Work on the new ride progresses at a snails pace. A business trip took me to a warmer climate temporarily only to arrive back home in what could only be described as absolutely shitty weather. And wrapping up taxes took up most of any free time I had on Saturday.

Nevertheless, some progress was made. Not a whole lot of technical documentation on the Columbus FEL fork, at least what I managed to find. Here is a photo of it all laid out prior to dry fitting.


Not shown is the Columbus compression steer tube insert. We’ll get to that bad boy in a moment….

Dry fit-up of the Columbus FEL fork ready for cutting. I follow the prescribed advice of cutting the fork slightly shy so that there is 2mm of clearance for the top cap in order to pre-load the bearings properly.
And here we are in the jig/guide ready for cutting. I keep a 32 TPI saw blade just for the sole purpose of cutting carbon steer tubes.

Helpful hit – soap and water is a great cutting lubricant for carbon. A little shot from the foaming dispenser borrowed from the kitchen works perfectly.
Relax and take a deep breath. Work slowly, keep even pressure against the saw guide. Relax you hand and rest your index finger parallel with the saw blade. Don’t think about ruining hundreds of dollars worth of carbon fork if you screw it up…..

Afterwards, take a fine tooth file and break the edge / deburr the cut. Some people use sandpaper, I’m more comfortable with a file.

Ok, reassemble the fork to check…wait a minute…..
Remember that expander?? ….yeah, well, it sits proud of the steer tube by exactly 2mm. Rather than re-cut the steer tube, I dug through my parts bin and found a 2mm spacer.


That did the trick.

Next up was mounting  the new Campagnolo Scirocco (sans decals) wheelset I picked up on Kijiji with the Continental Grand Prix “Classic” 25mm tires I picked up when I was in Texas earlier in the week. New 12-29 cassette picked up for the “cheap” on eBay.

And this is why the whole spring / fall / wet/ gravel bike project started in the first place….clearance. Thinking 28mm will be no issue whatsoever.
Once wheels are mounted it’s time to check the alignment of the rear hanger.

As expected, the hanger was out by an obscene amount. The Park tool rule of thumb / guide within 4mm as you move around the wheel at the various positions A through D. With a little patience you can usually get within less than half that.

Ok, making progress. Still far from rideable, but getting there. I love the look of those Grand Prix Classic tires. No telling how they ride, but they look bad ass.

Building the Cinelli Part 1

The day of days finally arrived as time and weather converged to allow me to FINALLY get started on putting together the Cinelli.

File_008

Remember in Meaning of Life where Headmaster John Cleese declares “You don’t have to go leaping straight for the clitoris like a bull at a gate. Give her a kiss, boy”

Yeah, well…first things first, prepping the frame.

File_009

I’ve never met a derailleur hanger that didn’t need its threads chasing. Particularly new ones.  10mm x 1 tap with a squirt of foaming cutting oil cleans out the threads – and look at the crap in there.

File_000 (1)

That’s better, now ready to align the hanger when I finish prepping. On to step two – seat post.

File_009 (1)

Peer down the hole, what do you see. Crud, oxidation and general nastiness. Just to be safe, I ran a micrometer inside the tube to make sure I had some material to play with. Good to go – time for the flex hone.

File_008 (1)

Masking the seat tube with some low-tack painters tape. This protects the paint should the flex hone spin out of control.

File_006

Always lubricate the flex hone (or any metal cutting tool). Although cooling the tool is not necessary this instance, it does help “float” out the cuttings and leaves a thin film of lubricant to prevent further oxidation.


File_007

That’s more like it. Crud and oxidation eliminated. The flex hone leaves a cross-hatched finish. A test fit of the post and it slides in Smooooothly…….

File_003

And now the water bottle bosses. A quick run of the M5 x 0.8 tap with a squirt of cutting fluid.

File_005

Again, always surprising what you get after running the tap through the threads.

File_004

Finally, install the bottom bracket cups. I’m running a Campagnolo Chorus Ultra-Torque 50-34 compact.

I always like to check the dimensions of the bottom bracket – particularly with Ultra-Torque, as the design requires a wave washer to take up any difference in the bottom bracket shell width. Specs call for 68mm -/+ 0.2mm, anything outside of that specification results in either the crank bearings moving around in the cups, or excessive tension on the wave washer and excessive drag on the bearings.

File_001 (1)

Looks ok – right on the edge. If I had a facing and tap tool for 1.370 x 24 TPI shells, I would probably shave a little off the shell – say 0.1mm – while also ensuring the shell faces are perfectly parallel. Alas, I spent the big bucks on a PF30 reamer and facing tool.

File_002 
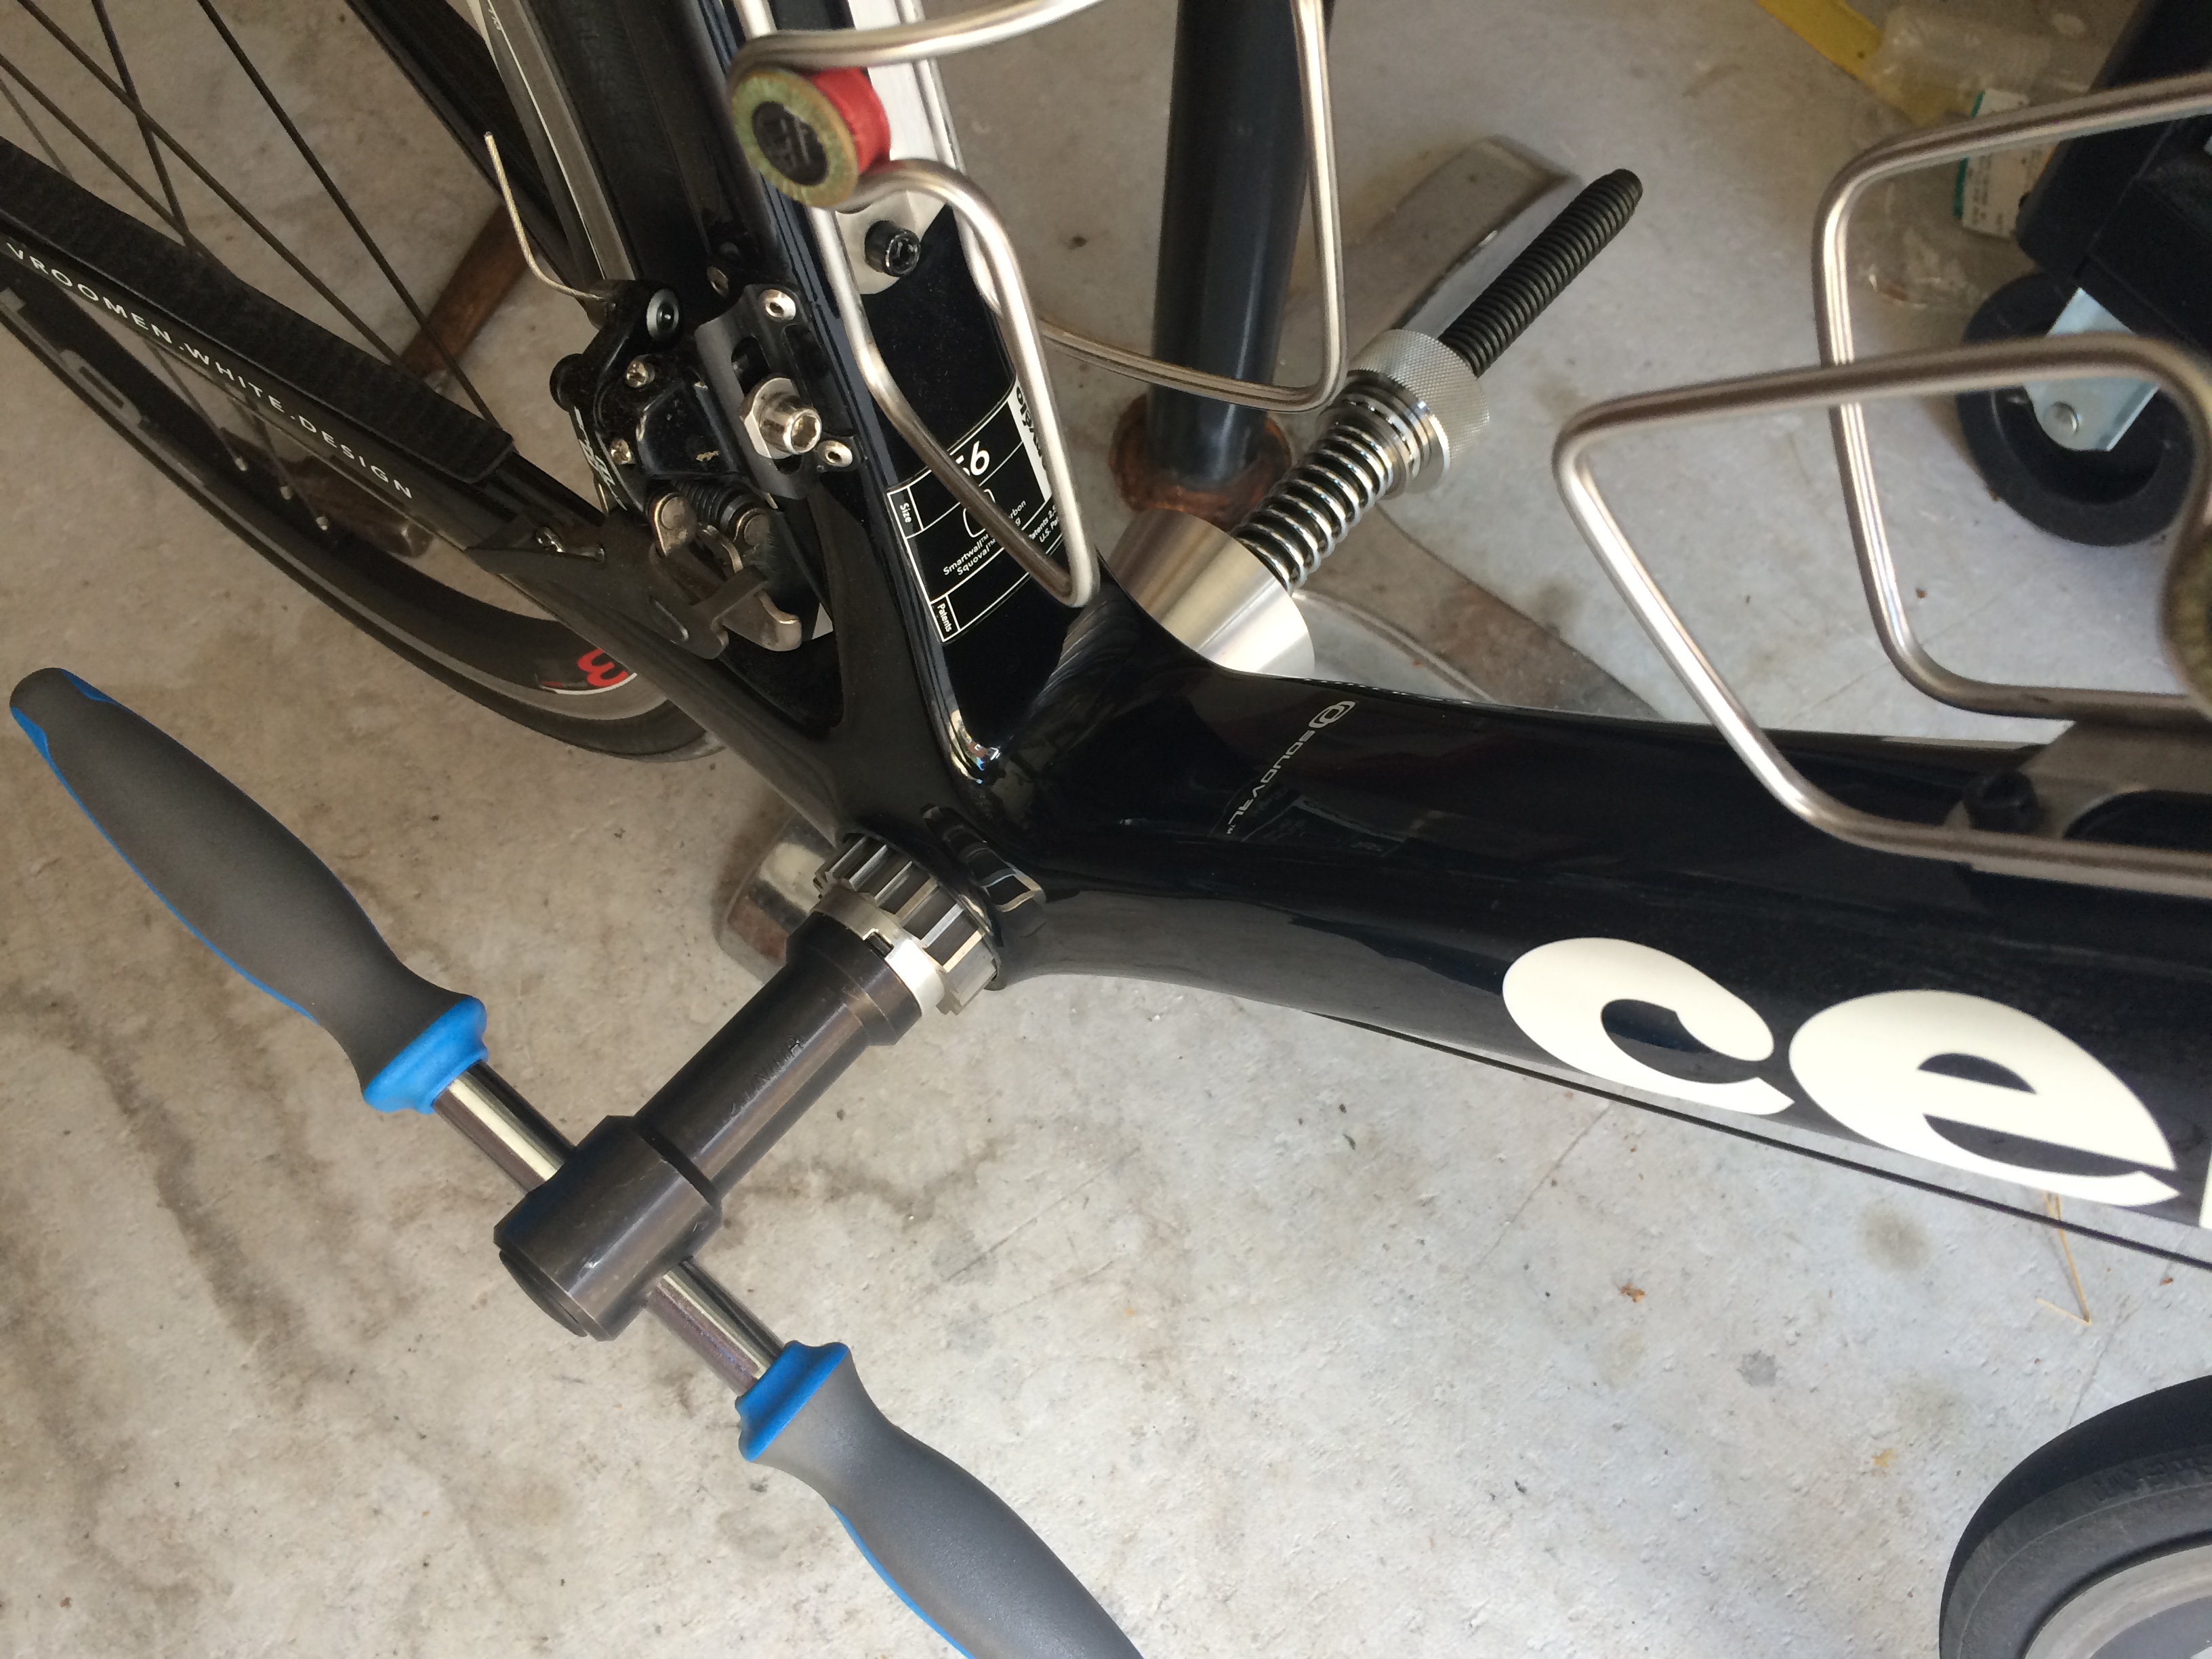
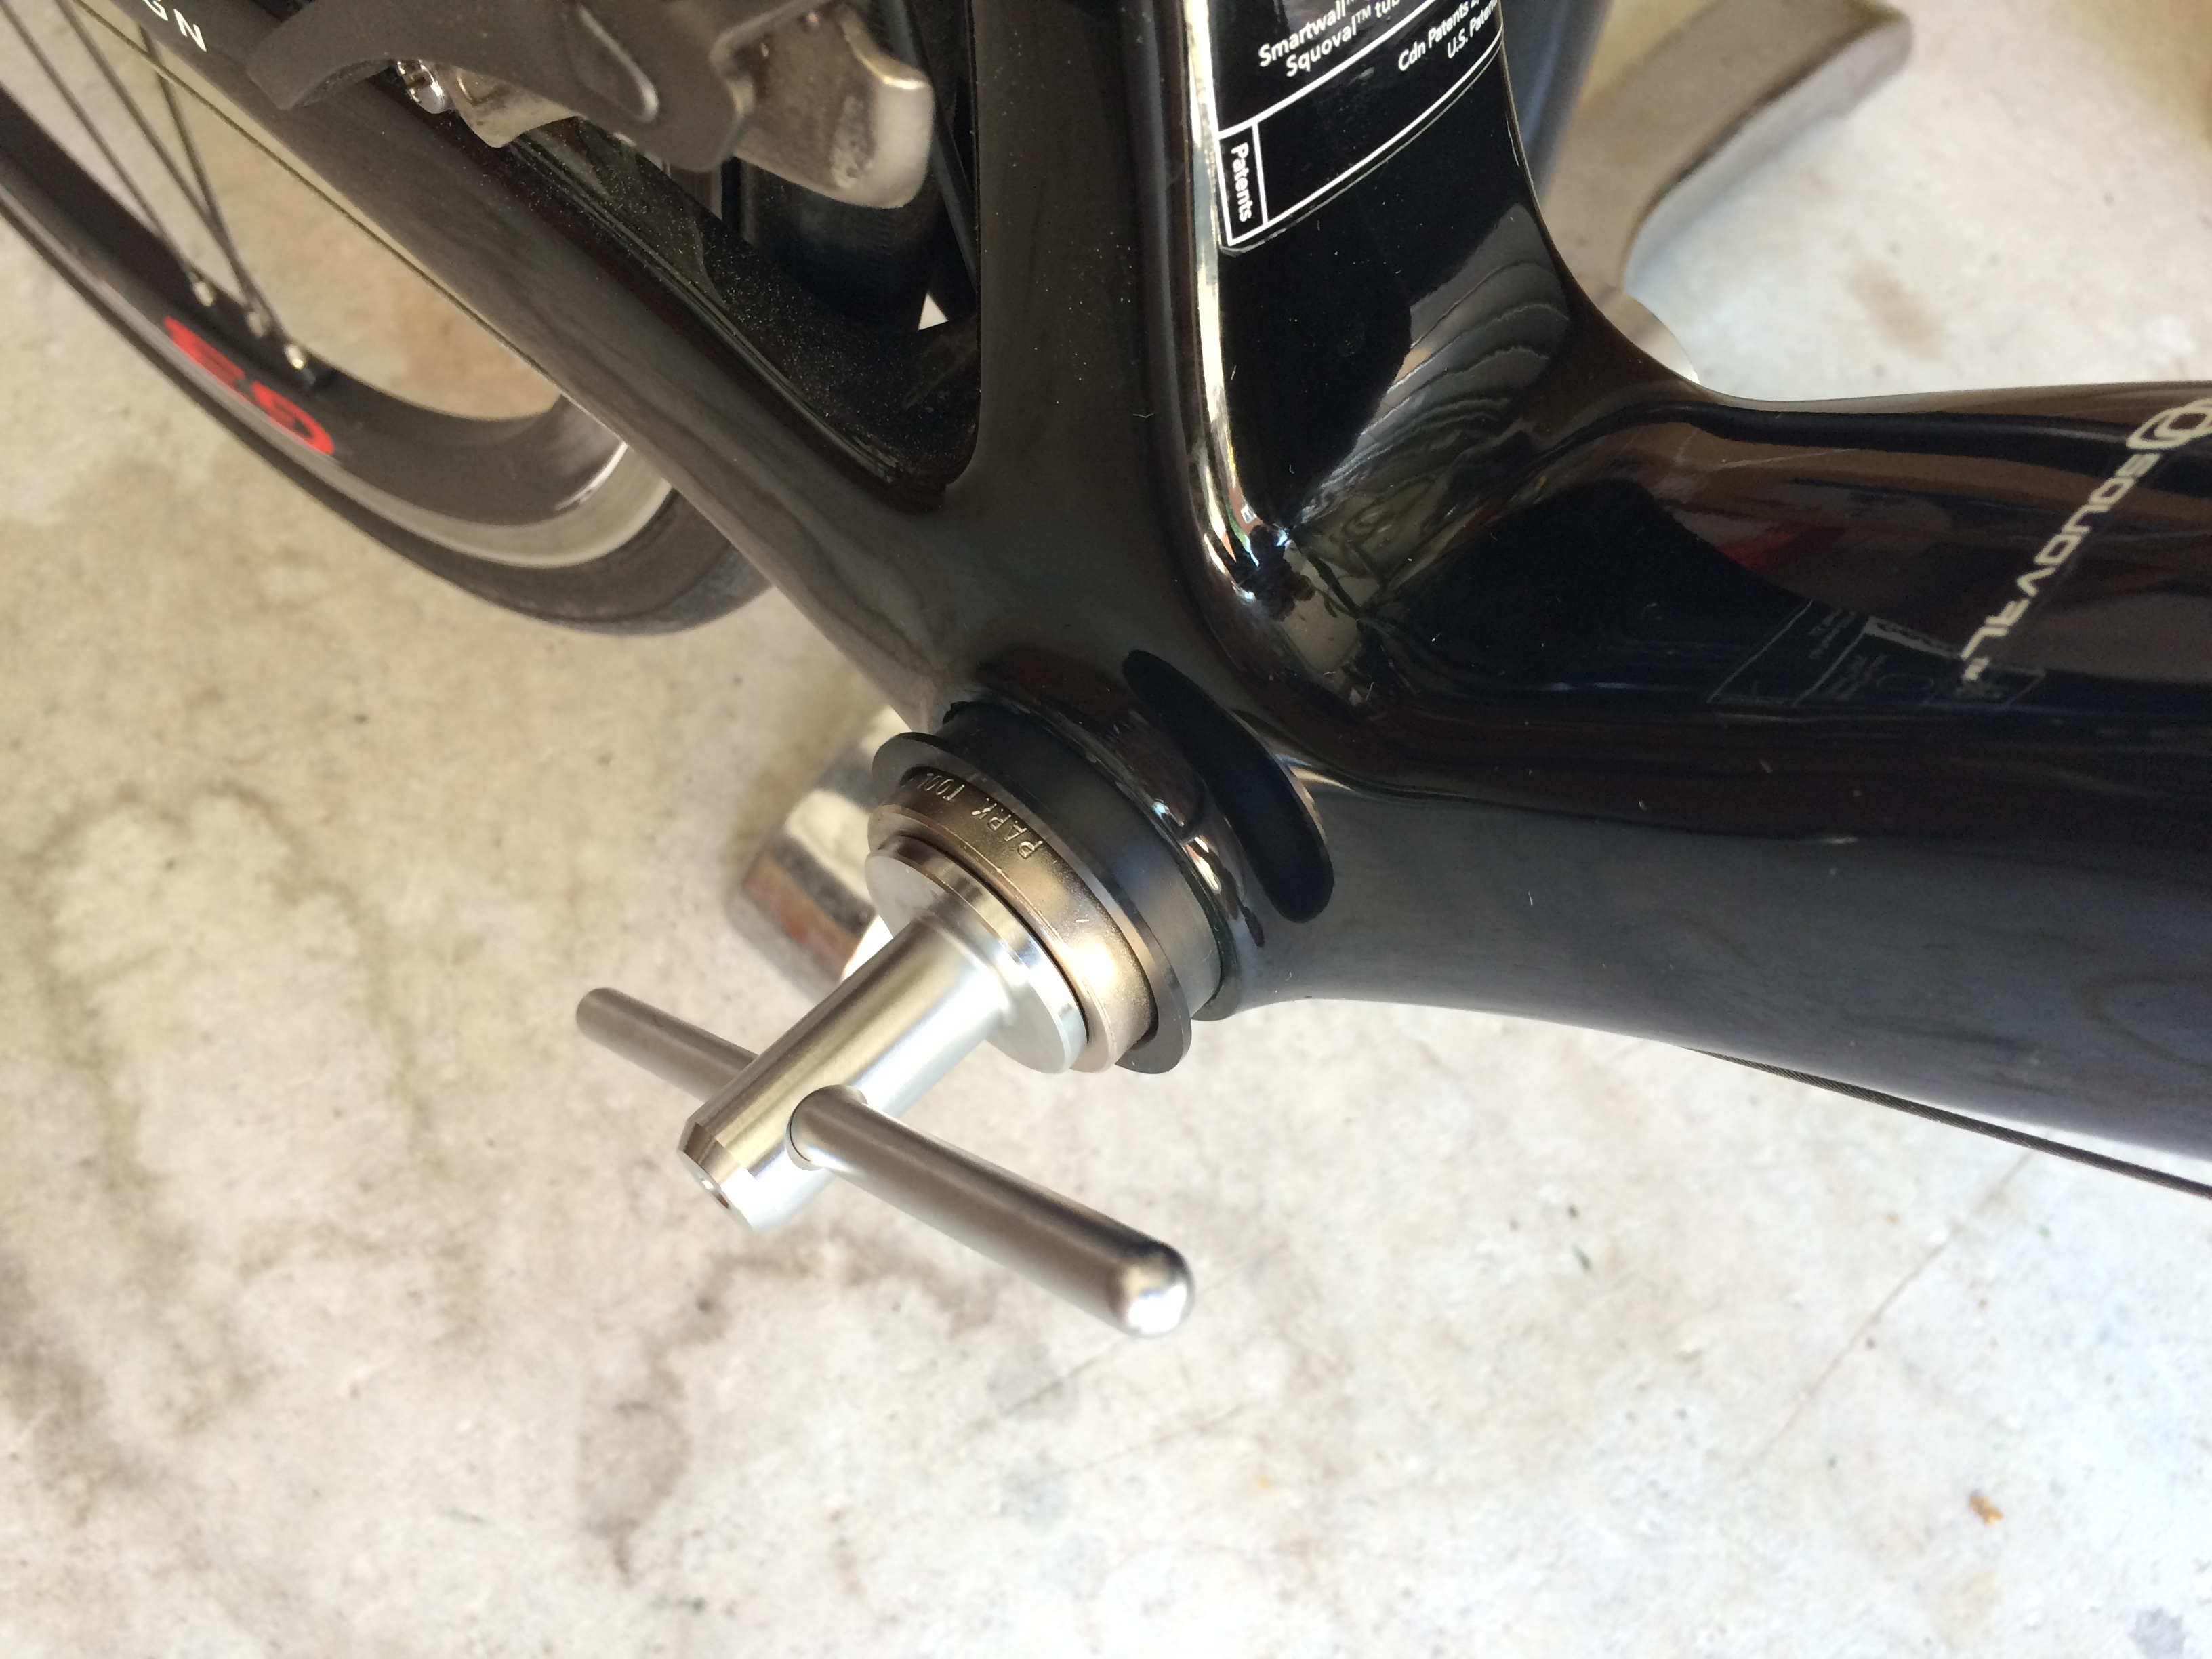
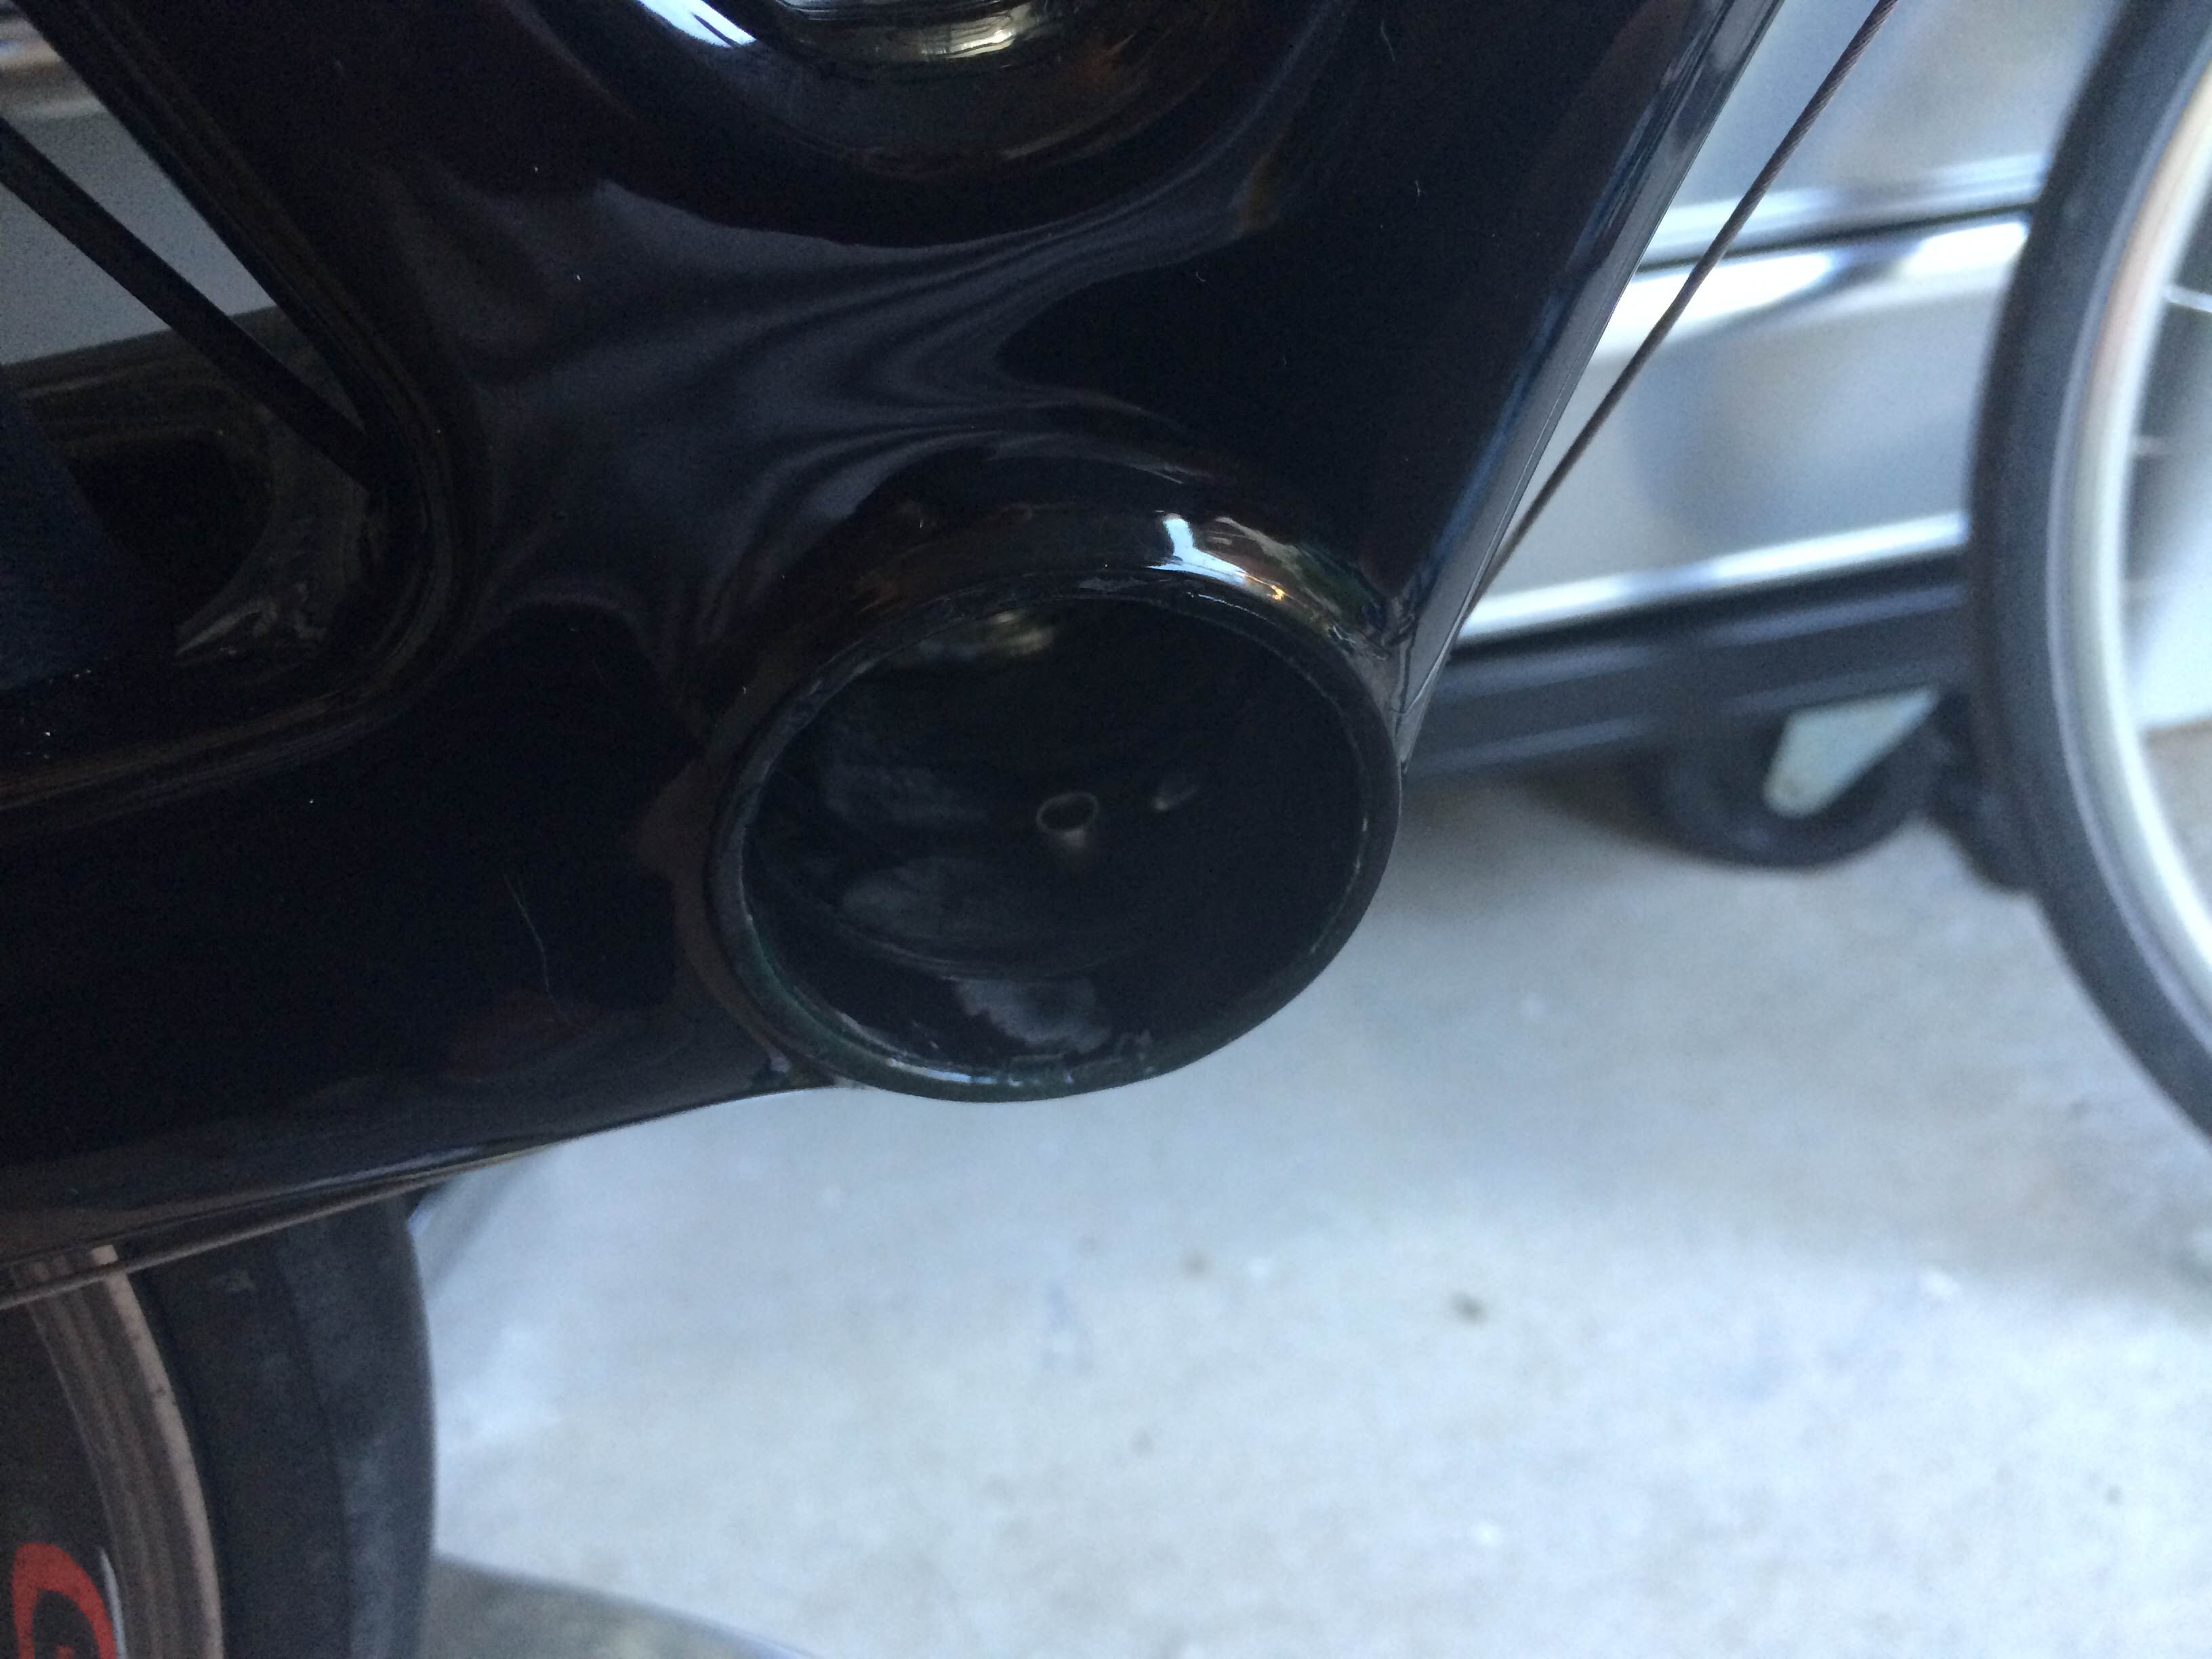
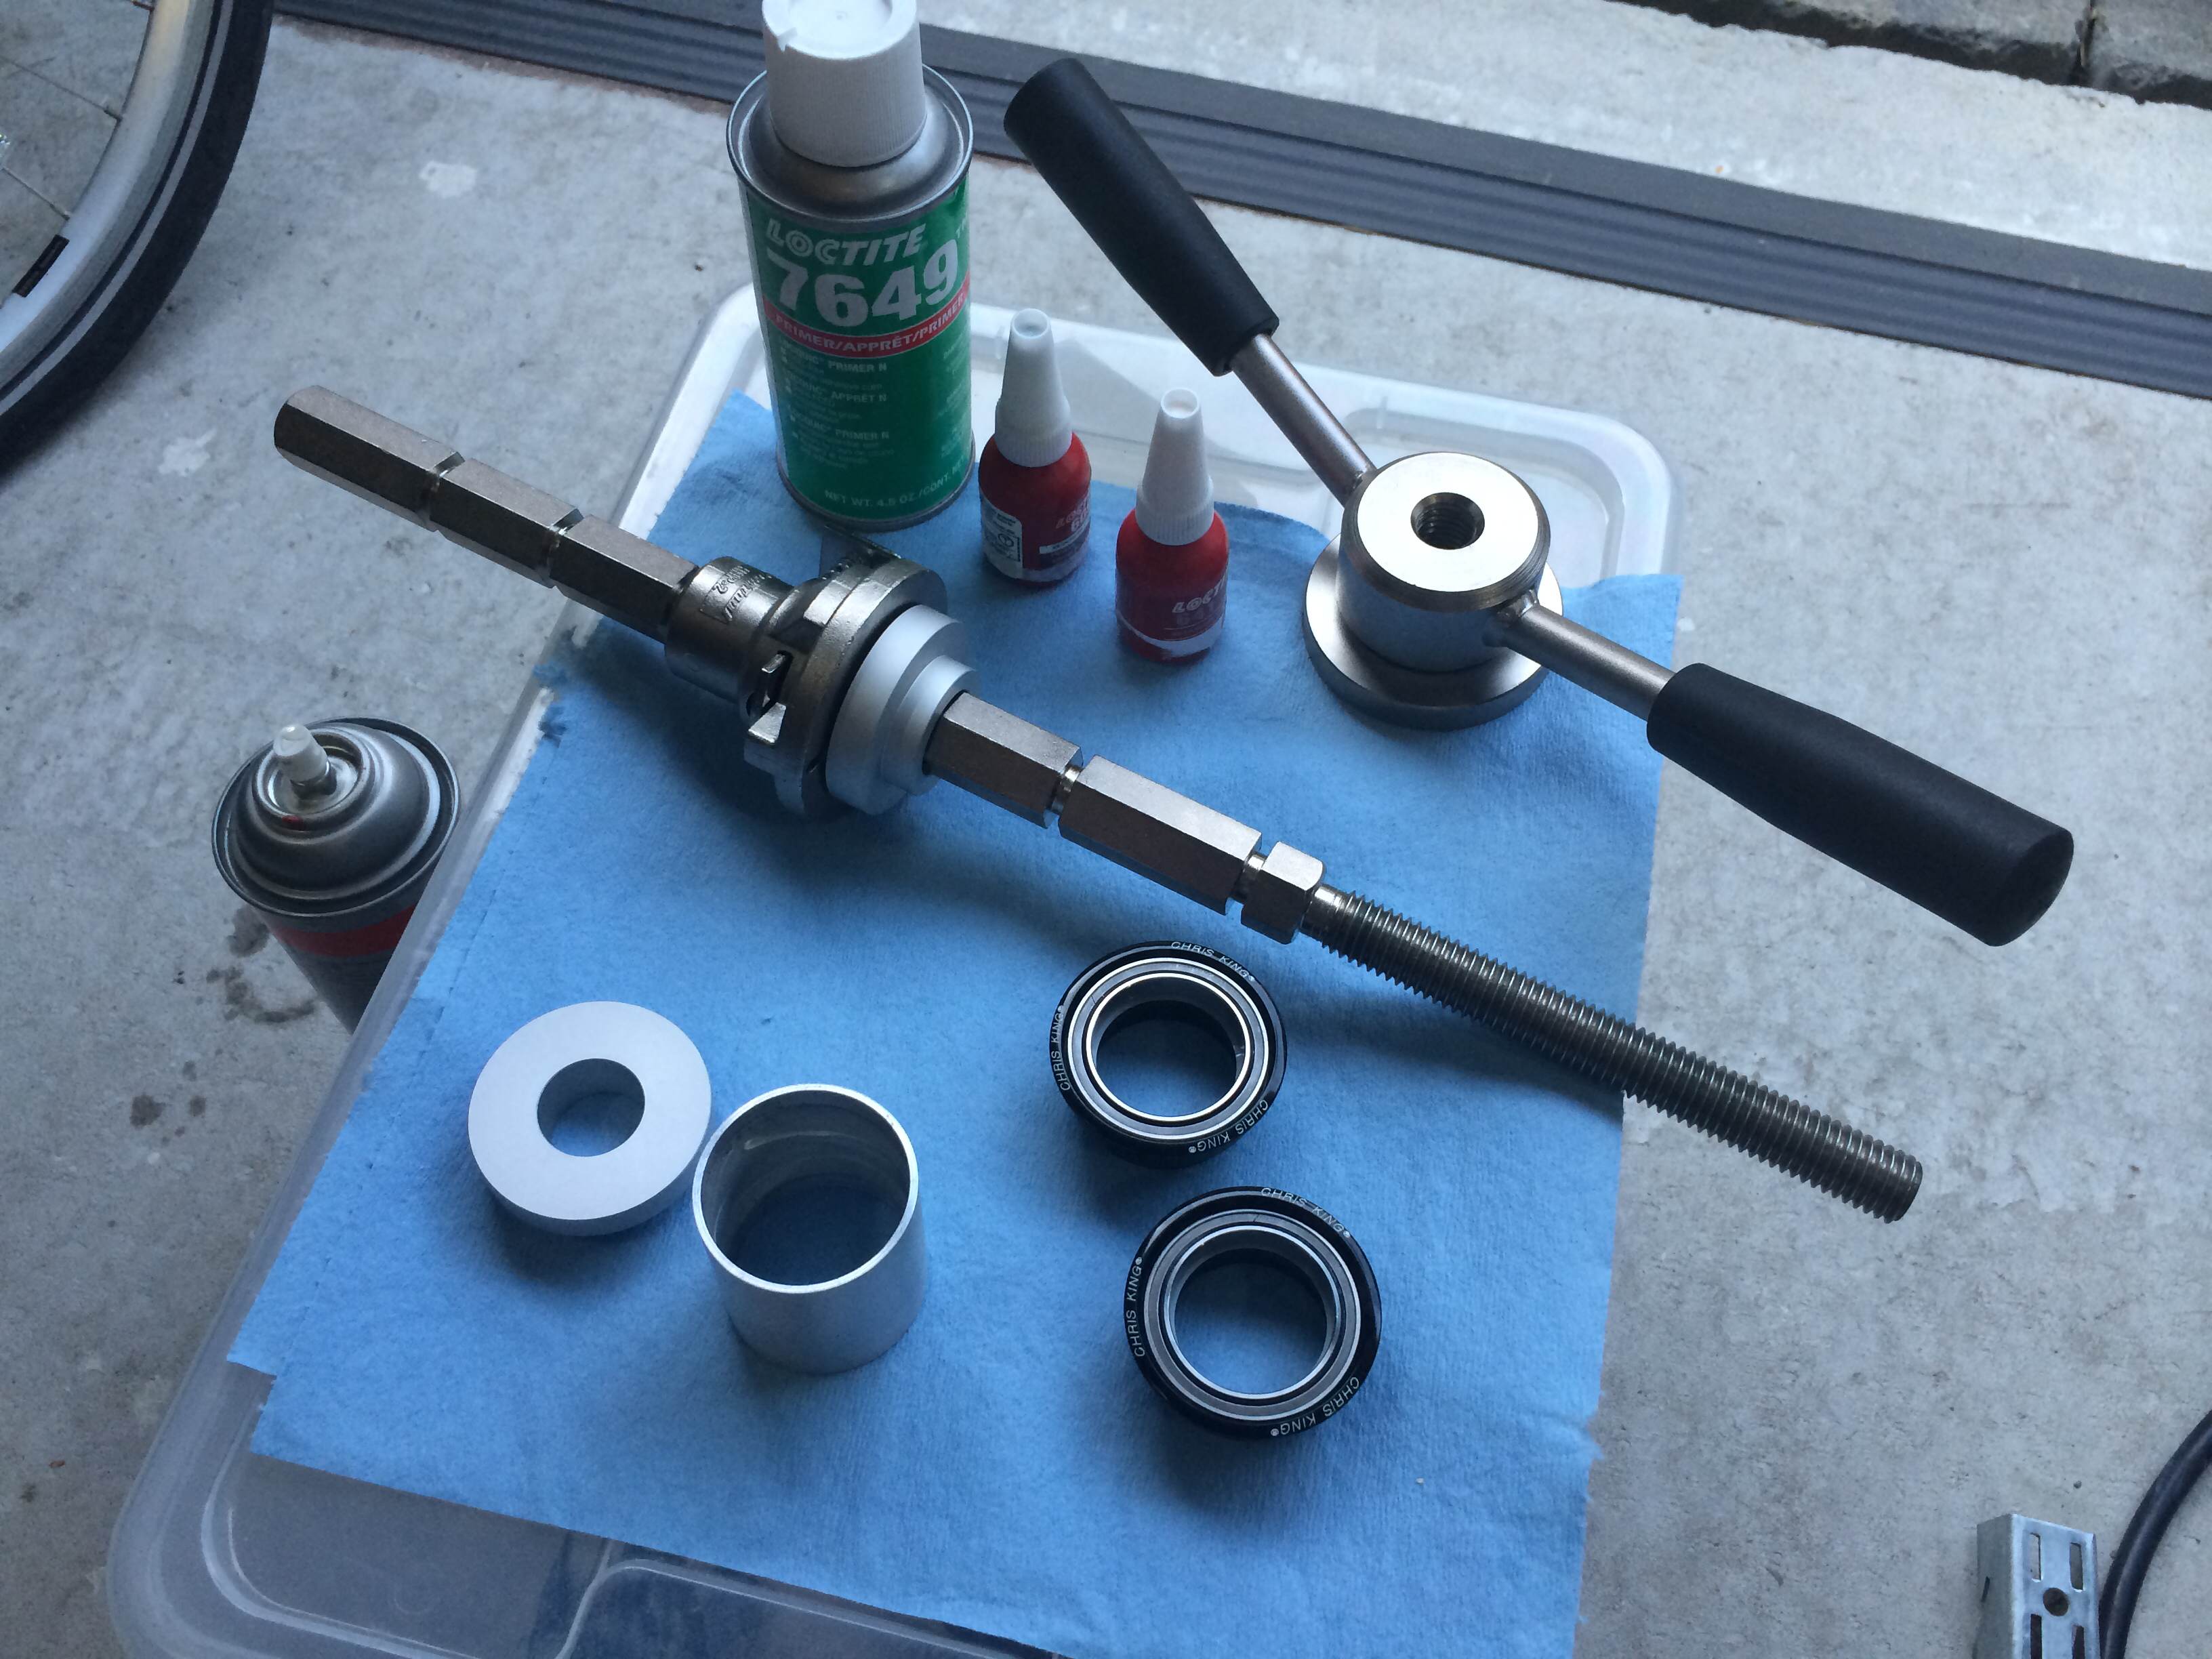
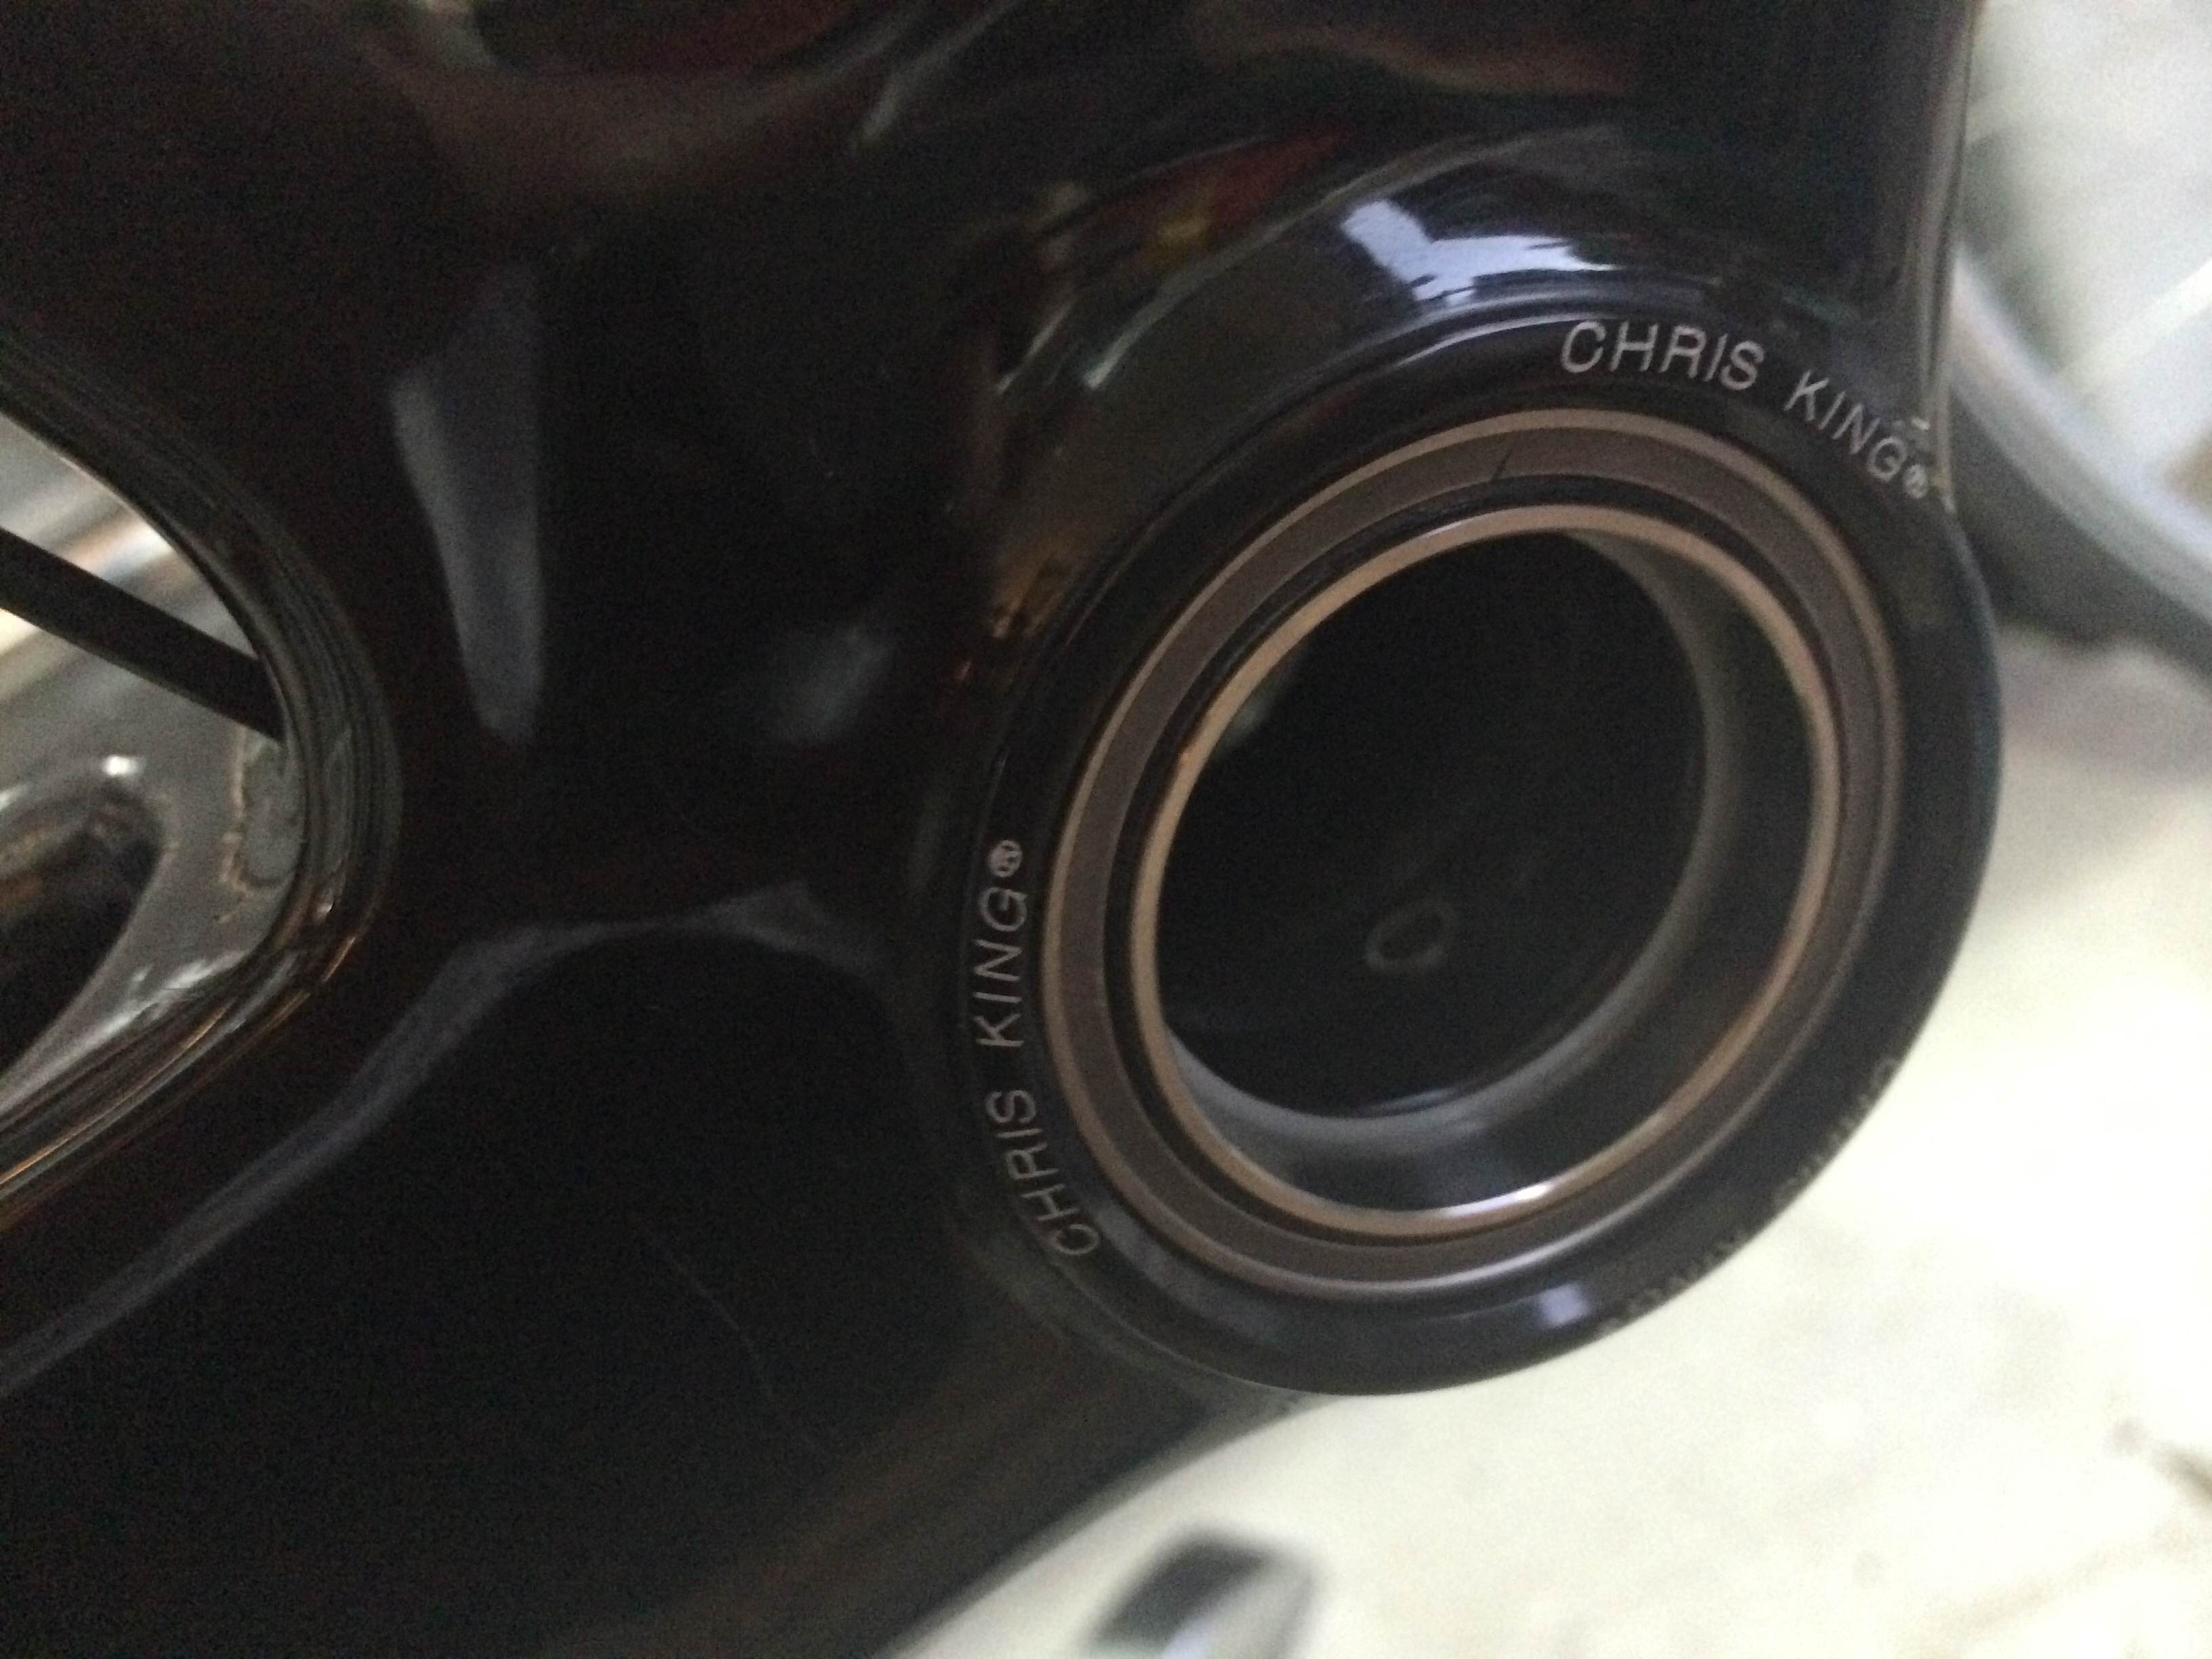
De-greasing the cups with the appropriate Loctite formulation. I spray then give the threads a quick wipe with a clean paper towel then allow the excess to evaporate before applying Loctite 246 to the cups and installing them. Loctite 246 is a medium strength low viscosity thread locker I use on steel, aluminum and titanium frames as a little heat is sometimes necessary to remove the fastener. Not an issue on metal frames. Would not recommend 246 on carbon frames, rather go with 242. Unless you are cool hitting your carbon frame with a heat gun or torch…..

File_000 (2)

And there we have it. I will mention, those cups were DAMN tight to install. Clearly, the threads could have benefited from being chased out. I’ve always followed the early Campagnolo instructions of using Loctite and nominal torque to install the cups (opposed installing dry and torquing to 35 Nm) and have never had an issue.

So thus ends part 1. Getting a little bit closer to riding this…..


Am I Over Thinking It ? The Saddle Conundrum.

Put any serious distance underneath yourself and, unless your kink is masochism, you come to appreciate the comfort of proper fitting bike.

Most cyclists get a cursory fit at the bike shop when they buy a new bike. Typically this involves a 20-something part time employee raising your seat enough and moving the handlebars up or down a little and sending you on your way. Spend a bit more money at the shop and perhaps said individual will swap out a stem and move your seat fore or aft.

In theory,  a proper fit should not be rocket science. Simply it’s the position where the principal points of the body that contact the bike – feet, hands and arse – give the rider an optimum position relative to the bikes dimensions. But what’s the difference between theory and practice, well in theory they are the same, right ?…..

To find these optimum points you have essentially two choices. One, fiddle around long enough with your stem and seat adjustments and probably you’ll find a good comfortable position that allows you to achieve your cycling goals. The same logic also dictates that a thousand monkeys with a thousand typewriters will, given enough time, complete a work of literary brilliance equal to that of Hemingway.

Choice two is seeking the services of a professional fitter.

A fitter will access your flexibility, your fitness and your cycling goals. They measure you up, look at your cleats and shoes, then you hop on your bike set up on a stationary trainer or specialized bike made for the purpose. You spend an hour or two while he or she puts a protractor on your knees and elbows, adjusts your seat, your cleats, your stem and ask you questions like “how does that feel? Sometimes it feels damn strange at first. Sometimes your power output is measured and adjustments refined to get you into an optimal position.

I sought out a professional fitter in 2009 after a cycling accident left me with a minor fracture to my T8 vertebra. My return to the bike 5 weeks later was damn uncomfortable. About 15 minutes into a ride I would lose feelings in my hands. 30 minutes into a ride, I would start getting numb in my gentleman’s regions. I would shift constantly trying to get comfortable. If I continued to ride, eventually I would lose feelings in my toes. It was most unpleasant. I would walk into the house after a ride sauntering like a cowboy with only a vague notion of what anatomy might be found below my waist. And if I stuffed my hands down my shorts to reassure myself, I wouldn’t have felt anything anyway on account of having lost all feeling in my hands as well.

The fitter decided to move things about. My seat was lowered and my stem raised an absurd amount to where I looked like Mary Poppins on a bike. He moved my cleats around and recommended funny and expensive insoles for my shoes. Nothing helped ease the pain and numbness while riding – other than to stop riding.

Then, after speaking with some other riders and researching,  I deduced it might be my saddle. I threw caution to the wind and bought a stupidly expensive and equally ridiculous looking saddle – a Selle SMP.  A  friend remarked that it reminded him of the Concorde.

So, minutes from returning from the bike shop I bolted it on and went for a ride. 30 minutes and, well…..no pain. 60 minutes – nada, nothing. Problem solved. No more numbness in my feet and neither regions….but I still had the ridiculous Mary Poppins position.

I did some research and found a different type of fitting system – Retul. It was expensive…I think I paid around $250 dollars close to 8 years ago. Completely objective, the Retul fit uses lasers aimed at reflectors placed on various parts of your body. The system measures angles and how your body moves as you spin about all the while the Retul fitter makes adjustments after your bike geometry is mapped by the software. My seat was RAISED and my bars LOWERED. My stem was swapped out for a longer one. A shim was placed under my left cleat due to a leg length discrepancy. The new position was still relatively comfortable relative to my Mary Poppins position but suddenly I was putting out +20 watts more than previously. Afterwards, I got a nice print out of my optimum position to refer to. That year I did a 186km ride and although utterly spent and windburned, I was pain free (my legs being the exception the next morning).

I have pretty much tried to stick to that position since, with a small deviation when I got a new frame in early 2013.  I’ve also swapped my saddle from the wide and thickly padded 150mm wide Selle SMP “Pro” to the narrower and svelte 137mm SMP “Forma” with no padding and find it more comfortable. The SMP Pro now resides on my CycleOps Pro 100 trainer.

So what does this have to do with anything and what exactly am I over thinking? Recall in the 6th paragraph I stated “stupidly expensive and equally ridiculous looking saddle.” Yeah, well….it broke. And sorry for the long winded introduction.

 File_0001

I sent an inquiry to the Canadian distributor of SMP hoping that it could be repaired, or some sort of warranty – even a “goodwill” warranty – would get me a replacement or a discount over a new one. Sadly, no. Replacement Selle SMP Forma Carbon Rail saddle, best price  I can find online = 521 Canadian dollars, delivered. Plus the possibility of HST and duties that could drive the price over $600. If I opt for the standard stainless rail model, it would be still be in the $400 range…and I need two of them – one for the Cervelo and one for the Cinelli.

Spending over a grand for two saddles….ugh….and people think golf is expensive.

So here is the conundrum. Suck up the replacement cost of the SMP or find a less expensive alternative from Selle Italia or Fizik, knowing that the fit may not be right….or will it?

I’ve ridden a SMP for 8 years now. Is it the only solution, or am I missing something by not casting a wider net in the saddle domain? Would I have solved my comfort issues had I just gone the RETUL route prior to buying the SMP? Or did the SMP solve my comfort issues and the RETUL just dialed my fit it?

I’m really curious to hear from others experience where adjusting hands and feet position solved the problem of arse….

N+1

That is the popular consensus as to how many bikes a cyclist needs. After two very shitty cycling seasons where I struggled to put even a fraction of my typical annual mileage behind me, I have decided that 2017 will be different. 2017 will be the year where bad roads, bad weather, and bad luck will no longer conspire against me. For this, it was decided,  a new weapon in the cycling arsenal was necessary – the all purpose “beater bike” as it is sometimes called. I call it my spring / fall / rain / gravel training bike.

My project started with taking stock of all the existing bits and pieces I have accumulated over the years, reading reviews, researching, making a “must have list” and shopping wisely. The boxes started arriving via FedEx, UPS and Canada Post. The weather remained nasty enough that I deferred getting my old Look 565 road worthy. Then one evening, while perusing eBay for deals, I spotted it…..

File_000

A 2016 Cinelli Experience Speciale. I cast my bid, and lady luck was with me. 5 days later it was mine.

Cinelli bikes in my experience (at least in North America) are not all that popular. While you can’t swing a dead cat without hitting a Cervelo ( whose headquarters are based here in Toronto in all fairness and of which I also own one) I think I have seen only one Cinelli on the road in the last decade.

My introduction to the Cinelli brand was probably like everyone else – the ubiquitous Cinelli forged aluminum quill stem – and that’s where it stayed. It wasn’t until I saw the crown jewel in the Cinelli bike line up in an issue of Bicycling –  the Xcr – that I realized Cinelli had a very interesting, almost esoteric line up of bikes noted for their peculiar names and unique graphics and paint schemes.

Incidentally, the Xcr is a frame I still desperately want to own and probably the coolest and sexiest bike in current production ATMO.

But what about the Experience? First off – it’s not carbon. It’s 7005 Columbus Airplane. The “Speciale” version, adds a full carbon FEL Columbus fork over the standard Experience with a carbon blade / aluminum steer tube. The FEL fork, BTW is the top of the line Columbus carbon fork that is used on the top tier Cinelli bikes like the Nemo Tig, the Stratofaster and the Xcr.

What attracted me to the frame was a nice mix of old vs new technology. The BB for instance, is good old 1.37 x 24 TPI by 68mm English, while the steer tube is a more modern 1.125″ to 1.5″tapered, and looks incredibly beefy. It has a 27.2mm seatpost. It can take up to 28mm tires or smaller 25mm with mudguards, exactly what you want in a wet-weather-exploring-gravel roads kind bike.

And, as if it was “meant to be” or “the icing on the cake” if you will – identical stack and reach dimensions of my current ride a 2012 Cervelo R3 in a Cinelli size L.

Next up, the build….

Arrivederci Rotor…..

I have been through so many iterations and permutations of bottom brackets and cranksets I have lost count…I think I may have finally solved my problems with Campagnolo and BBright. Finally.

Experience is what you get when you don’t get what you wanted in the first place, right ?

I could not live with the Rotor crankset. Well, more accurately, I could not live with the font shifting of the Rotor Rings. Absolutely horrible – months of dropped chains, constant adjustments, the awful noise of chain rubbing against the front derailleur and worse yet, the trepidation of approaching a climb not knowing if I was going to be able to shift to my small ring or be stuck at the bottom with greasy hands wrestling with my chain as my riding companions soldiered onwards and upwards.

Luckily for me, Campagnolo had a (albeit unofficially supported ) solution – the Over-Torque crankset. Why unofficially ? Good question, there is no reason IMHO….but Campagnolo says no.

But if Over-Torque supports BB386 (46mm x 86mm) there is no reason why the 79mm shell of BBright can’t be accommodated…perhaps they can’t be bothered by taking one spacer out of the bag ? (in their defence, the centre BB sleeve from a PF30 BB is not long enough to bridge the 79mm width of BBright – but it’s only necessary for EPS electronic groupset owners – what you could do is get a BB386 BB sleeve and trim it down 3.5mm on either end, but DON’T buy a BB386 BB instead of a PF30 BB, you won’t get the appropriate spacer(s) !)

A Press-Fit 30 (or PF30) bottom bracket is a 46mm ID shell by 68mm wide that houses a set of bearings in removable cups that accommodate a 30mm crankset spindle. It’s a completely symmetrical design whereby the centre of the shell to the outer faces of the drive and non-drive side are an equal 34mm. BBright is essentially a PF30 bottom bracket that is 11mm wider on the non-drive side (NDS) while maintaining the same 34mm centre to shell face dimensions of the drive side (DS)

So to adapt a Over-Torque crankset for Cervelo’s BBright, you simply use the Campagnolo PF30 bottom bracket and only one of the two included spacers – the spacer goes on the DS, and the adjustable lock-ring on the NDS. Presto.

Only I given my “experience” with my Cervelo and BBright, I wanted it (nearly) perfect, so here’s what I did:

First step after removing the Rotor Crankset and Chris King PF30 BB, I reamed the shell with the Park Tool #791 reamer to the exact dimensions of 45.94mm. While I don’t have the recommended Park HTR-1B tool and 750.2 Cone, a local machine shop made a bushing for the #791 reamer to fit my Cyclus tool (from the Czech Republic, very well made) as well as a custom cone basically identical to the #750.2 from Park.

IMG_0358

Reaming the shell was dead-easy and left me with a nice clean carbon shell to press the new Campagnolo bottom bracket cups in. I did a test fit first before applying the Loctite 609 for the final press.

IMG_0363

I used the Park #668 PF30/BB30 bushings on my Campagnolo UT-BB140 tool designed for the Campagnolo OS-Fit BB cups – works like a charm, and easier to use than my Park HHP-2.

My trusty dog Tullio watched over the whole proceedings in the garage. Actually, his name is Comet….Tullio would have been cool, though…..

IMG_0360

After test fitting, I applied the Loctite 7649 Primer to the cups and inside the shell and allowed to dry, followed by a liberal application of Loctite 609 on the cups, then pressed in place. Unlike previous attempts NO nasty popping and creaking sounds ensued….they went in with sufficient resistance but smoothly.

IMG_0365

I left the UT-BB140 in place after backing it off ever so slightly overnight before installing the Crankset. Although theoretically the cure time for the Loctite in in the range of ~ 30 minutes, I had other matters to attend to that evening, so I installed the crank the next day. In hindsight, I wish I had faced the shell as well, but not having invested in the Park #690-XL facer I took the chance the shell was as parallel as specs and factory QC tolerances allowed, alas..it was not the case, but close enough.

If you are interested in installing your own Over-Torque Crankset – be forewarned – you’ll need to invest in the special tool necessary for installing (and removing) it – the UT-FC220 and it’s companion part UT-FC130 in addition to a 24mm box end wrench, as well as1.5mm, 5mm and 8mm allen wrenches. Campagnolo’s official instructions are here. For Cervelo BBRight owners, use only one spacer (on the DS) and the adjustable spacer on the NDS.

IMG_0367

There you have it. New chain and rear cassette installed as well for prudence sake (plus the old chain was coming up to around 8,000 km). Perfect front shifting restored, as good as if not better than my original Chorus Over-Torque compact. Note, you may find it near impossible to lock the adjustable spacer with the 1.5mm allen once it’s in place….the bottom bracket cup makes it very difficult. While mine hasn’t budged in ~ 1000 km, I plan on removing the NDS crankset arm and locking the ring down with some Loctite 242 on the treads at first opportunity or if necessary, whichever comes first.

IMG_0366

First ride with the new Crankset….performed flawlessly. I have a nice 172.5mm 110 BCD Rotor 3D+ with 50/34 Rotor Rings and a Chris King PF30 BB if anyone is interested ? I can’t guarantee they will shift all that well, but I’ll make you a great deal…..

Tagged , , ,

So long Ultra-Torque OS Fit, Long Live the King !

I’ve gotten many comments both off and on-line about my various postings dealing with adapting Campagnolo OS fit cups for Ultra-Torque cranksets and Cervelo’s  BBright bottom brackets, and I sincerely hope everyone has found it useful. However, after yet another case of “wandering cup”, I’ve given up on the Campagnolo adapters and gone native.

Sort of.

Late last year I snagged a deal on a Rotor 3D+ crankset from TotalCycling.com in Ireland. It’s been sitting on my shelf waiting for the opportune moment to install it. I’ve been hesitant to give up my Campagnolo Ultra-Torque compact and the phenomenal shifting of  X.P.S.S – while I don’t often drop into the small chain ring (a function of more of the local topography than fitness), when I do, it never misses a beat.

But my bike had been making funny sounds as of late. A close examination showed the drive side OS fit cup managed to work itself loose yet again by approximately 2mm outboard. Curses.

Knocking out the cups was a trivial matter. Cleaning out the residual loctite 609 less so. Nevertheless, after an hour of diligent scraping with a razor blade followed by a few quick passes with a scotch-brite 000 pad and acetone, I was left with a clean bottom bracket to install the new bottom bracket. Ta-da.


All cleaned up and ready to go.

All cleaned up and ready to go.

For the new bottom bracket, I went high end – the Chris King PF30, steel bearings, in black. While King does not officially support using their PF30 in the BBright shell (the inner sleeve is not long enough to accommodate the 79mm shell width), there was no other reason why I could see that it would not work if I opted not to install the sleeve. Yes, the risk of crap entering the bearings increases, but I’m not planning to ride cyclo-cross.

Necessary bits - Park Press, King Adapter Bushings, Locite Primer and 609

Necessary bits – Park Press, King Adapter Bushings, Locite Primer and 609

The PF30 is amazingly well made piece of kit, as is everything else made by Chris King. Proprietary machined bushings are necessary to press the face of the bottom bracket so that the angular contact bearings are not damaged during install. I purchased mine from Ebay.

Installed !

Installed !


Wrangling the Park HHP-2 is no trivial matter, particularly with the bearing cup dripping Loctite on the floor, but working carefully, the install went without a hitch. A few nasty popping sounds ensued…

Rotor 3D+ Installed

Rotor 3D+ Installed


Installation of the Rotor 3D+ went pretty smoothly after I removed the 1mm spacer from the NDS because of excessive pre-load on the bottom bracket (I could barely turn it after torquing the nut to spec). I opted to use only the adjustable nut to set the pre-load and everything spun smoothly. I needed to drop the front derailleur by about 2mm to bring it to within the Campy spec of 1.5mm – 3mm off the chainring.

So, first impressions of the Rotor 3D+ ? It’s stiff as hell and about 50 grams lighter than the Chorus Carbon I was using. It does not shift as well, but not terribly either. Some fine tuning of the FD will be necessary.

My first 90km ride went without a hitch, the crank spins smoothly and the seal drag has noticeably decreased. Hopefully this will be the end of my problems with BBright.


Make Quick Work of Brake Adjustments

Setting up brakes can be a challenge. This little jig from Tacx makes installing and adjusting your brakes a snap.

Little blue wonder !

Little blue wonder !

It’s called the BrakeShoe Tuner. I bought it off ebay for $24.99 shipped to my door from a seller in Taiwan.

I don’t often change out wheels, however, when switching from my aluminum Zonda wheels to my Easton carbons, the position of the pads always need adjustment. This is where this ingenious little tool comes in.

The Tacx jig in use.

It’s simple to use. Simply loosen the bolts on the pad holders and cable retaining bolt. Slip the tool (observing the proper orientation) between the wheel and the pads. Tighten the cable using your third hand tool and torque to spec. Then torque the pad retaining bolts to spec.

The jig keeps the pads a perfect 1 – 1.5mm off the surface of the rim and sets the toe-in perfectly. The entire job took less than 5 minutes to adjust my front and rear.

As a helpful hint, after the cable is loosened, reset your cable adjuster screw to the mid-point, particularly if you have been tightening it to accommodate for pad wear over the season(s).

If you are constantly fiddling with your brakes or are disappointed with how your brakes perform, try this tool !

New SL Fork Upgrade…wow !

I got a 121 gram savings switching my standard R3 fork to the SL. Less weight I expected. A completely different ride I did not. It’s like a completely different bike.

Yes, it’s impossible to swing a dead cat without hitting a Cervelo – they are that popular. It took a fork change to the 33K SL fork to see what all the hubbub was about.

Don’t get me wrong, the R3 is well engineered bike. Not particularly nice to look at. The paint and graphics are somewhat pedestrian. And it’s  not the best built compared to higher end offerings from France – Look, Time – or Italy – Colnago, Pinarello.

As much as I like riding, the R3 has remained emotionally neutral for me, much like a useful tool is. It was, in my mind, ok, but it certainly didn’t evoke a “I LOVE riding this bike” like others I have ridden. It wasn’t worth every penny. Cervelo fans might gasp if I boldly claim it was perhaps a bit over-rated. After nearly 2 seasons of riding it, I don’t even know if I would even endorse it for others looking for a new ride. It’s good but not exceptional. Unless asked directly, I doubt I would even would have told anyone I rode a Cervelo in a casual conversation about cycling.

But the SL fork has changed my opinion.It’s not a good bike anymore. It’s a very, very good bike. Really very good. Fantastic.

I put 120 km over the weekend. Not a lot, but as much as I could muster with my schedule the way it is at the moment. The SL fork, while at first impression not as stiff as the standard fork, is where the magic comes from. You can still feel the road imperfections, but barely. The font end feels every so slightly disconnected from the road but not in a bad way. Chip & seal roads become less buzzy and my hands don’t nearly get fatigued as quickly. The bike still tracks and steers well and standing on the pedals while exerting a hard effort during a climb doesn’t flex the font at all negatively. Gravel vanished under me. Now **this** is the bike the “pro’s ride”.

There was a huge difference in price between the R3 and R3 team when I bought my R3 early last year. I paid less than $2,000 for a complete bike with SRAM rival. I sold the wheels with tires and tubes, the Rival group, FSA crank and BB, seatpost, saddle and bars for around $800 on ebay and locally to defer the cost of the R3 frame with stem and headset to around $1200.

A R3 team was $2900 MSRP for the frameset alone.

That’s a significant difference.

But so is the ride.

After 120 km, hands were still feeling fresh !

After 120 km, hands were still feeling fresh !

New Frame Shopping. Decisions, decisions….

Having more than one bike for most probably seems like an necessary luxury. Any cyclist with more than one bike (of which I am one as well) when speaking casually about cycling to a non-cyclist will usually be met with that witty “how many can you ride at once” retort when he or she mentions they have more than one bike in their garage. After all, in Toronto (and probably most of Eastern and Central Canada save Quebec) at least, a bike is something you stop riding after you get your divers licence, or are foolish enough to lose it after a DWI charge, right ?

My stable is pretty light. I have my carbon road bike, and my aluminum city bike with basket and fenders. The latter is used to run small errands to the local hardware store, the liquor store and casual rides with my children.

But inevitably, for anyone who clocks a few 1000 km a year or more, a second road bike becomes something more of a necessity than a luxury. It’s that go to machine when it rains (or snows) – those times when you want to ride but cringe at the thought of your newly cleaned bike becoming fouled with git and road oil – or worse still, a beautiful day to ride but a mechanical failure puts your bike out of commission.

My rationale is slightly different. Yes, I need a rain bike. But I also want a second bike for those times when riding my carbon road bike isn’t necessary and where my 30 pound single speed city bike would be impractical.

After many years of mainly solo riding, I have been fortunate to have found a group of cyclists to ride with. While not speed demons and at minimum +15 years older than me (some close to 30 years older), I can honestly say our weekly 60-90 km jaunts are something I desperately look forward to. Some are ex-racers and have been cycling for more than 40 years and still remain far fitter than average. The pace is more casual and social. The sprints and KOM’s are done more in jest than to humiliate or intimidate. We stop half-way for a coffee and pastry and talk. And the roads purposely chosen are rural, less traveled and dirt and gravel.

Here, a second bike, purposely chosen for wider tires and a wee bit more comfort is ideal. So this is my intention and my shopping list. Steel or aluminum. I want a modern quick handling and stiff frame, so a PF30 or BB30 bottom bracket and carbon fork is desired. My short list is a follows, the Chris King Cielo Road Racer, the Guru Sidero or the Stoemper Taylor. On the aluminum side, the Stoemper Darrell, or a Gaulzetti Corsa look good.

Of the group, the Cielo ticks the most boxes but the geometry has me concerned. The medium, with 129mm headtube and 555mm toptube seems I would have an enormous saddle to bar drop on account of my long leg vs short torso bias, while the large with a 152mm headtube and 570mm toptube would have me stretched out more than I like.

The Sidero, with PF30 and tapered carbon fork and head tube is growing to be the most expensive option on the steel side, but is Canadian made and full custom geometry.

The Darrell ticks all the boxes too, but could be more battering ram that what is required. The Gaulzetti looks business, but too, could be more bike than what I am bargaining for. Both look absolutely bad ass.

Decisions, decisions.

PedalWORKS

the man who goes alone can start today ...

Dr. Steve Lerer

Experienced Gallup certified strengths coach helping individuals, teams, and organizations utilize strengths to maximize potential

gowerworld

A great WordPress.com site

Archer Watches Blog

Just another WordPress.com weblog

sarah kim bonner

pro triathlete