Monthly Archives: May 2013

Oh Crap !

Took the R3 for it’s inaugural 40km shakedown this afternoon. I opted to do a quick dash down to the lakeshore and back rather than my usual 55-60km rual loop. My rationale was simple – new bike, new build. Too many things to go awry and the through of a country walk in my cleats kept me in the city.

First 750m and disaster struck !

crackedMy Garmin 310 popped off my handlebar mount after hitting a particularly nasty-bumpy-deteriorated-and-crumbly bit of road and went under my rear tire. The tread-mark is pretty evident.

Crap !

I’ve been riding with this 310 since 2008 and it’s been a loyal companion. Damn, I’ll miss it.

But the R3 rides beautifully. A bunch of new PR’s on Strava without even trying offers pretty compelling evidence as well.

Done !

Done !

2012 R3 Chorus 11 Build – 16,5 lbs all in. And ready to ride.

Freshly Pressed !

Finally, progress made. Goal is in sight.

My first attempt to press the BBright Campagnolo cups into the R3 frame ended in disaster. I ended up pressing the left hand side cup crooked with about 0.25 mm space between the shell of the bottom bracket and the cup flange. Not happy with the result, I knocked out the cup and attempted again, this time making it worse. I ended knocking both cups out, cleaning up the loctite and placing an order for the proper tool (Campagnolo UT-BB140) and a set of replacement cups.

Now here is something interesting worth mentioning. There appears to be at least 2 versions of the Campagnolo Ultra-Torque BBright adapters – Campagnolo part numbers IC12-UTR51 and IC12-UTR51E. The two versions vary significantly enough that it is worth mentioning.

IMG_1178

IC12-UTR51 (L) 58 grams and IC12-UTR-51E (R) 67 grams

The UTR51E appear to be a later version judging from the “EPS COMPAT” markings on both the packaging and on the shells of the cups themselves. The UTR51E cups have a prominent o-ring around the leading edge of the cup, and extra material around the bore. This makes the UTR51E cups heavier by 9 grams.

IMG_1179

Close up of the right hand side UTR51 (L) and UTR51E cups (R). Note the additional material on the inner diameter of the cup.

IMG_1180

Left hand side UTR51E cup (L) and UTR51 cup (R). Same additional material is present as on the right side cups.

Obviously, the material is there for some good reason. If I had to wager I’d bet the re-design is to accommodate the EPS bottom bracket sleeve that prevents the internal wiring from tangling around the crank axel. I will say however, removing these cups is going to be a colossal PITA as the Park BBT-30.3 can’t be used as the extra material prevents the neck of the tool from being placed through the inner bore of the cup. Hopefully the VAR Tool used for extracting Campagnolo cups will fit.

Here’s a shot of the juices required as outlined by the technical documentation provided by Loctite.

IMG_1184

Loctite ODC-Free Cleaner, 7649 Primer, 609 Retaining Fluid, Campagnolo OS Fit tool

Basic procedure: Degrease the cups and the bottom bracket shell with the cleaner, minding not to spray it over everything, wiping up the excess. Once dry, apply a few squirts of the primer to the cups and bottom bracket shell surface. Mind not to get the primer on the seals of the cups, as the acetone will discolour the seals. It’s also recommended to put a shop towel into the bottom bracket to prevent primer and/or degreaser from pooling in the shell. Be tidy.

After the initial squirts of primer are dry, apply a second, then following the directions for “housed components” -pg 29, apply a bead of the 609 to the leading edge of the cup and press in, following the procedure outlined by Campagnolo.

IMG_1187

All done !

For the uninitiated – it requires a significant amount of torque to press in the cups. Nasty popping sounds will ensue. If you are careful and continue to twist the handle they will go in. Leave the tool in the cups for at least 30 minutes to allow the loctite to set-up. Some people say overnight. Loctite says 30 minutes minimum is fine at typical room temperatures.Full strength is reached in 24 hours, so it’s not recommended that you install the cranks and ride until after a full cure has been achieved.

The results. Nearly perfect. The Right hand cup still does not meet the shell perfectly. There is about a 1cm spot where the flange is 0.001″ out as measured by a feeler gauge. That’s 0.0254mm or about 1/4 the thickness of a sheet of 20 lb paper.

Or close enough for government work.

UT-BB140 vs. Park HHP-2

A while back I commented on using the Park HHP-2 as a tool for pressing BB30 and PF30 cups. Here’s my experience with using the HHP-2 for the Campagnolo BBright cups – Disaster.

Yes, a poor workman blames his tools. But unless you are extremely dextrous or have a willing assistant, the UT-BB140 is a better tool for pressing in the Campagnolo cups. Here’s why:

The HHP-2 is one heavy mo-fo at 2550 grams (around 5 pounds), longer than what is necessary for a bottom bracket that is only 79mm wide and has a shaft diameter damn near as thick as the inner bore of the Campagnolo cup. This makes it treading the shaft through the cups without catching the bearing seal and damaging it a tricky proposition. In addition, because Park does not supply (or even make) the proper sized bushing, you are forced to install the cups by pressing on the face of the cup.

Technically this is fine, but in practice, pressing the cups using their faces makes aligning the face of the press with the face of the cup perfectly parallel using the heavy, slippery mo-fo difficult without stopping to rest the tool on the inner bearing seal and damaging it. In addition, the face of the HHP-2 pushing on the face of the cup scratched the face/lettering of the left side cup all to hell when the necessary torque was applied. In the end, it looked like crap.

Yes, it can work. But it’s tough. Most home mechanics will resign themselves to trying anything before resorting to spending  $100 for the proper tool that will be used only a few times. I should have known better, but I tried anyway. I failed miserably. I capitulated and purchased the Campagnolo tool after pressing the left side cup crooked, scratching the lettering off the cup face, and damaging both seals.

IMG_1176

Campagnolo UT-BB140 and Park HHP-2 side by each.

Do it right the first time with the right tool. When you see Campagnolo’s more elegant solution in action, you’ll thank yourself for shelling out the additional dollars, knowing that a critical component of your bikes drivetrain has been installed correctly. Put it on your desk as a paperweight between times you need to use it. It’s beautiful.

R3 Build Update – Fork Installed

Canada Post brought me a nice surprise today – both the Park TNS-1 the Campagnolo Ultra-Torque OS Fit BB-cup tool (UT-BB140) ! I set out almost immediately to set the star nut and install the fork.

IMG_1169

Tools used: Park TNS-1 and ball peen hammer used to set the star nut perfectly

The TNS-1 is a whopper of a tool, and set the star nut perfectly to a distance of 15mm inside the steer tube. Once the nut was set, I installed the upper and lower bearings, slid the fork into position, installed the retainer ring, bearing cap, spacers, fork and top cap.

Out of curiosity, I weighed the bearings and retaining ring.

IMG_1172

Bearing set and retaining ring – 45 grams

And stem. It’s the ARX-Pro, 100mm. Identical to the ARX-Team, with the exception of the colour stripe and steel bolts vs. titanium.

photo-2

3T ARX-Pro stem – 132 grams

Fork installed – finally !

IMG_1174

Fork installed !

Progress made ! I’m running a 10mm spacer beneath the stem and opted for 7.5mm above. Once I get my position dialled in, I imagine I’ll drop the stem to the top cap (pro-slam !) and cut off the excess. But I’ll hold off until I actually ride the beast before deciding.

New build update…progressing slowly

My impatience is growing, nevertheless, I have managed to make some small progress on the R3 while I wait for the Campagnolo Ultra-Torque OS Fit BB-cup tool (UT-BB140) to press in my OS Fit BBright cups. Hopefully it arrives any day now so I can get on with it.

Apparently, some have used the Park Tool HHP-2 Bearing cup press to install the Campagnolo cups, but I wouldn’t recommended it. Don’t get me wrong – it’s a fine quality tool. My reluctance to use the HHP-2 (of which I have one) is that it lacks the proper bushings for the OS Fit cups. Not the end of the world, but it’s actually pretty tricky to get the faces of the cups parallel to each other while managing a heavy and slippery tool in the other hand. Four hands would be ideal.

I speak from first-hand experience as my first attempt to press the cups in ended in complete disaster with the left cup ending up crooked in the frame.

So, rather than juggle with the HHP-2, I opted for the proper Campagnolo tool. I’ll do a posting comparing the two.

Nevertheless, I did manage to cut the steer tube to spec:

photo-1

Cutting set-up – 32 tpi hacksaw blade, precision ruler, saw guide

I was surprised to see a good-ole star-fangled nut in the steer tube, and a aluminum insert epoxied into place as my Look HSC5 fork only used a compression plug. Before I could cut it, I needed to drive the nut down 20mm so as not to cut into it. I used a nail set and hammer, carefully tapping and measuring as I went. The aluminum insert is 70mm long, and the star nut is set 15mm into the tube, so cutting 20mm leaves 50mm of insert, of which there is plenty remaining for the nut. I plan on running a 10mm spacer under the bearing cap, and a 5mm spacer above, so I’m good to go. What would have been better was had the fork been supplied WITHOUT the insert epoxied in, but alas.

When cutting, a few points to remember – measure twice, cut once. Go slowly. And a little lubrication doesn’t hut either when cutting through the aluminum. A few light passes with a file is also recommended to round over the cut edge to reduce the likely hood of the carbon edge chipping when installing the fork.

photo-3

Ta-da ! 9 grams lighter

So, once my Park TNS-1 arrives, I’ll set the nut and install the fork. Bingo !

BBright and Loctite, cutting through the fog

A while back I disclosed my dissatisfaction with the assembly instructions for bearing cups for Cervelo BBright frames. In short, the instructions provided by Cervelo BBright are simply not clear with respect to the materials and procedures for pressing bearing cups into their frames. If alternative or revised instructions have been made available to authorized retailers, I would encourage that documentation be passed along.

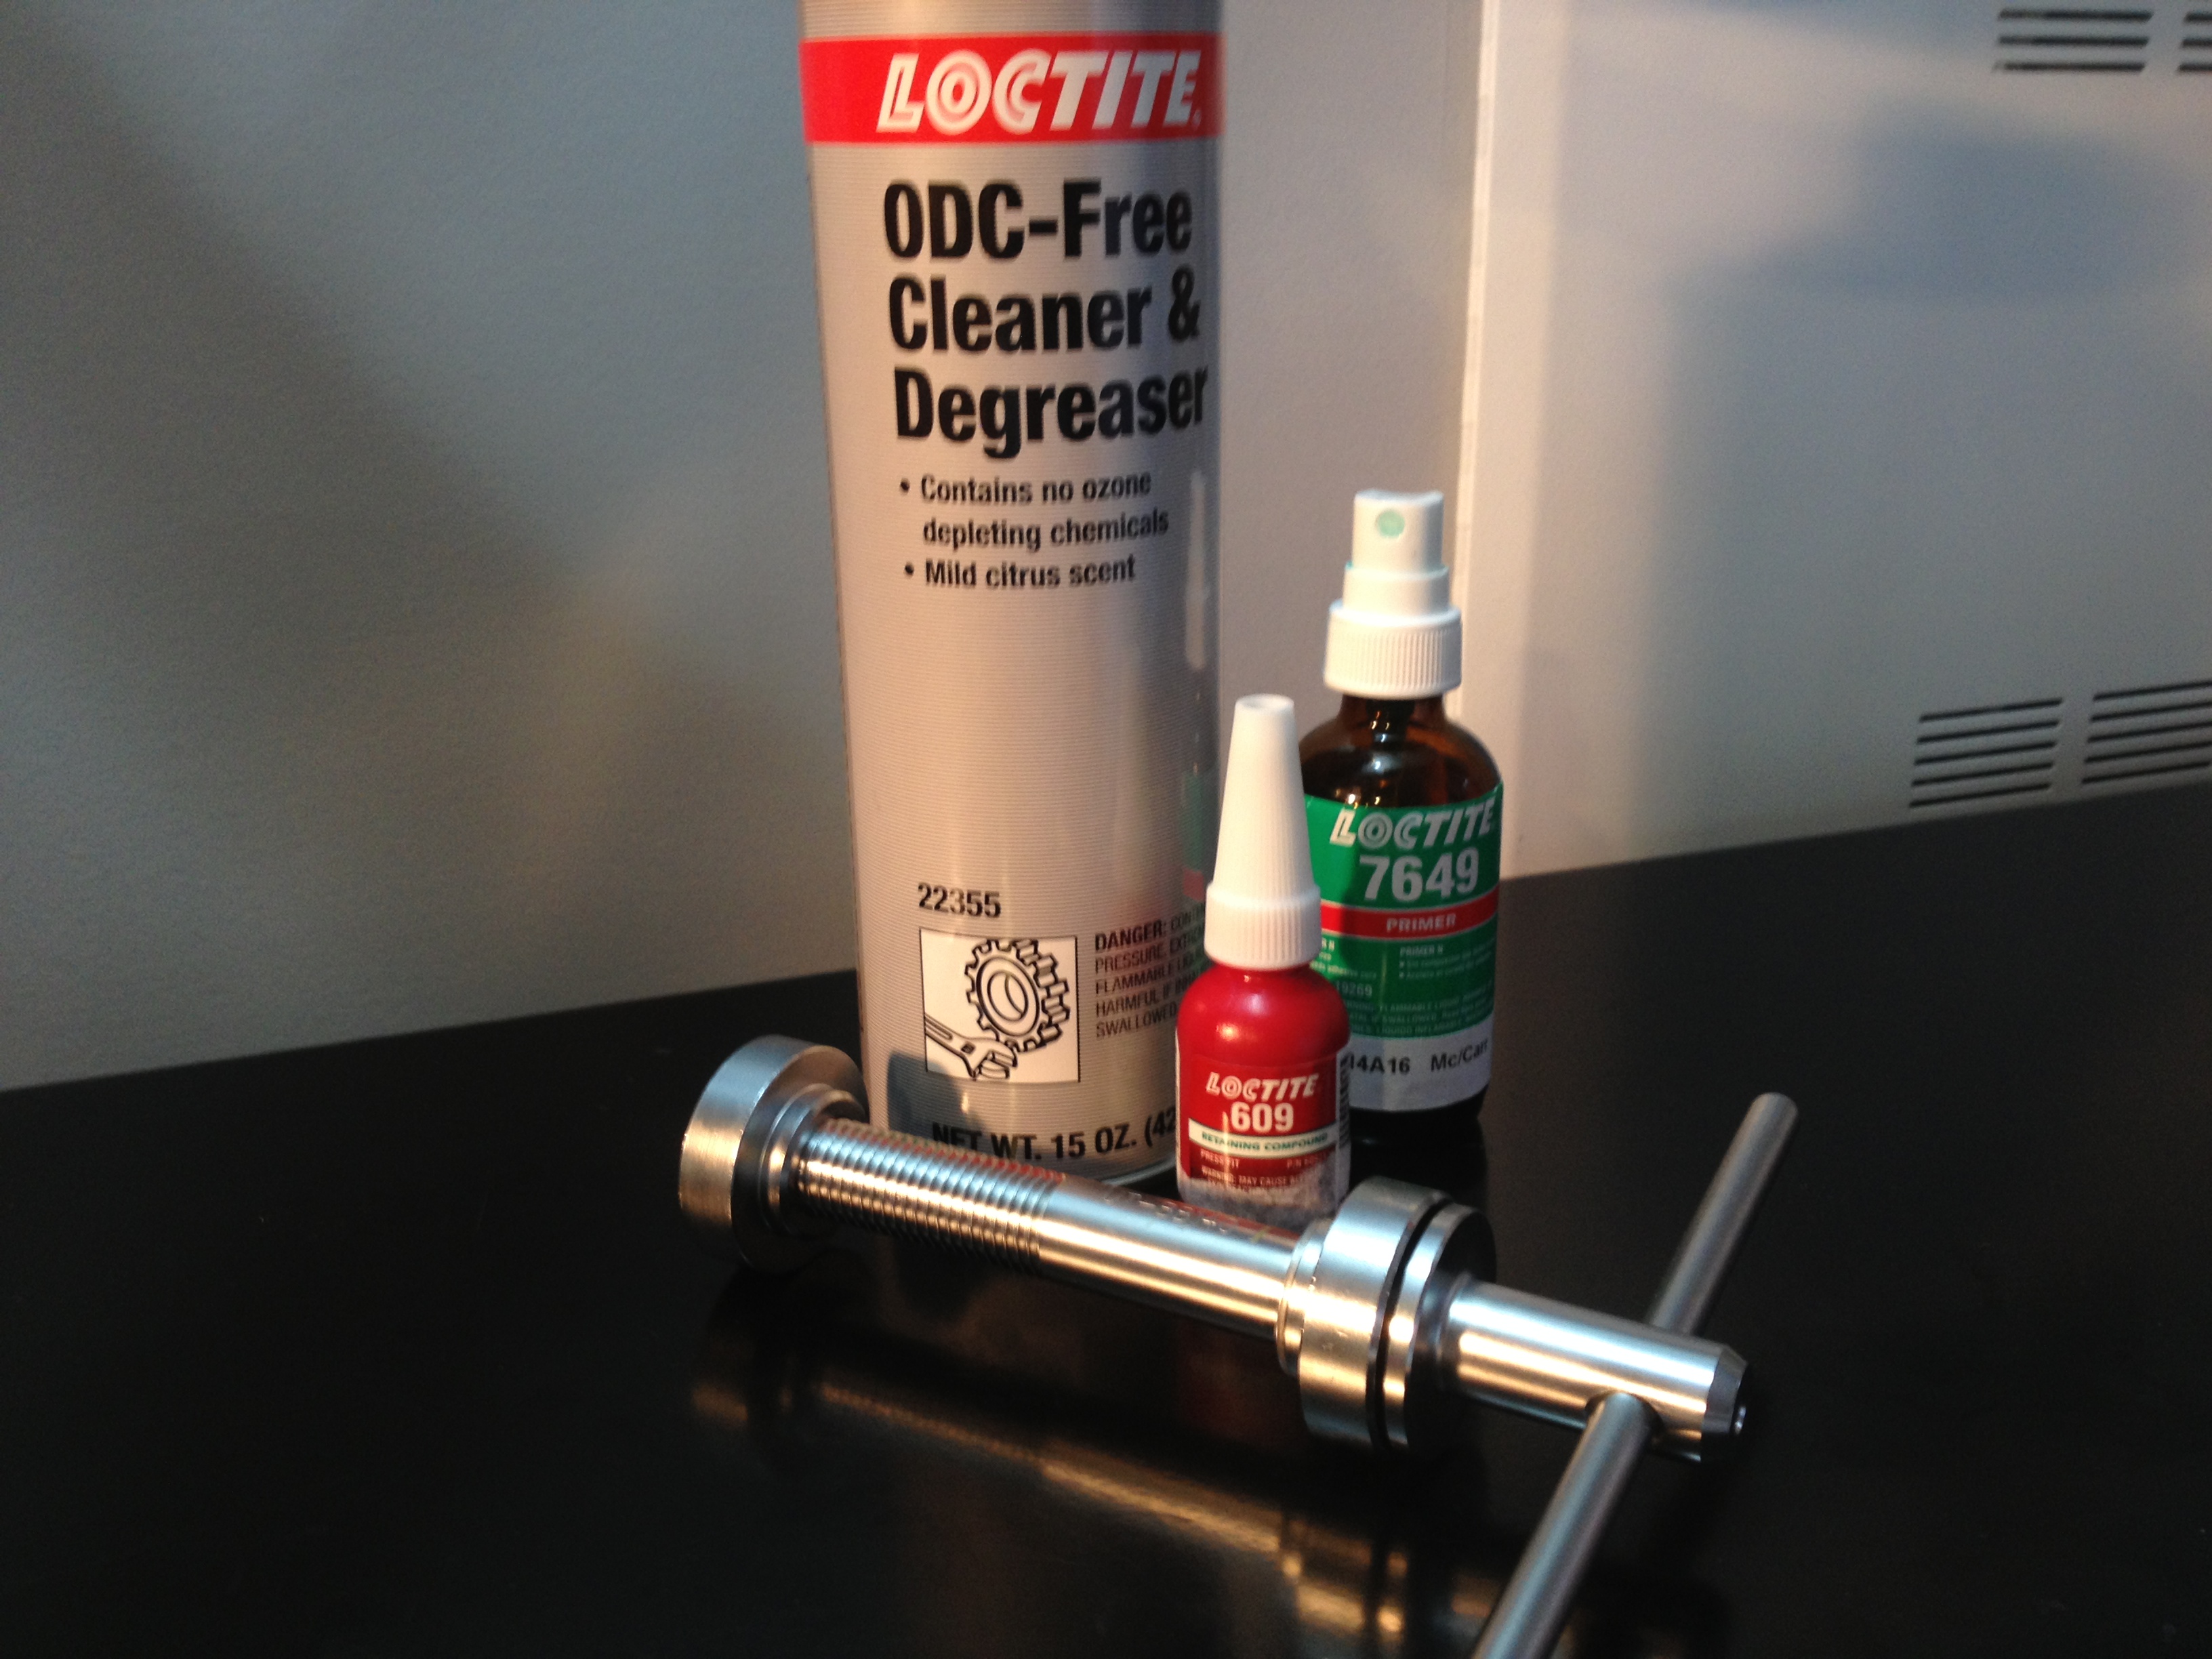
Loctite, fortunately, has a myriad of documentation associated with their products, as well as product guides and best practice / procedures. Two of the best documents with respect to press fit assemblies I found are here and here. I would highly encourage others to review their documentation to get a clear understanding of how retaining compounds are used, and how to select the appropriate retaining compound for the job.

Following the guide outlining the best practices for Bonding non-threaded cylindrical metal assemblies, I come to the first decision criteria – “IS THE ASSEMBLY BADLY WORN?”

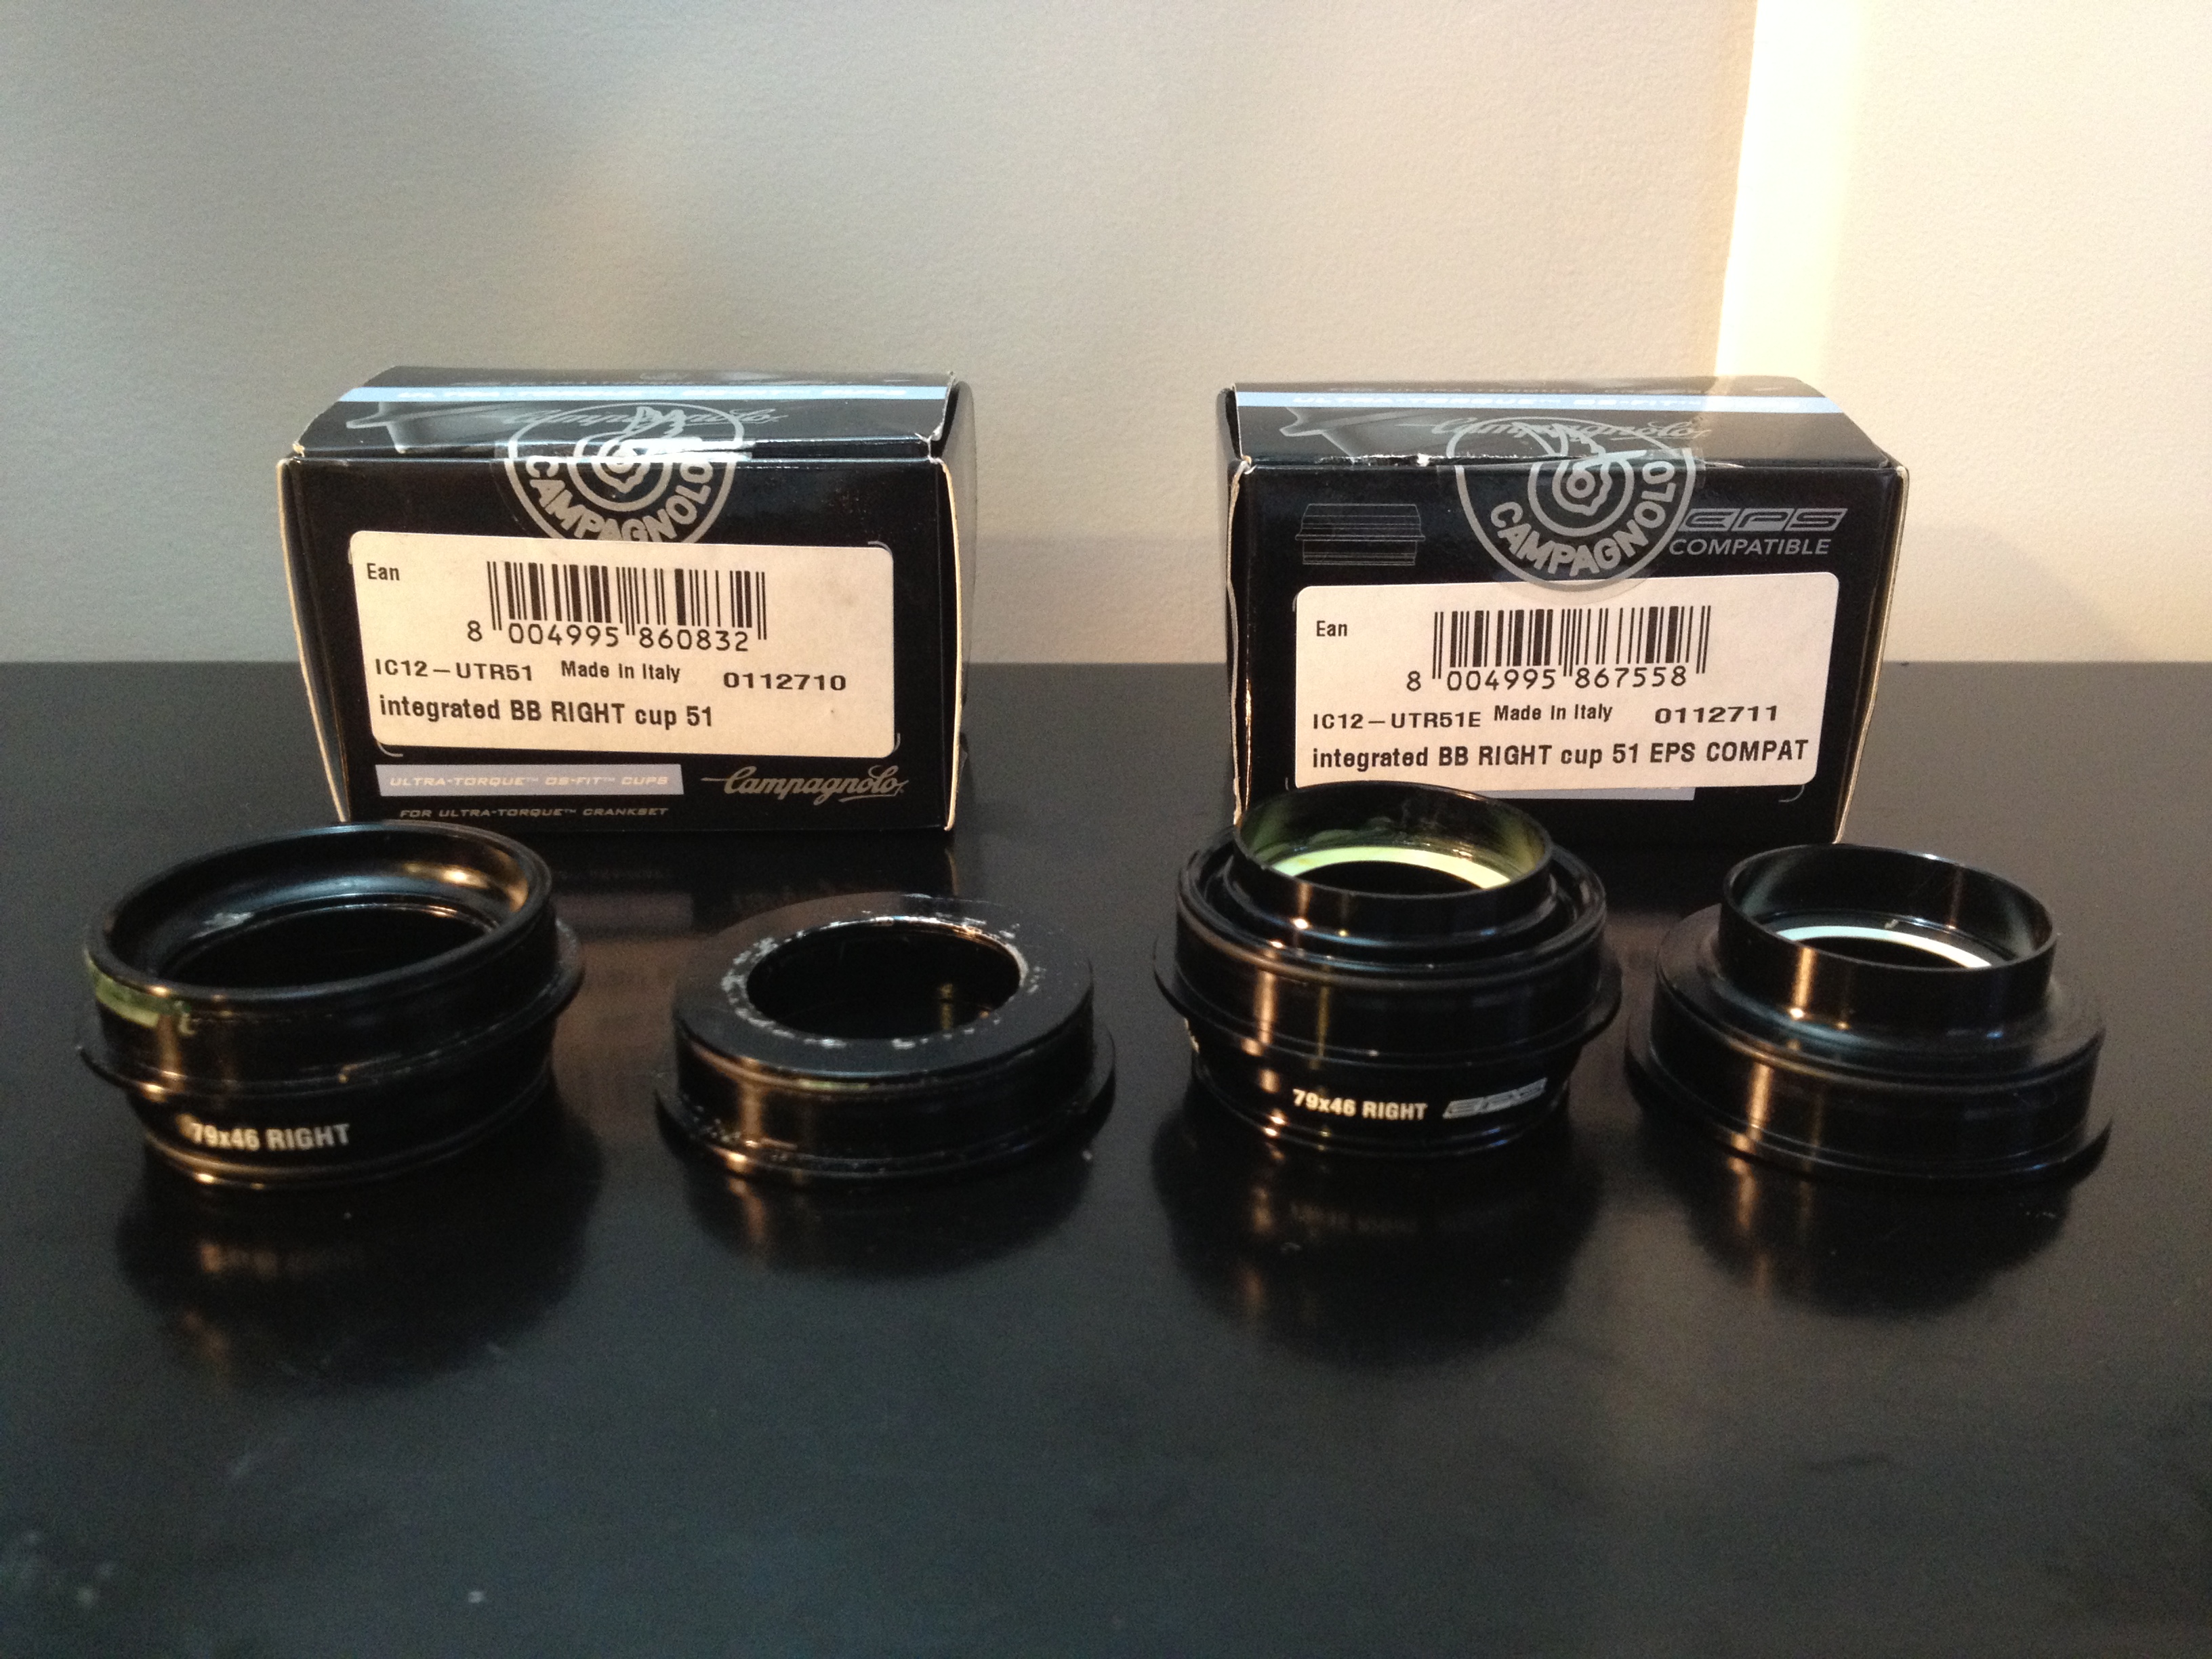
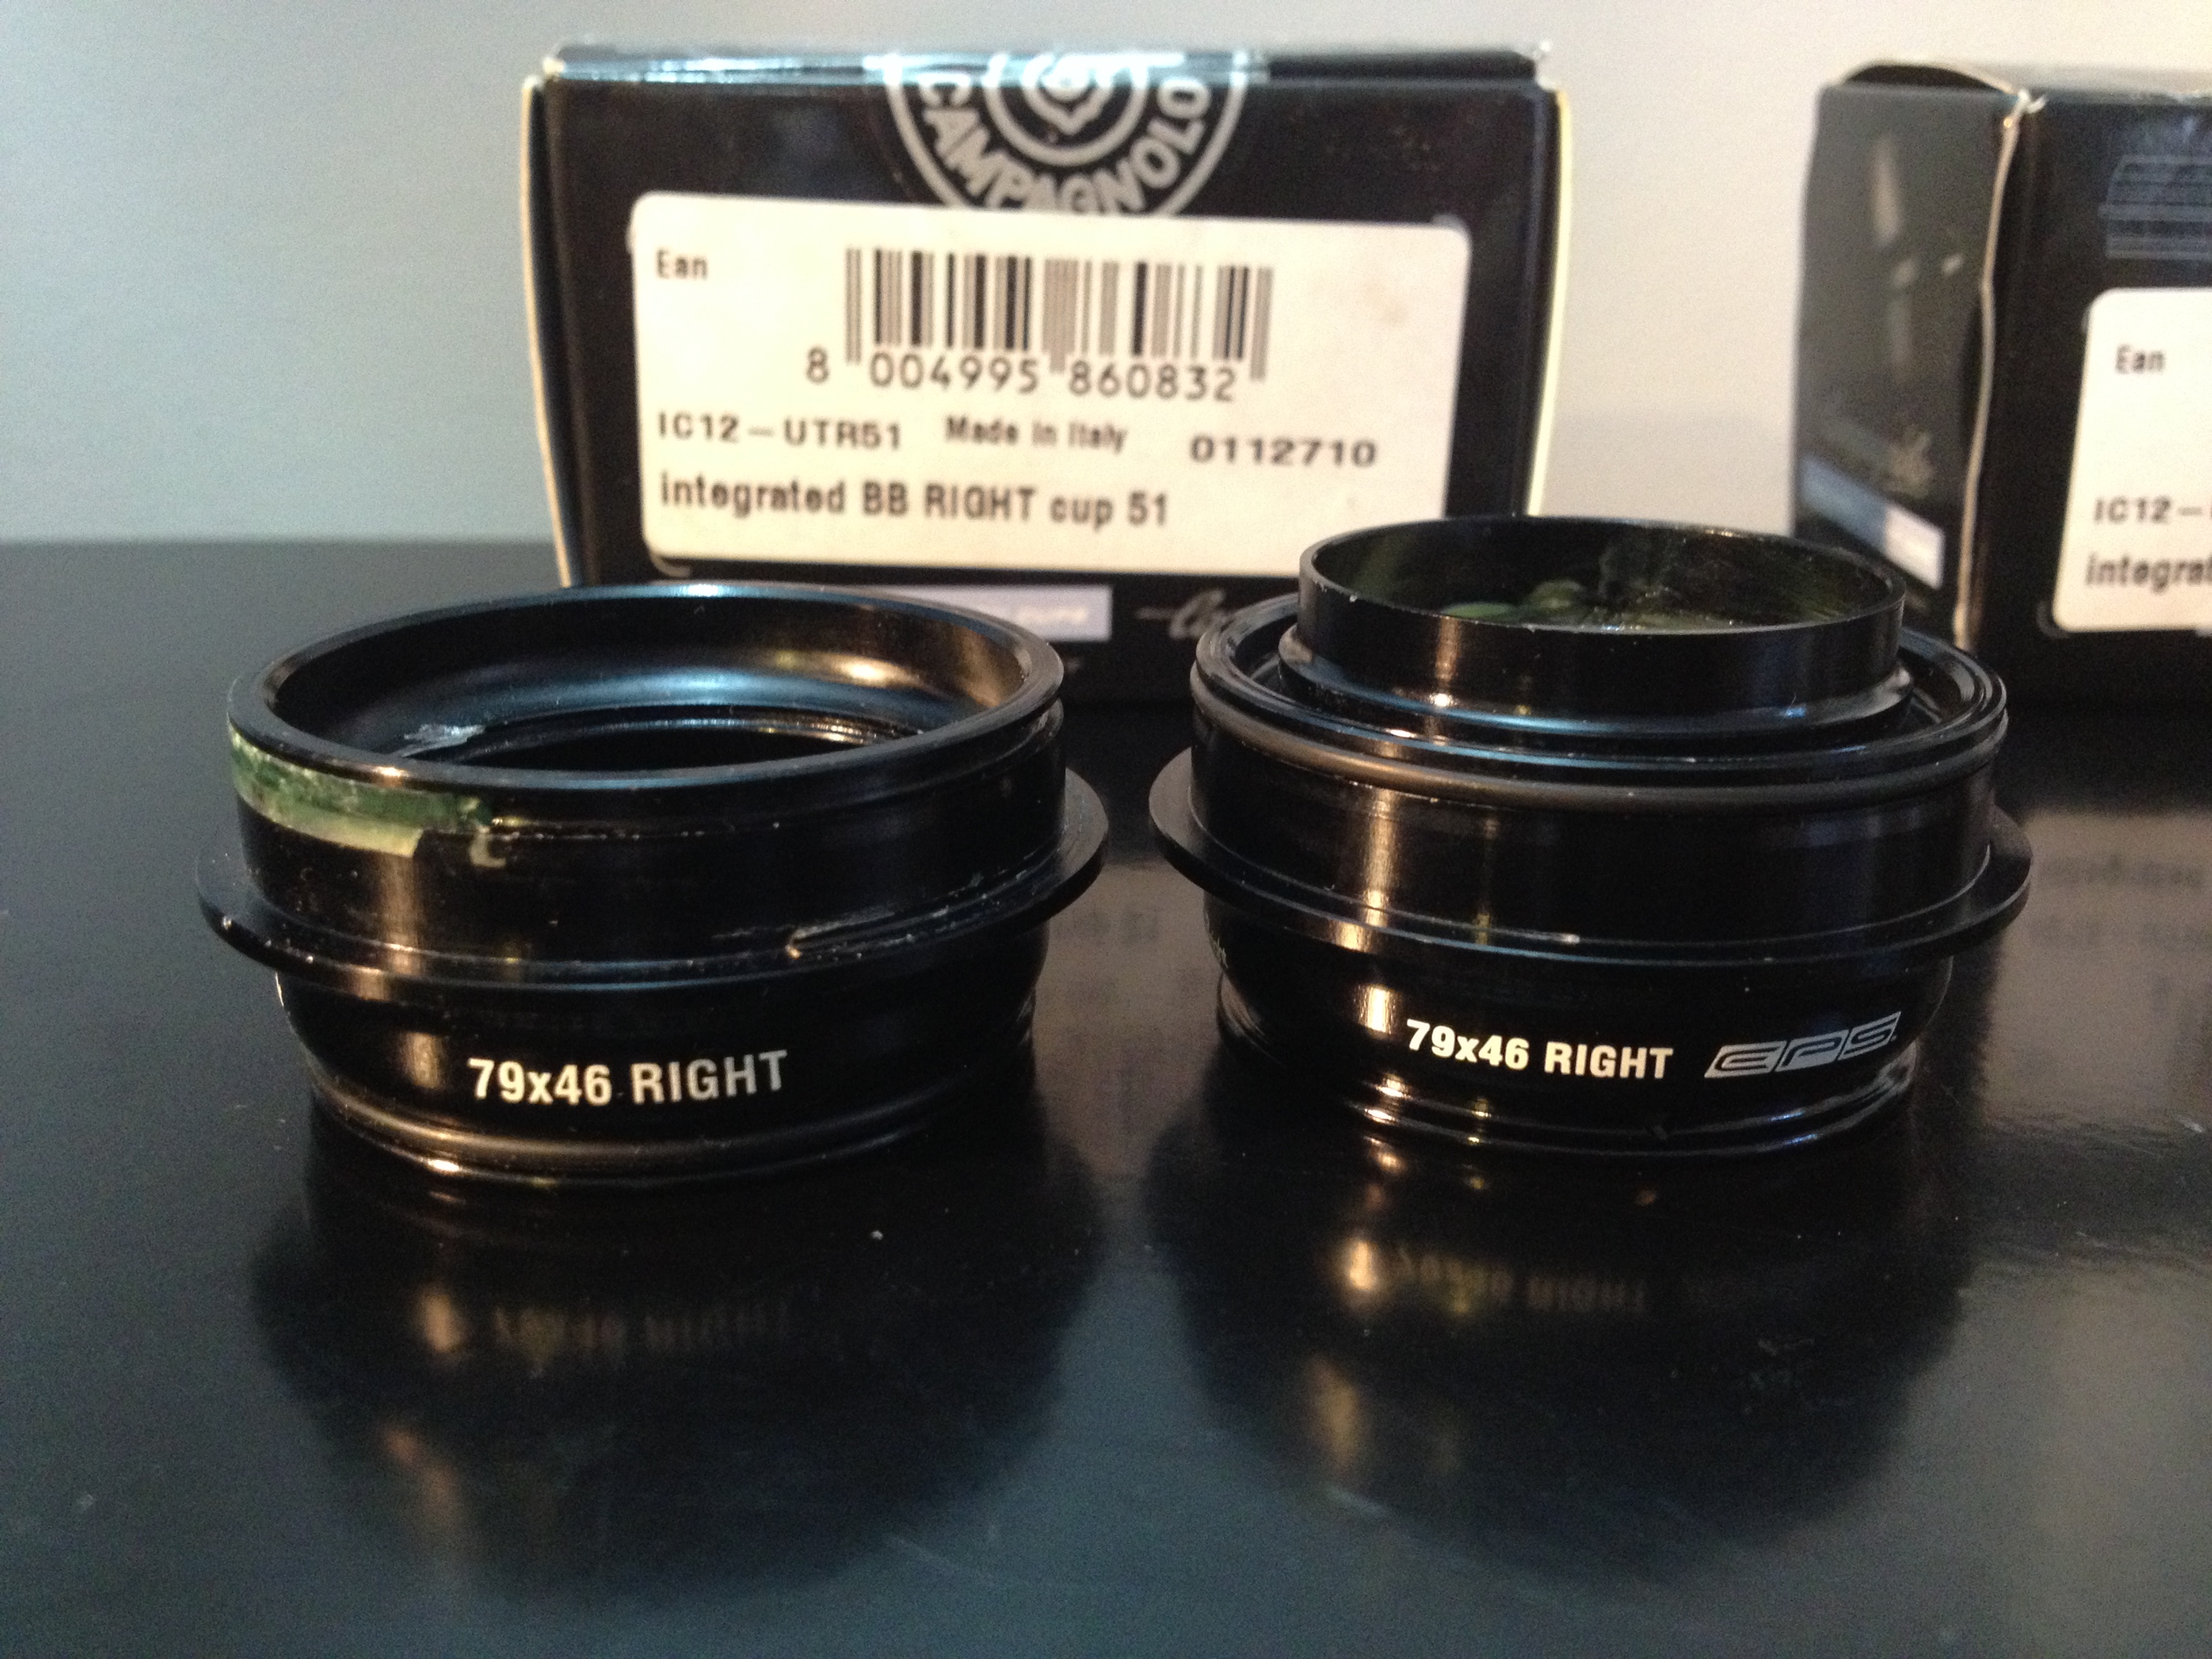
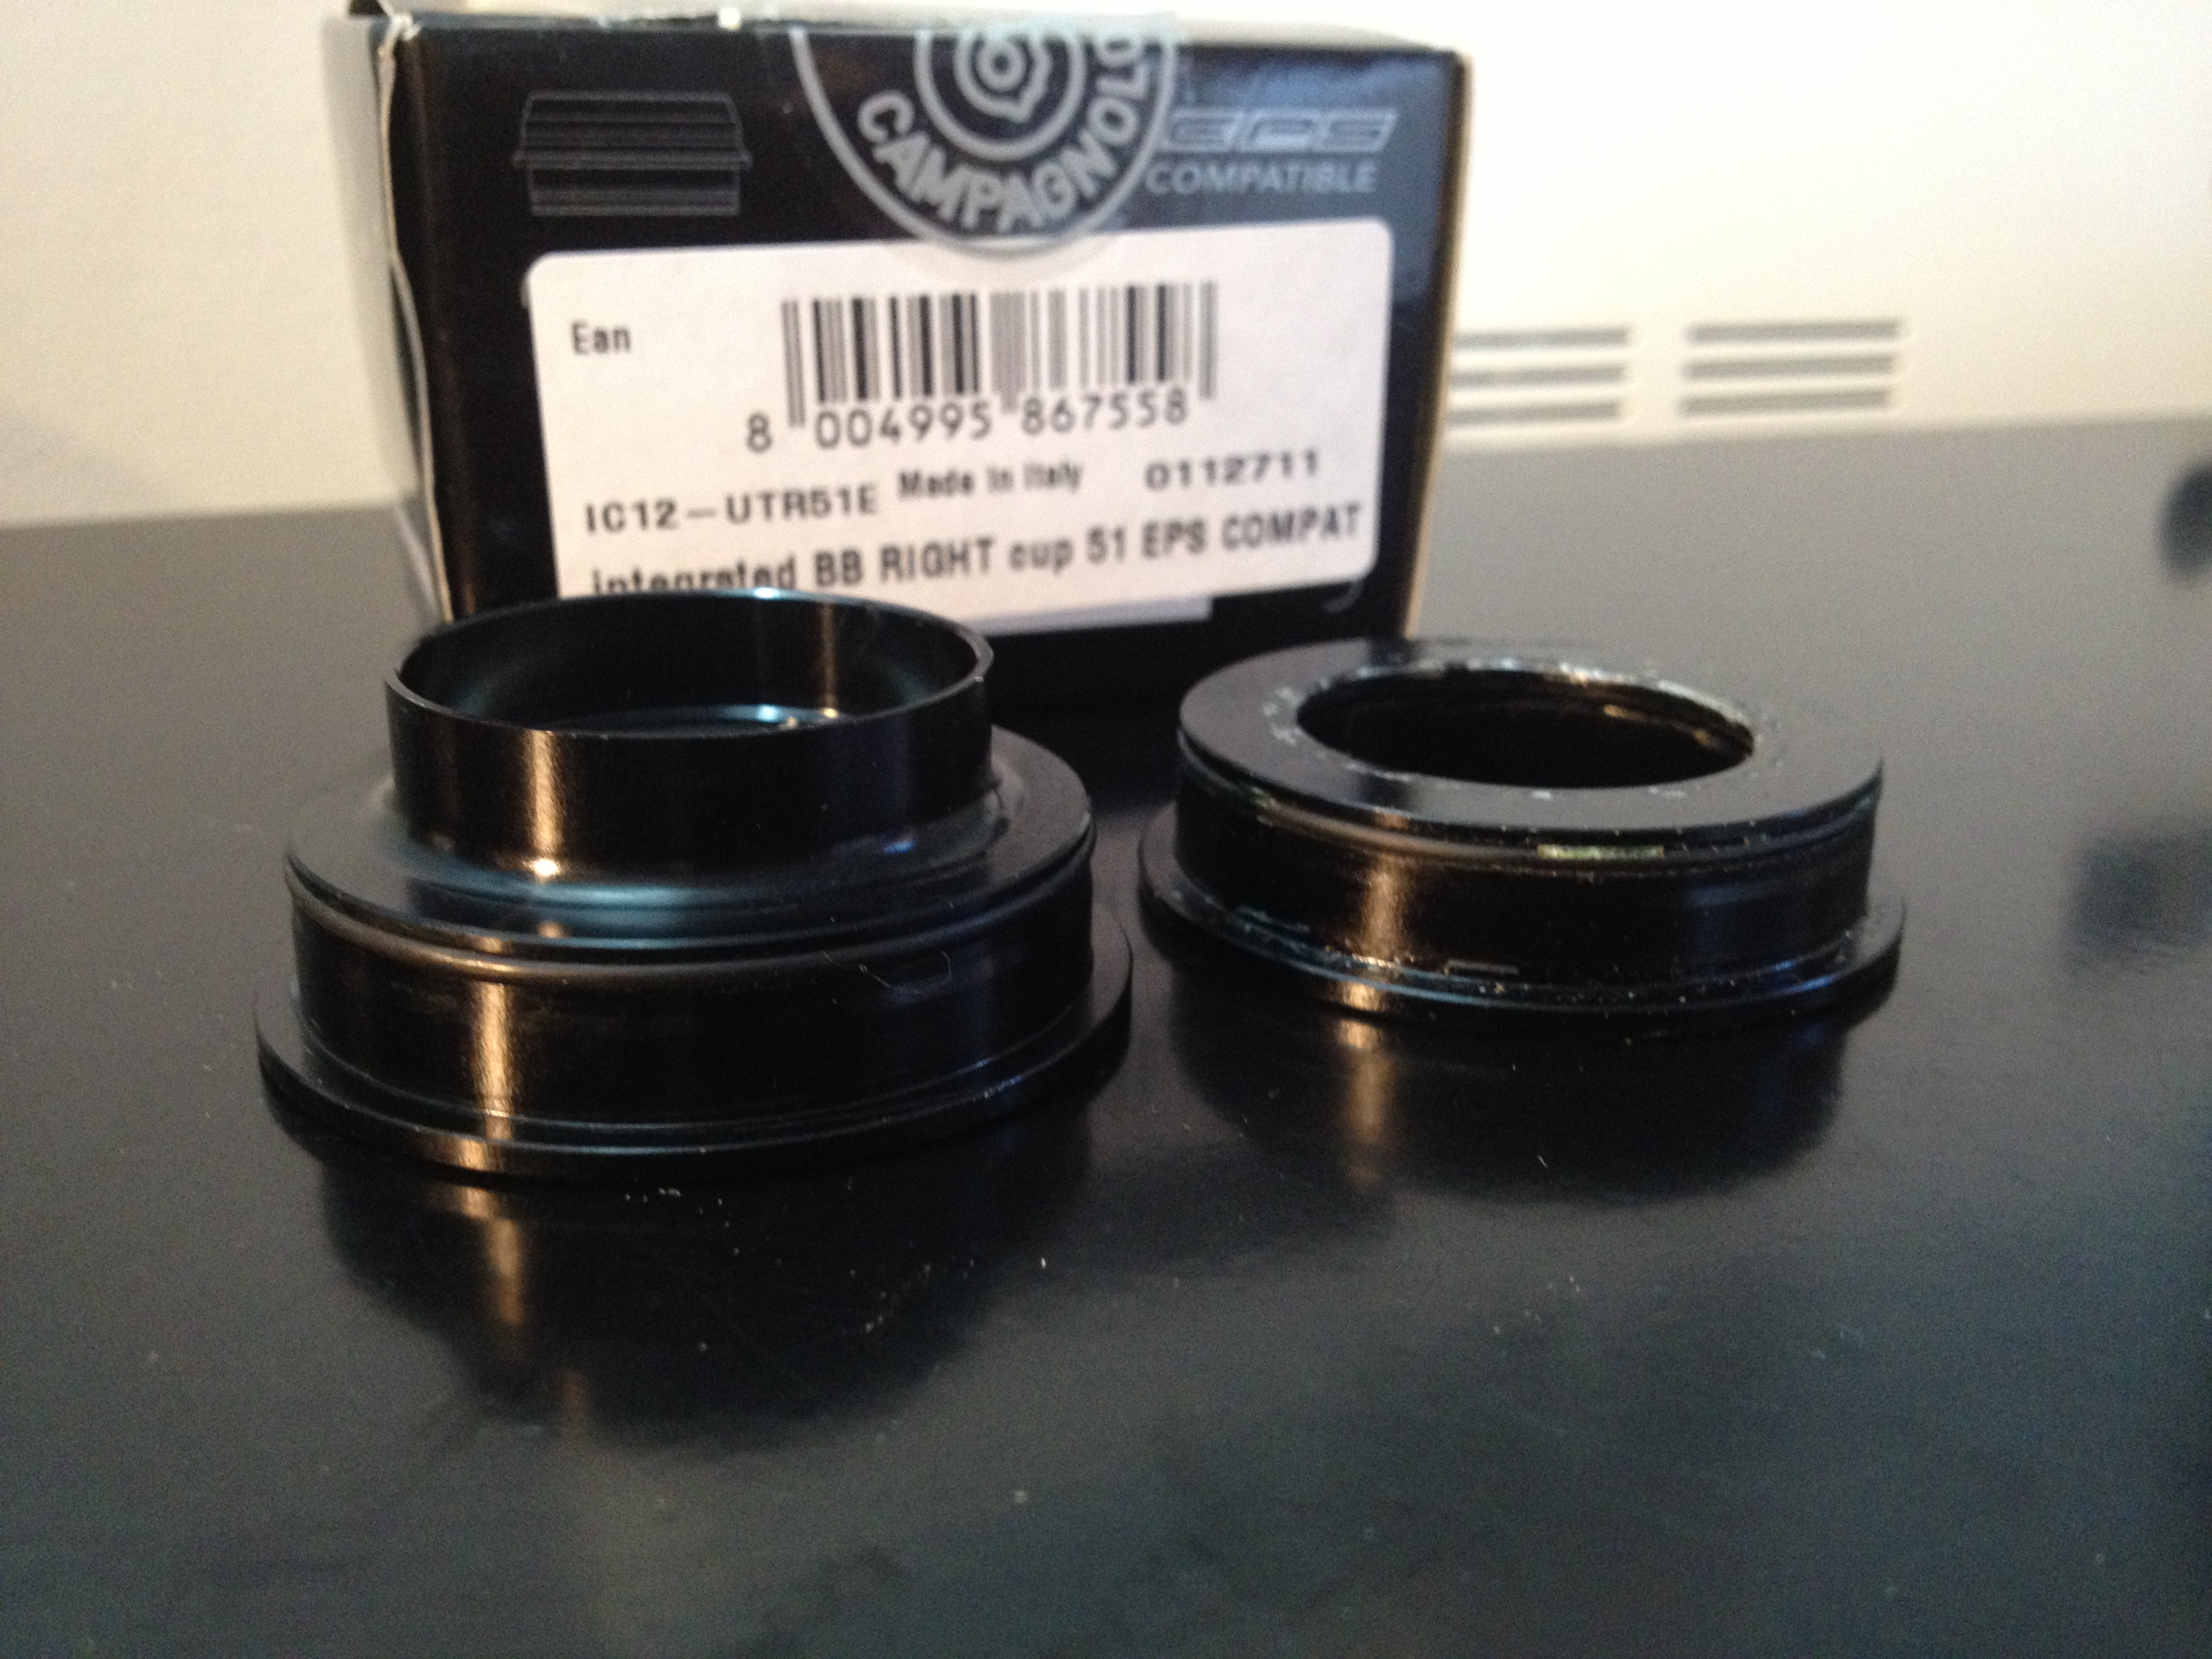
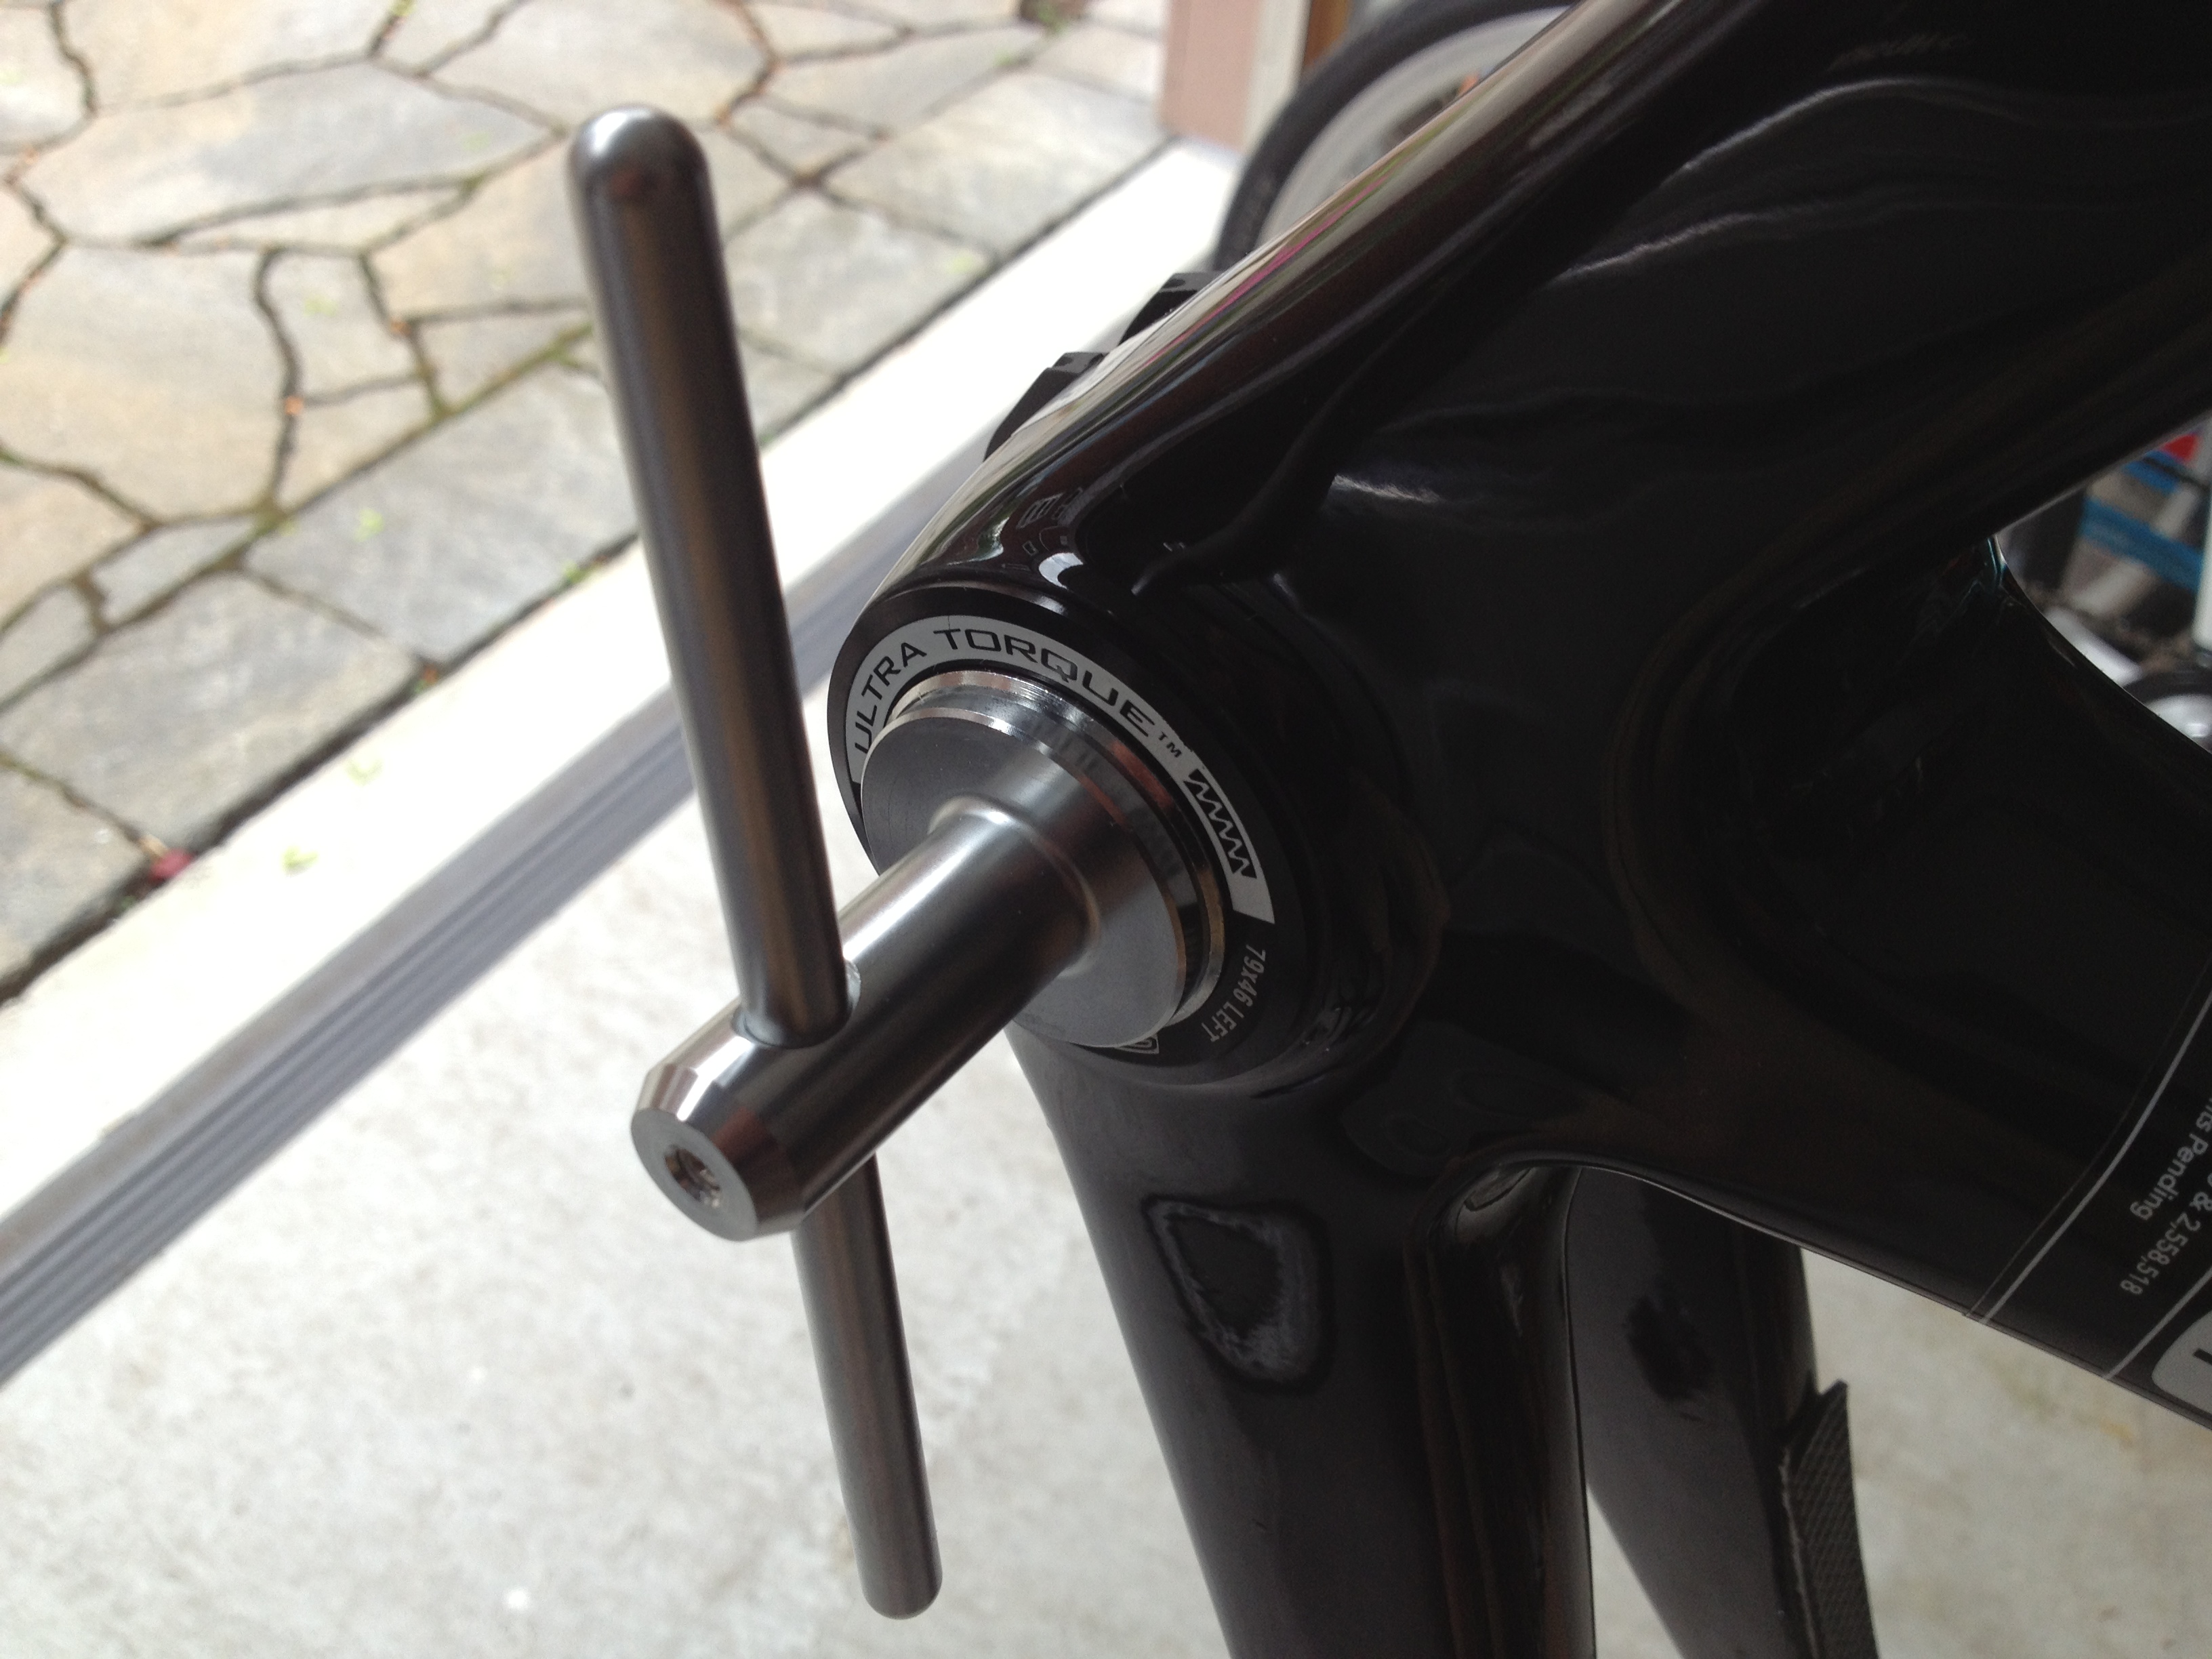
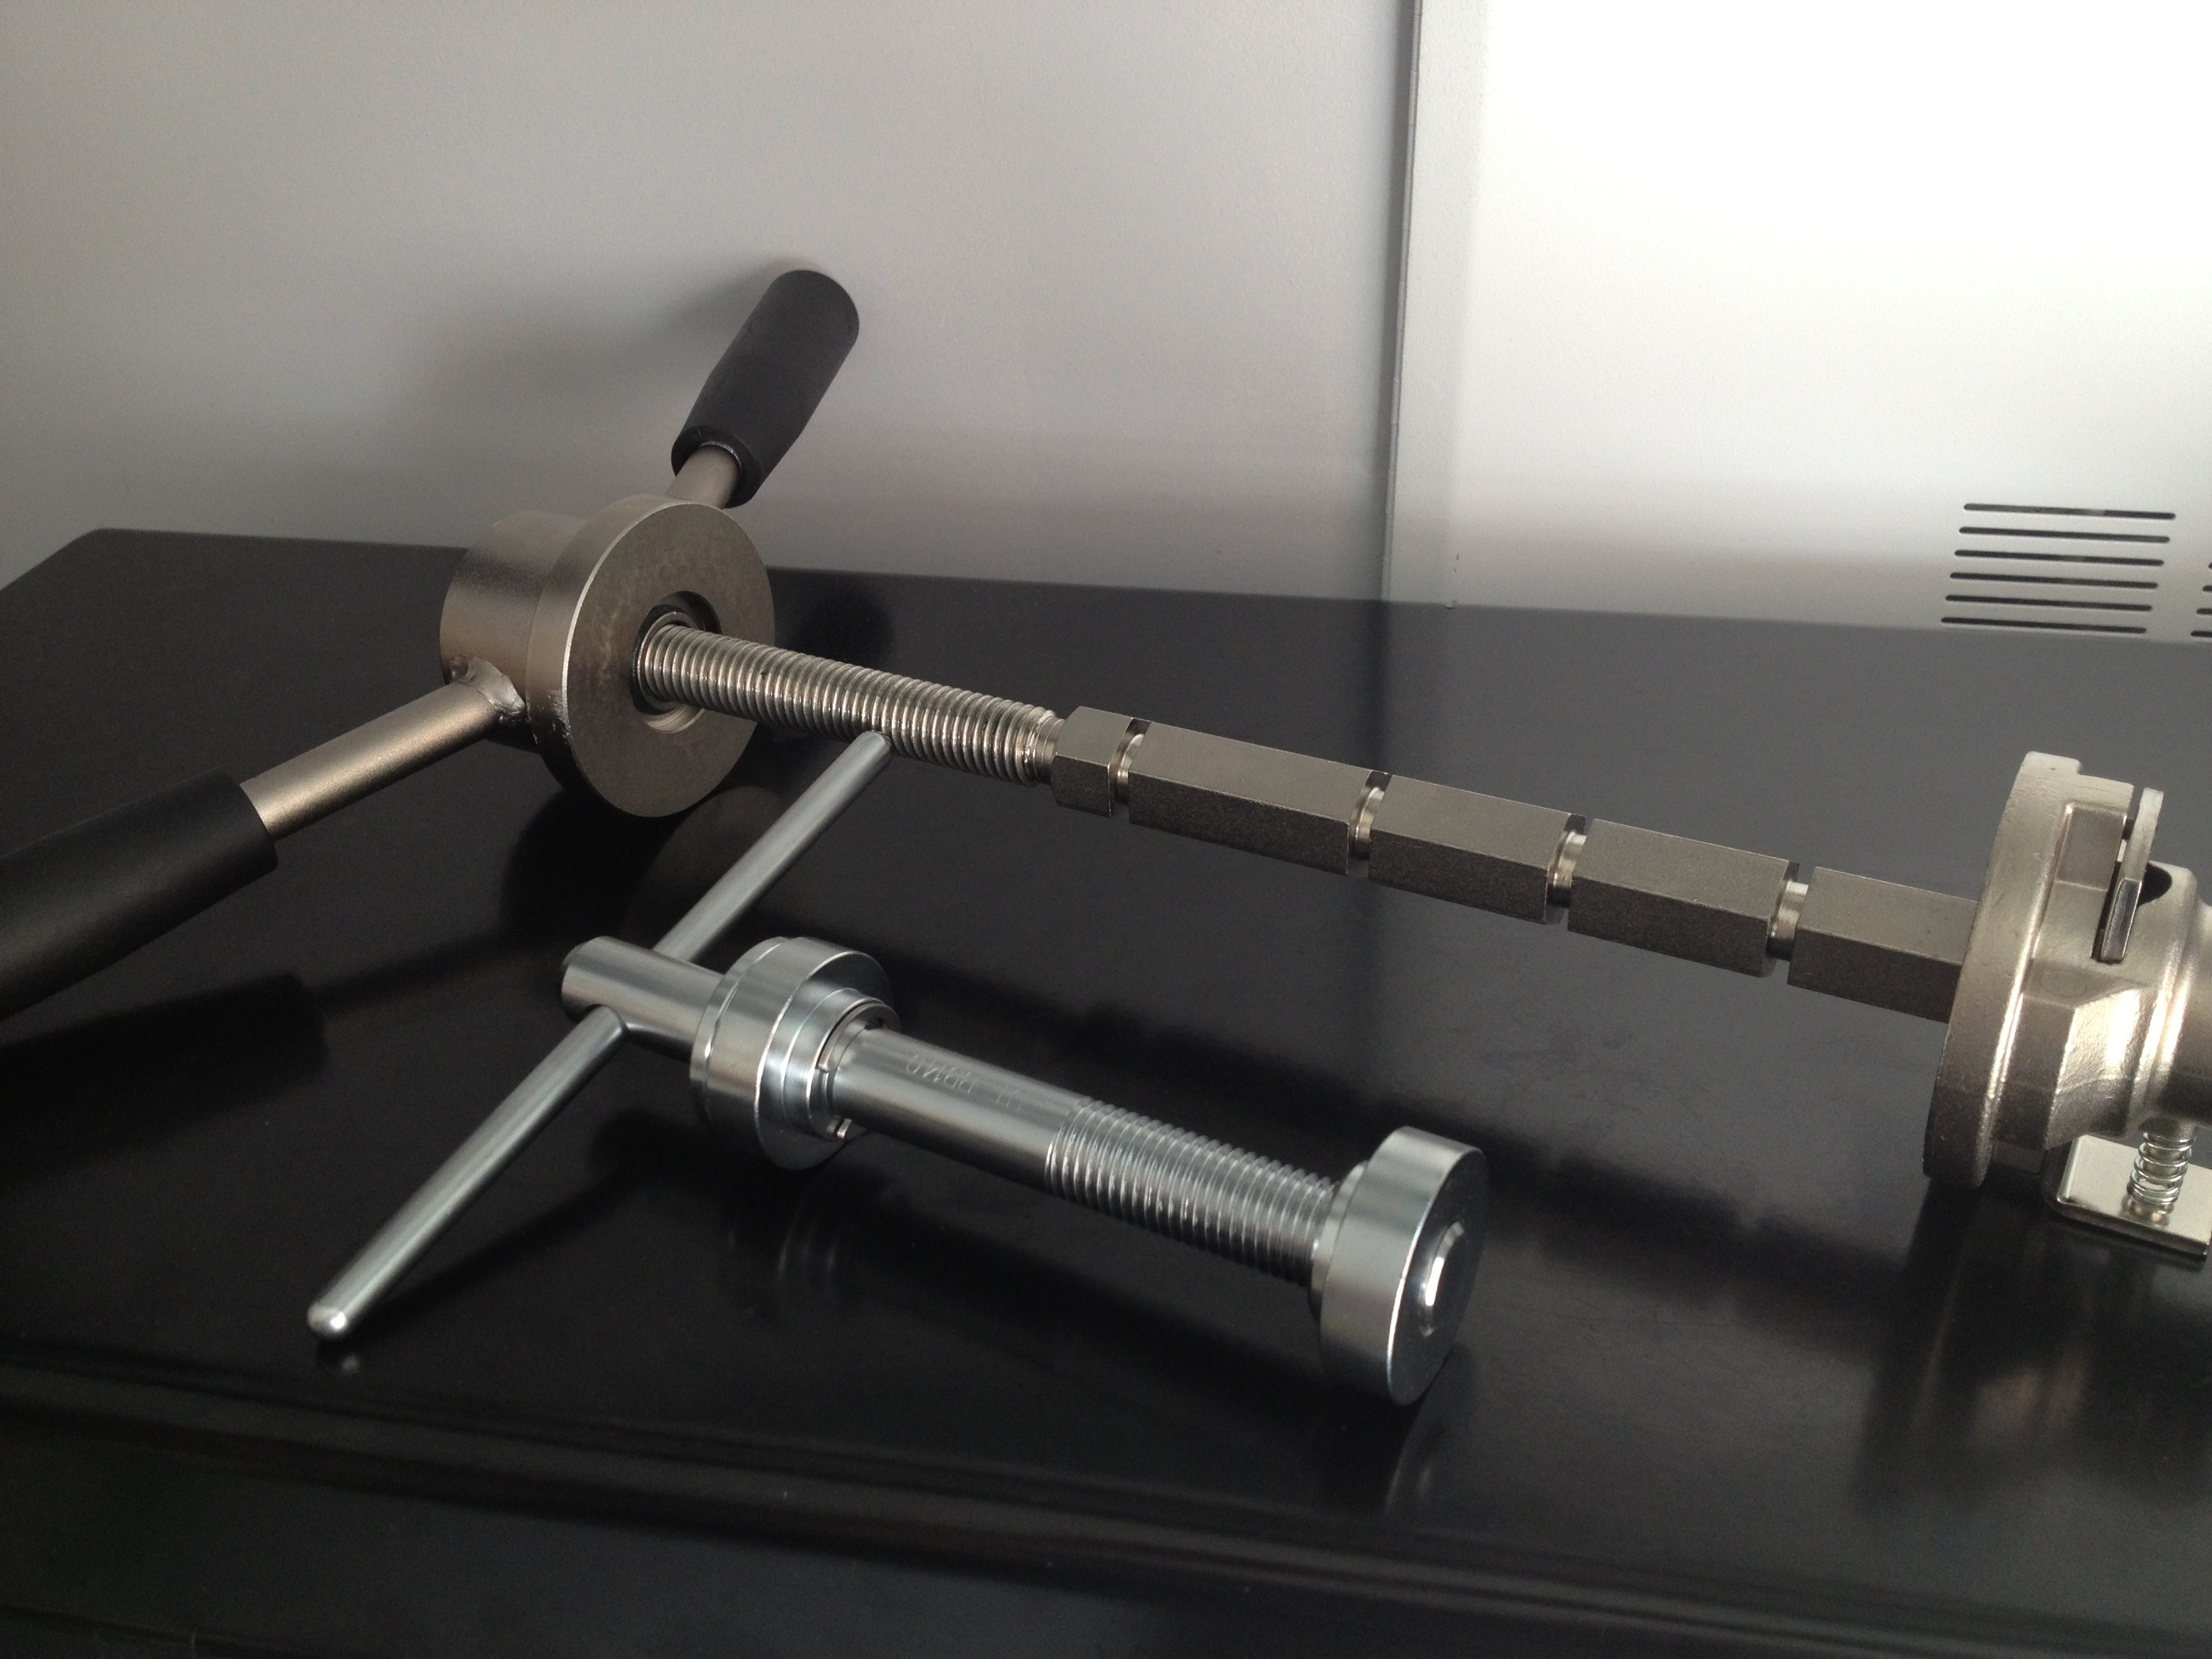
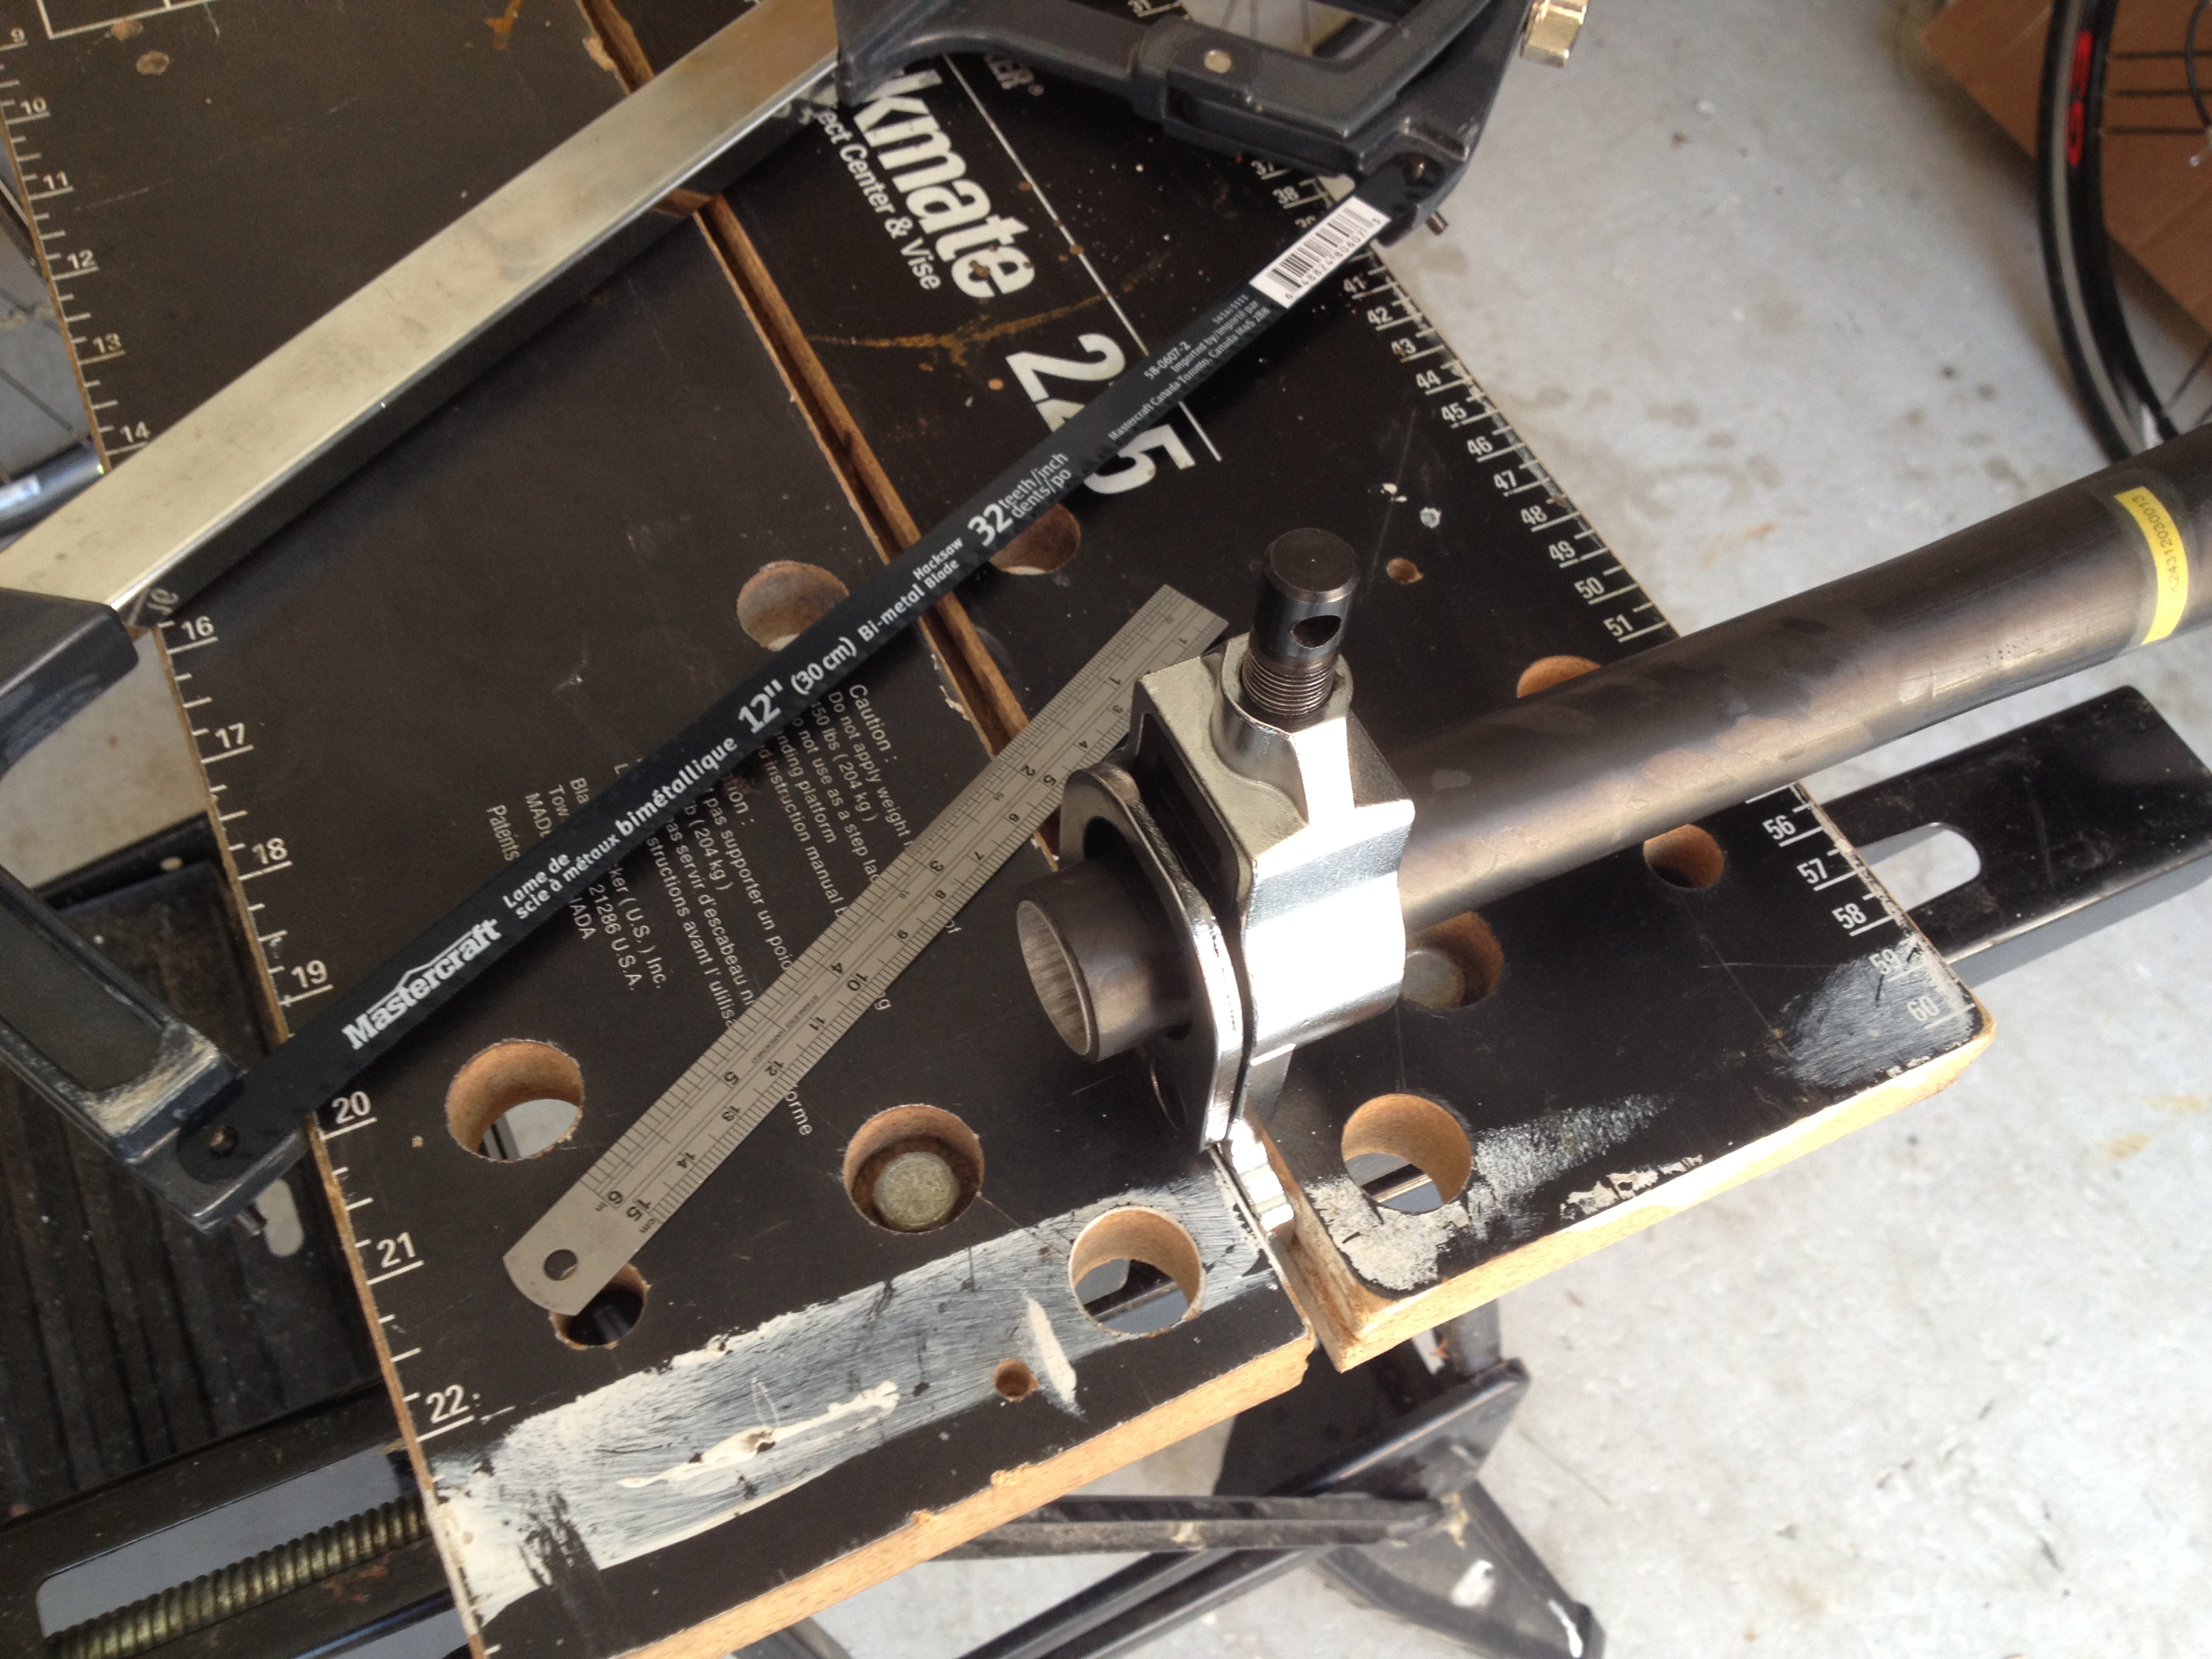
No, but I decide to measure the diameter of the two parts in question with my micrometer anyway – the BBright bottom bracket and the Campagnolo Ultra-Torque OSfit adapters. The left cup measured 46.0mm even, and the right cup measured 46.04mm. The BBright shell varied from right side to left side, but fell within the Cervelo specifications of 45.88 to 45.96mm. Given the errors in accuracy of my 25$ micrometers, and the difficulty in measuring a cylindrical assembly freehanded, my measurements of 45.86, 45.92, 45.90 and 45.96 are all in the ballpark.

So, Campagnolo cups – 46.0mm, BBright Shell 45.90mm ave. Given the diameter of the cups are 0.1mm larger than the BBright shell, one would imagine that a retaining compound is not even necessary in this situation and that, according to the BBright instructions, all that is needed is to grease and press them in for a tight fit.

Nevertheless, out of prudence, I am going to go the Loctite route, and use a retaining compound anyway. This is given the difficulties others have had with the Campagnolo cups and grease only.

So, continuing to follow the Loctite guide, I am faced with another decision on the tree – “Will the parts be dismantled later for maintenance? e.g., bearings, sprockets and sheaves”.

Yes. So I can use, according to Loctite, either 641 or 609. Ok. Done. 641 for low strength applications, 609 for medium strength applications. The principal differences between the products being their gap filling capability and their shear strength (read – ease of removal).

But what of the 680 mentioned in the BBright instructions ? Ahhh…..it would appear this retaining compound is recommended when disassembly is not required. Hummmm…..I take that to be “permanent”.

I don’t know about you, but the idea of permanently fixing a 50$ aluminum cup that could potentially wear over time, into a 2000$ frame frame that should theoretically last longer than the cup seems a bit shortsighted and might be something worth mentioning by the manufacturer (Cervelo). Again, not to crap all over Cervelo, but really, those assembly instructions are the best you could manage ? I submit another 15 minutes would have all that would have been needed to put together a better document. The caution about the use of 680 and the potential for permanently fixing the cup to the frame might have been nice, too. What if the customer wanted to change cranks down the road ?

Ok, so 641 or 609 and we are go to go, right ?

Ahhh, but wait. We have only covered the criteria for the proper Loctite product selection. Now we need to examine the proper method for use. This is where the cleaners, primers and the proper application to the parts of the assembly come into play.

Stay tuned for Part II.

New Build Progresses

My new build is progressing, albeit at slower pace than previously anticipated. Work-life balance has been precariously leaning towards work these days. That, and the fact that I’m doing a complete groupset transplant from the 565 means I don’t want to be without the ability to ride should the opportunity presents itself, so I been purposely avoiding stripping the 565 of it’s components until the R3 frame is prepped and ready to go.

Work started by stripping the frame down of all it’s SRAM components, wheels and associated bits.The Press-Fit 30 (PF3) cups were carefully knocked out using the Park BBT-30.3 tool with the frame carefully cradled in my lap. Interestingly enough, the cups refused to budge using a rubber mallet no matter how hard I tried. A small ball-peen hammer was necessary to get the cups moving. When removing PF30 cups, there appears to be two tools of choice from Park – the BBT-30.3 and the BBT-90.3. Both tools will do the job, but I opted for the BBT-30.3 as the head of the tool rests on the race of the bearing and doesn’t touch the frame like the BBT-90.3.

Here’s the frame, sans fork and PF30 cups on the scale. 1002 grams

2012 Cervelo R3, 56cm - 1002 grams with bolts, hanger and seatpost collar

2012 Cervelo R3, 56cm with bottle bolts, hanger and seatpost collar  – 1002 grams

Here’s the bolts and collar on the scale. 22 grams.

Cage bolts and seatpost collar - 22 grams

Cage bolts and seatpost collar – 22 grams

Here’s the fork on the scale, steer tube not yet cut and aluminum insert and star-nut installed.

R3 standard fork, uncut with aluminum insert and starnut installed - 402 grams

R3 standard fork, uncut with aluminum insert and star-nut installed – 402 grams

So by my math – frame with hanger, 980 grams. Not bad at all. It’s no R5Ca / RCA….but a good 200 grams lighter than my 565, it will be noticeably lighter than my current ride.

Out of curiosity, I did a dry fitting of the Ultratorque cups to get a feeling for when I am ready (and time, and courage) to loctite them in. I’m waiting on my order of 609, 641, 7649 primer and 7070 (ODC-Free) Degreaser to arrive.

IMG_1135

Campagnolo Ultra-Torque cups for BBRight dry fitting prior to pressing

Work remaining: Press and Loctite Ultra-Torque cups, cut fork, strip 565 of Chorus 11 groupset, transfer to R3, tune, adjust and ride !

PedalWORKS

the man who goes alone can start today ...

Dr. Steve Lerer

Experienced Gallup certified strengths coach helping individuals, teams, and organizations utilize strengths to maximize potential

gowerworld

A great WordPress.com site

Archer Watches Blog

Just another WordPress.com weblog

sarah kim bonner

pro triathlete